
Printing with Salt and Silver Nitrate
I go back to the beginnings of photography to explore salt printing, a method that uses chemicals in contact printing to make photographic likenesses and prints
The Idea

For a few months I’ve been attending a local photo club, Photo Fusion in Brixton, which brings together photographers who are making beautiful art from cameras. Once a month on a Saturday some of us get together and discuss projects that are in flow. A few of these have mentioned salt printing, and I was interested to find out more.
I was planning to do a course, but Corona Kicked In. So instead I did a bit of research on the Internet. This article got me started. As a side note, I am finding a lot of great material on Lomography.com when I Google random photographic techniques. It’s either got a great SEO team or great content (or, conceivably, both).
Things You Need

Based on the article, I acquired the list of things needed. As usual, eBay fared better than Amazon for sourcing random chemicals. The big ticket items are really silver nitrate, citric acid and sodium thiosulphate.. The latter are quite cheap and you get quite a lot for your money; my silver nitrate however was £20 for 20g, so a more considered purchase. You might also want some clean decorating paintbrushes, a shallow plastic tray (I had one I had previously used for marbling inks) and some glass jars for storing the solution in. You could also do with a piece of glass big enough to put over your prints while developing, though I found that this did inhibit the colour somewhat. You might also want some plastic gloves, as my hands have been covered in black stains for over a week, and plenty of kitchen roll for wiping down the glass, digital negatives, etc.
That’s for the actual printing process. You need to make digital negatives as well (unless you happen to have some large format negatives lying around that you want to use). For the first batch I used this digital transfer film in my inkjet printer, but you can also buy OHP transparency sheets that are around half the price. They are pretty simple to make, and I used this guide: https://parallaxphotographic.coop/how-to-make-digital-negatives/
Choosing the Right Images
It’s important for this process to choose the right sort of images, with the correct amount of contrast. I had a digital negative of a picture of my son, an agapanthus flower and of a shot I took in the Tate Modern last year. These were sample images that I wanted to try out and that I thought would look quite good in the medium.
Choosing the Right Day

You need light and sun for this process. And because it’s messy as Hell, really you want to be outside with that tub of black-staining evil silver nitrate solution. Which means, in the UK, picking the right kind of day for it (ie no rain). And too sunny can be a bad thing too. My first Tate contact print I left for far too long in the sun (with this technique less - exposure - is definitely more).
The Basic Process
Mix up your chemicals as instructed in the article. Soak your cardboard or thick paper in the saline solution and let it dry. Then paint on the silver nitrate solution and let it dry in a dark place (I used the shed). Pop on top your digital negative, cover with glass and expose in the light for the relevant time. You then need to wash the paper and soak in sodium thiosulphate solution for around 5 minutes, to fix the chemicals. Missing this step means a black picture, in time. So the process is actually pretty simple and easy once the prep has been set up.
Things I Still Need to Work Out

Exposure time. Especially on more delicate prints like the one I took at the Tate Modern, less exposure is better and especially in strong sunlight. The prints get darker as well the older they are, so underexposing at first is not a bad idea
Card stock. There is a lot of liquid involved in this process and normal paper isn’t going to work (I did try on some.) For my test prints I used a stack of white card from the Pound Shop, but if you are getting wise to this process it would obviously be better to use higher grade materials
I soaked my card in saline as per the instructions, but actually I found it left a few air bubbles. So next time I will try painting on the saline with a thick paintbrush
I found I got “splots” on my prints - and later found these were acquired in the fix bath. So I need to do some trials to work out how to eliminate these. I’m not sure whether it’s a solution issue, a paper issue or what - but I might try painting on the fixer rather than soaking the card in it.
My prints are very “brown”. I know that’s kind of the point, but they seem browner than others I have seen. So I may also try diluting the silver nitrate solution a little more with some more citric acid solution, or using a smaller paintbrush to apply it more sparingly to the card
I may also try this technique on cheap canvases from the likes of The Works (or indeed the Pound Shop)
So there’s lots to learn about this old technique, as with any new skill, but it’s fun to go back to the beginnings of photography and merge them with the technology that we have now.


Photographic Objectivity in Documentary Photography
Combining the last weeks of documentary photography study with field practice, shooting in a retirement home, I consider what it means to be truly objective as a photographer - and whether it’s possible at all.
Over the few weeks that I’ve been attending this course at City Lit, we’ve touched upon the subject of objectivity a number of times, and especially as it relates to photography.
What Does This Mean?
As with all subjects that get mired with academia, there are numerous definitions of what objectivity means in photography. When I looked up the subject on the Internet, I found a good article by a guy called Steve Middlehurst. He says,

“In Photography (1) Stephen Bull offers a definition of objectivity and subjectivity. He says that photographic objectivity is when the object, or subject matter, in front of the camera produces the photograph whereas photographic subjectivity is when the photographer, the subject behind the camera, has produced the photograph.”
In my field, ecommerce, there is an old but oft-quoted textbook by a guy called Steve Krug, called Don’t Make Me Think. The point is that, in Internet design, if a customer has to think about how they do something online, it’s just not simple enough. And that’s how I feel about that quotation. While I may be missing the point, even thinking about that quotation leaves me a bit confused. How would I tell if a photographer or an object has produced the photograph?
So, as I see it now, this is my Simpleton’s Guide to Photographic Objectivity.
Has the photographer taken the shot candidly, or with the knowledge of the subject (if the subject is alive)?
Has the photographer altered the composition in any way? For example, have they asked the subject to pose in a particular way? Have objects in the room been moved? Is the entire scene staged?
Has the photographer altered the photograph with post-processing (be this digital or with more old-fashioned dodging and burning techniques)?
When was the photographer shooting? What equipment were they using? What were or are the constraints around this? For example, in the early days of the photograph exposures were long and those candid moments were harder to capture
Has the photographer captured a one-off shot, or have the images been gathered over a period of time?
Has the photographer been paid by a particular organisation to portray a particular point of view? Have they embarked to illustrate a point or idea, or have they concluded the photographic essay with what they found along the way?
What is the photographer’s motivation (if not paid)? Here we looked at the work of Lewis Hine, a campaigner against child labour in the United States. While the motivation may be intrinsically benevolent, it is still introducing - nay forcing - bias into the photographic process and into the minds of the viewer. In effect, it’s propaganda
Has the photographer’s work been censored in any way? Typically we think of censorship as part of repression or wartime - you could argue it’s also part of the editorial process, of curation. A friend of mine took a selection of pictures for a documentary project, and the participants selected the shots. This is a beautiful community action, one that I really like, but did the participants “hold a mirror up to nature” - or select the shots that they believed most flattering?

Finally, a topic we haven’t touched on in class, and that is the photographer’s relationship to the subject. Taking some shots in a retirement home at the weekend, where my aunt is resident, I didn’t expect to be so overcome with my own emotion.
Should a photographer shoot subjects that are “close to home” or do they give away their objectivity in doing so? Is it ethically right to photograph people we know really well? Or is the photographic bias blown away from the outset?
Furthermore, it’s clear that the process of visually documenting aspects of life can be truly shocking. Some of the most remarkable documentary photos pivot on this - for example, the war photography of Don McCullinn. While you can hardly equate going in an old person’s home with entering a war zone, the experience did make me think about the kind of documentary projects I want to shoot. Feeling emotion is a powerful tool to creating emotion in others - but how much is too much for the photographers themselves? And how do you know when you’re about to cross that invisible line?

Steps in Documentary Photography
To extend travel and street photography practice, I’ve enrolled on documentary photography courses to find out more and dive deeper into this fascinating branch of photography. I start with a study of the elderly.
2020 is the year for documentary photography to begin for me. This feels like a good next step.
Why?
Street photography has taught me a lot: it’s sharpened composition skills; it’s taught me to see and react quickly to what’s happening around me. But it will never be my first love. As one of my favourite Instagrammers, @fluffystreetcloud recently said, I like to treat people on the street with the same level of respect that I would like to be paid when going about my daily life. I have never quite reconciled myself with the business of “stealing” candid shots, however much I intellectualise it.
Travel photography has long been “my thing”, borne of a desire to see the world and capture those wonderful moments you experience along the way. They are often beautiful, evocative images - but on a fleeting visit to a place, you can only scratch the surface. It’s a superficial view on a much more permanent world.
Documentary photography makes sense, then, as an opportunity to dig deeper and explore subjects and themes. And for someone who has always been heavily influenced by social history this is even more appealing.
So What Am I Doing About It?
Getting into documentary feels quite hard. What subjects should I cover? What makes a good story? How do I make contact with the right people? How do I sequence the images to make them compelling? What do I actually want the finished product to be and who do I want to see it?
To teach me and to kick-start me into action I’ve done a couple of things.
1) Joined Photo Fusion in Brixton. Recommended by a friend, Photo Fusion do a monthly Saturday photo club where members present some of the projects they’ve been working on and others give feedback. As well as this they run a lot of other photo-related services such as processing, courses on alternative film processes such as salt printing and have a lovely members’ gallery. For £60 a year membership, this is one of the best bargains around.
2) Signed up to a documentary photography course at City Lit. So far this is really interesting, and we need to create a project that we will develop over the course of the coming weeks.
Ideas
There are so many ideas and not enough time. I really like the idea of exploring identity, and how it is shaped. I like the idea of circus and performance (though access may be tricky). In this day and age of immigration rhetoric I like the idea of exploring that we are all migrants in some way, shape or form.

But the idea I want to develop is around the elderly. How they live here in the UK, the services that are available and the isolation that our First World lives bring. Shooting overseas when I travel is also a great way of adding to this work, and documenting how the elderly live elsewhere - the work shot in Romania in November is a good pre-cursor to this.
Assignment
For this week’s documentary homework we have been asked to shoot in a location that we usually wouldn’t, and to produce a more symbolic image as part of this.
It felt like the right thing to do to shoot on film and, to add to the nostalgia (and avoid delays in film processing), it was time to whip out the newly acquired Polaroid. Bought on eBay, the camera was only slightly more expensive than the film itself. (But that film is magic - it’s even got its own battery charge in it!) I didn’t read the instructions on the packet before using the film however, and waved the exposures in the air as was the fashion in our childhoods instead of letting them develop in the dark, so the results - as you can see below - are somewhat patchy and blown.
In terms of symbolism, I think the answer has to lie in the elderly themselves but as I don’t have access to a compelling subject right now I decided to make a trip to the local cemetery. It was while photographing the grave of a Vietnamese immigrant, below, that it suddenly occurred it would be interesting to document how elderly immigrants cope with not just ageing but also ageing in a community with sometimes very different norms and values to the ones they grew up in. So, this is the direction that I am going to take.
And finally, for now, I’m quite happy with my over-exposed Polaroids. They’re nostalgic, they’re a thing of the past and they are misty - like stepping back in time through eyes with cataracts. It will be good to see where this one goes, and I am excited about longer term pieces of work with a running narrative.


Adventures in film (continued)
It’s been a fun few weeks as far as photography is concerned.
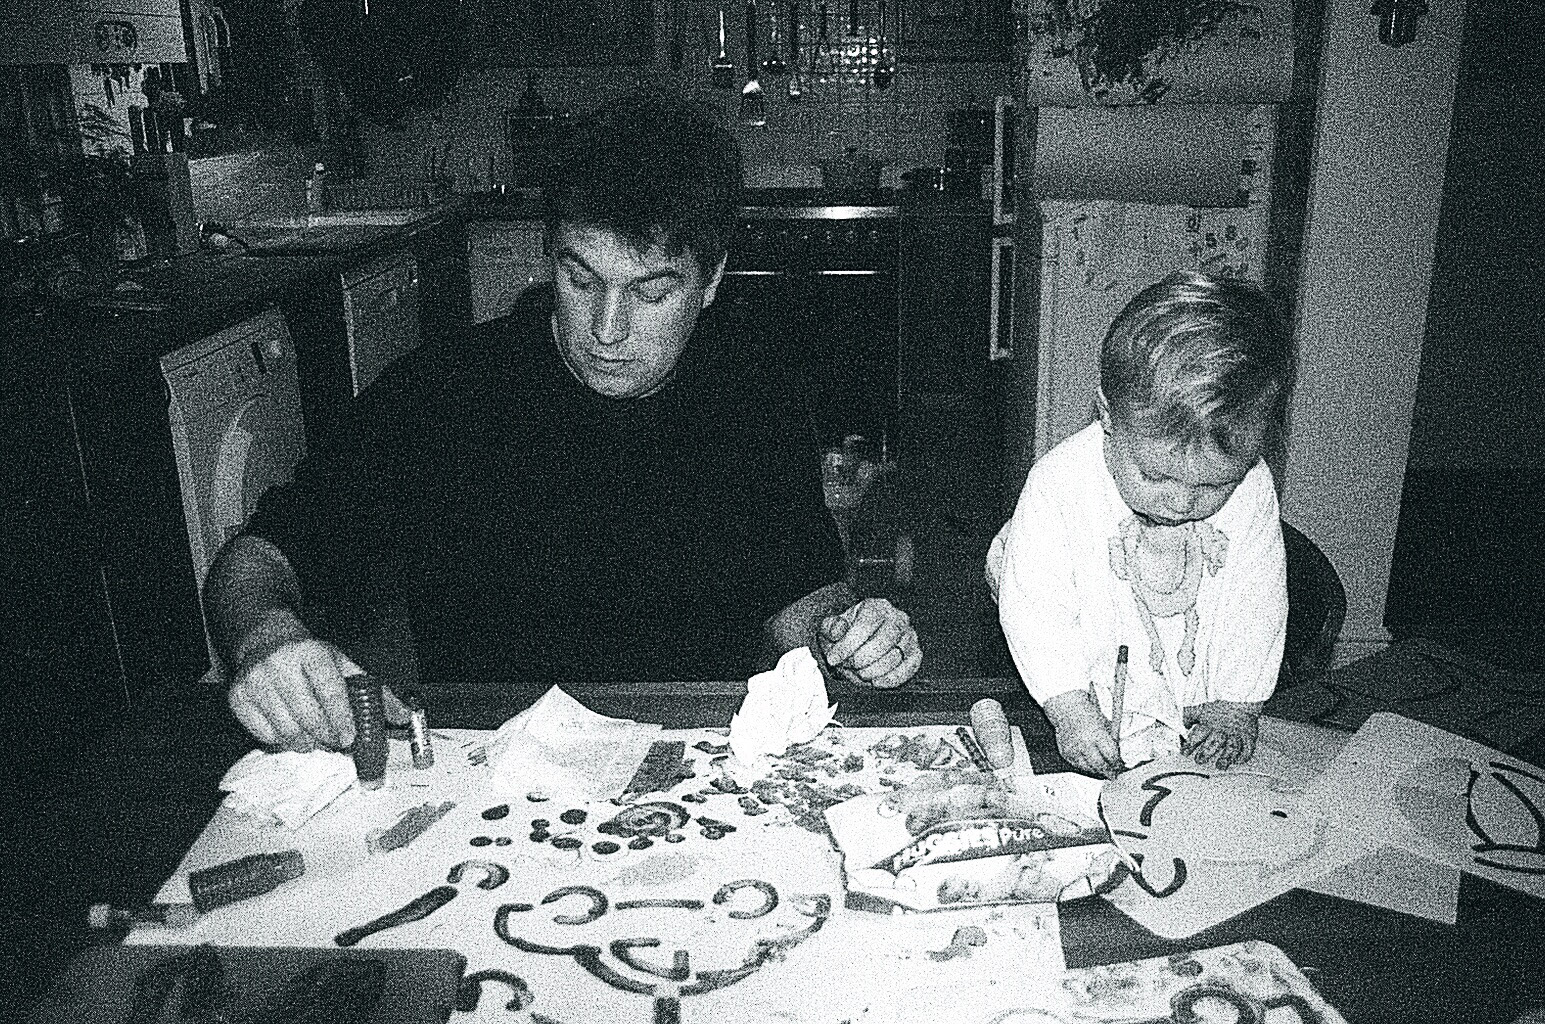
Old, grainy baby photos
The initial results of my film forays are in. Probably the greatest pleasure has been retrieving the old black and white film that was sitting in my camera for 9 years or more. As my son prepares to move to Big School, it’s lovely to find “new” images of him as a baby.
REDSCALE FILM
This 35mm film I bought from Nik & Trick (see previous post). It was the first film I’d loaded in to the camera in years, so part of the learning curve was getting used to the camera’s idiosyncrasies again.
I remember using a red lens filter years ago and having to over-expose the image to get any real sense of picture. The first couple of shots I took on an overcast day, and even with the overexposure the dark was shapeless and devoid of detail. Two stops would definitely have been better.

The shot could have benefited from more exposure
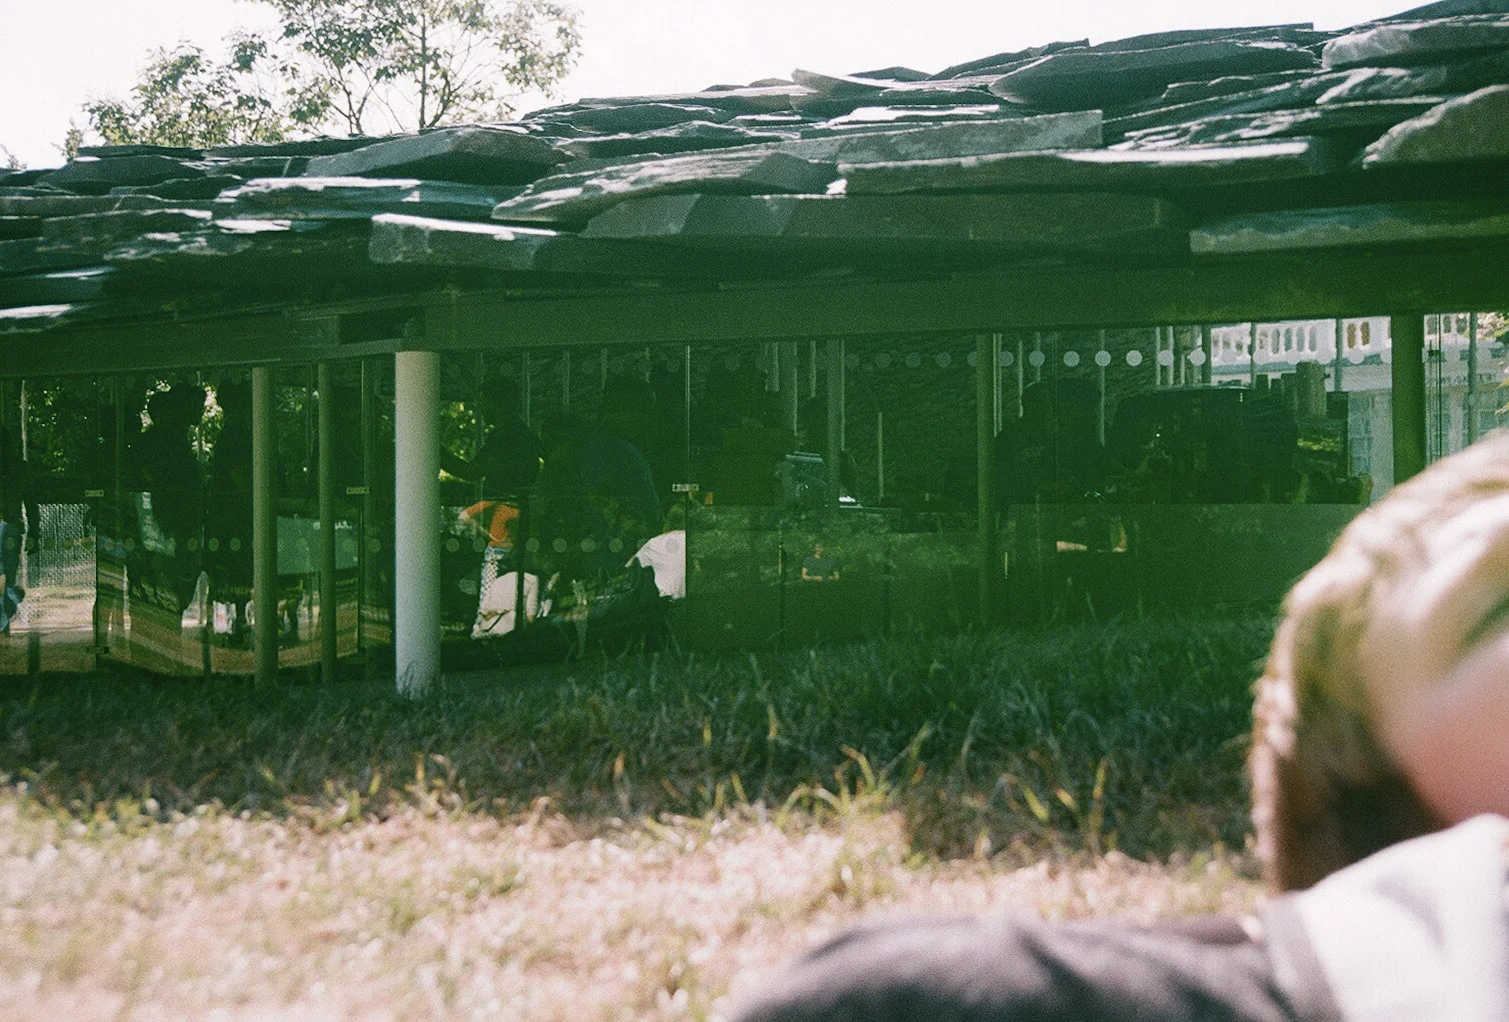
The next day I went out was bright and sunny with excellent cloud cover - perfect for redscale photography shots. Mostly one stop over-exposure was enough, but in darker areas such as in the shade of the Hyde Park Pavilion, it could definitely have benefited from more.
Now I have “cut my teeth” on redscale, I have a couple more options to play with. I have another roll of pre-rolled film to shoot - and I’ll choose my landscape more carefully, armed with my current knowledge. The other option I’m going to play with is playing around with coloured lens filters, to see if I can get the same effect on normal 35mm film or even on digital - without paying for the cost and hassle of film.
See the redscale photos here >
REVOLOG PHOTOS
Revolog is a brand of film that makes novelty effects (some might say gimmicky, but what have you got to lose other than a bit of money?). I bought a couple of rolls of different types here and here.
Obviously, taking the photos is as easy as taking any other type of film - you can’t see what you’re doing in the moment anyway. But in terms of the results, I much preferred the versatility of the Revolog film - though I still shot a little overexposed, the film was much easier to handle and the success rate of the shots was higher and especially in darker areas of the images. It is however more unpredictable in terms of the results you’re going to get - as you don’t know if a splotch of green is going to be to the left or to the right of the image.
This film is so much easier to shoot with, without so much decision making between light and shade
But of course, novelty film or no novelty film, it’s all a bit pointless if your composition is up to nothing. And this is one of the downsides of film: because the roll is in your camera, it blocks you doing anything else with it until that load is complete, so you end up taking slightly silly pictures just to finish up the roll. This said, I’ll definitely use this film again at some point in the near future: #filmisnotdead
Next time I’ll talk about loading the Yashica 44, and other medium format fun things.
Finding Vivian Maier
A few weeks’ ago I visited Photo London, the huge photographic show for dealers, buyers and generally interested bystanders. I know very little about photographers in general, so it was a great opportunity to get inspiration and see what’s going on in the photographic world.

Photograph featured from http://www.vivianmaier.com
Some of the work that really stood out was by the artists below:
Seydou Keita
Nino Migliori
Todd Hido
David Goldblatt
Nelli Palomaki
Sherin Neshat
Sabine Weiss
But most of all, the work of previously unknown photographer Vivian Maier really “spoke to me”. Her work stood out not because of her back story (don’t forget, I know nothing) but because it is excellent.
A Chicago eccentric, Vivian used her occupation as a children’s nanny to walk the streets for hours, recording street life with her Rolleiflex. She died unknown and penniless and it was only after John Maloof acquired a box of her hoarded negatives at auction that he began to piece together her life and work. Since then her story has been promoted and become famous, not least through the documentary film Finding Vivian Maier. Her work is documentary and prolific - you can really sense the spirit of the era - and to me at least evokes humour and pathos. For someone so much on society’s outskirts, you can really feel the connection Vivian had with the subjects she shot, and that timing she had is just so perfect.
This to me is what street photography is all about, and Vivian Maier has kept me thinking long after Photo London closed its doors, showing that inspiration can come from the most unlikely of people and places.