Exhibitionism with Unseen Tours
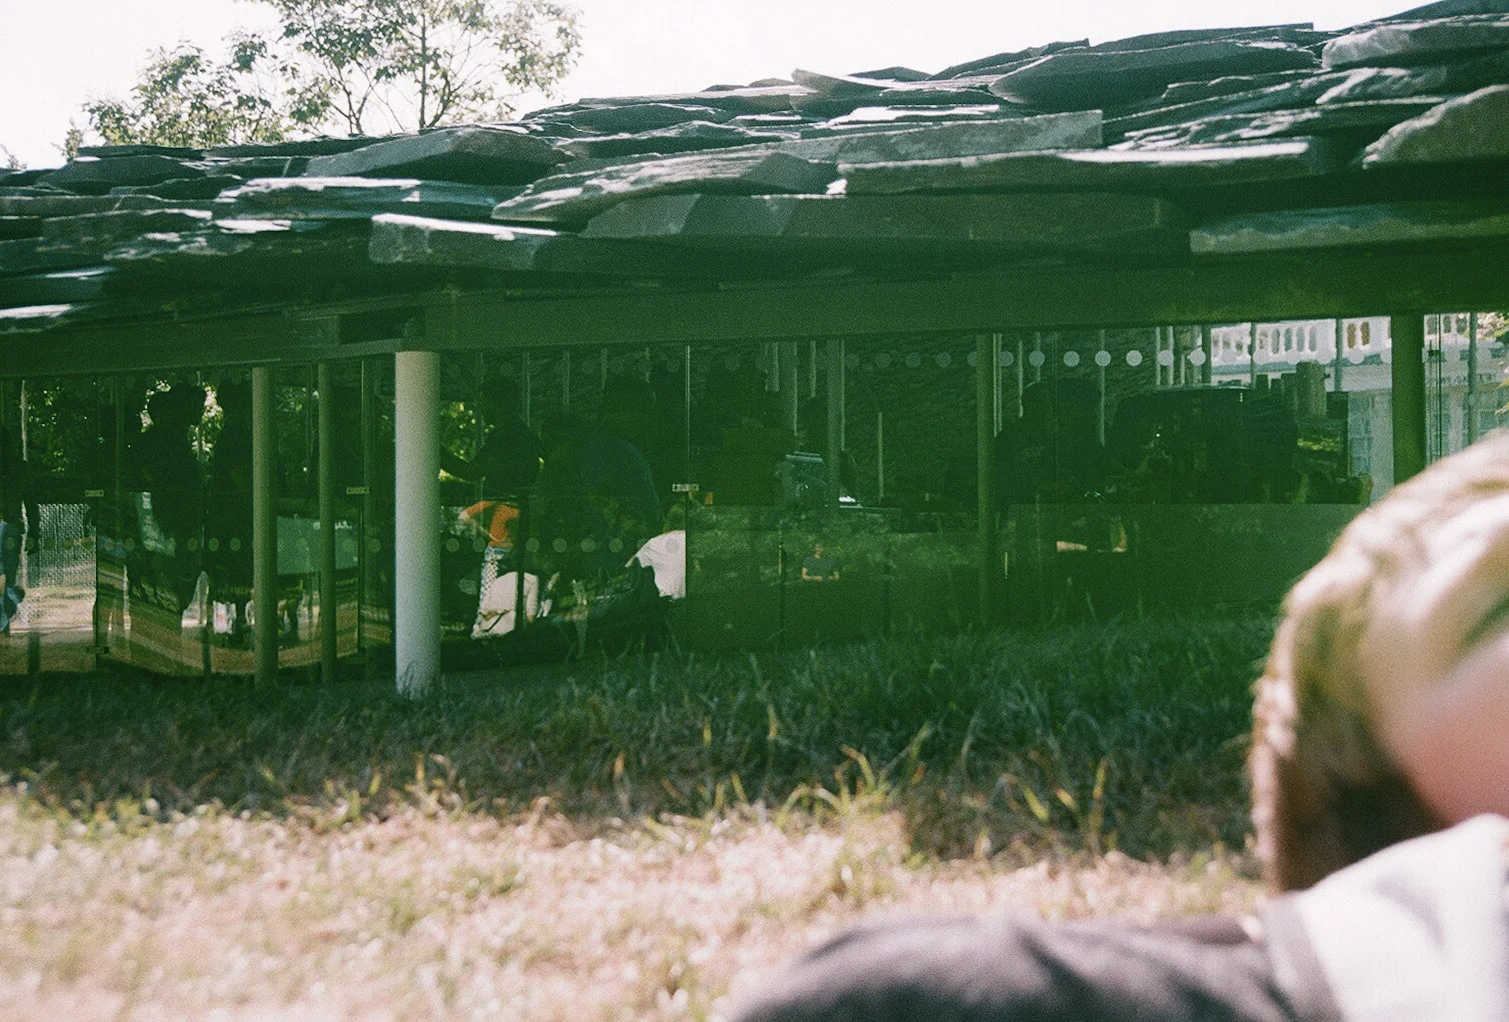
Unseen Tours is a social enterprise that’s based in London, and there couldn’t be a better partner with which to launch my first photography exhibition. A social enterprise is, in lay terms, a charity that makes money and reinvests it back into the organisation. In this case, Unseen Tours trains people who’ve experience of homelessness to be tour guides of their local area, and it was recently their 15th birthday. I was delighted to support them with the anniversary celebrations to create a travelling exhibition.
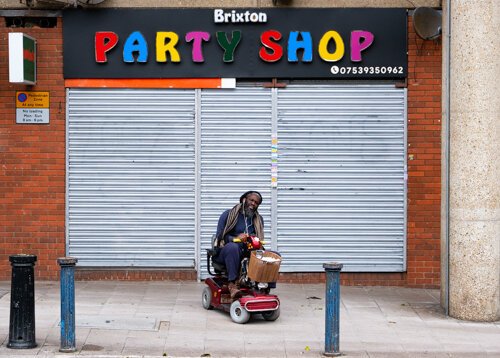
Unseen Tours has trained and helped 35 people to co-create their own walking tour route; currently there are five routes across some of the most popular areas of London, including around London Bridge with veteran guide David, and also in Westminster, St Pancras and Clerkenwell, Canary Wharf and Brixton. These are walking tours with a different flavour: apart from seeing the city from a non-conventional perspective - it’s amazing the details you can find in a city as rich in history as London, and helping some of those who have experienced housing difficulty, the tours cast light on other unseen aspects of life with no fixed abode. For homelessness isn’t just about living rough on the streets: sofa surfing and living from hostel to hostel also play a large role in housing insecurity, and are underreported from official figures.
From a personal perspective, I enjoyed meeting and getting to know each guide. When we refer to others in categories (“the homeless”, “black people”, “the far right”), we start to lose sight of individuality, peoples’ likes and dislikes, their skills and talents. These tours bring the “small peoples’ stories” to life, and show that struggling with permanent accommodation can happen to anyone. We have the multilingual Ben who likes to sing Brazilian songs to the guitar, Rah who knows more about the history of the London Underground than anyone I’ve ever met, Anne with her beautiful singing voice, and so on…
I shadowed all of the guides as they conducted their tours, creating documentary images: some candid and a number of more posed shots. We wanted to portray the tours as realistically as possible, with minimal processing and cropping. These were to be displayed on four-sided self-supporting panels - one for each guide and an additional stand for Unseen Tours itself. I shot on digital medium format for this reason, keeping focal length consistent with a 63mm lens. This turned out to be a wise decision, as our first venue to debut the exhibition was the Art’Otel Hoxton: there are huge walls in their gallery space onto which the images and moving footage were projected.
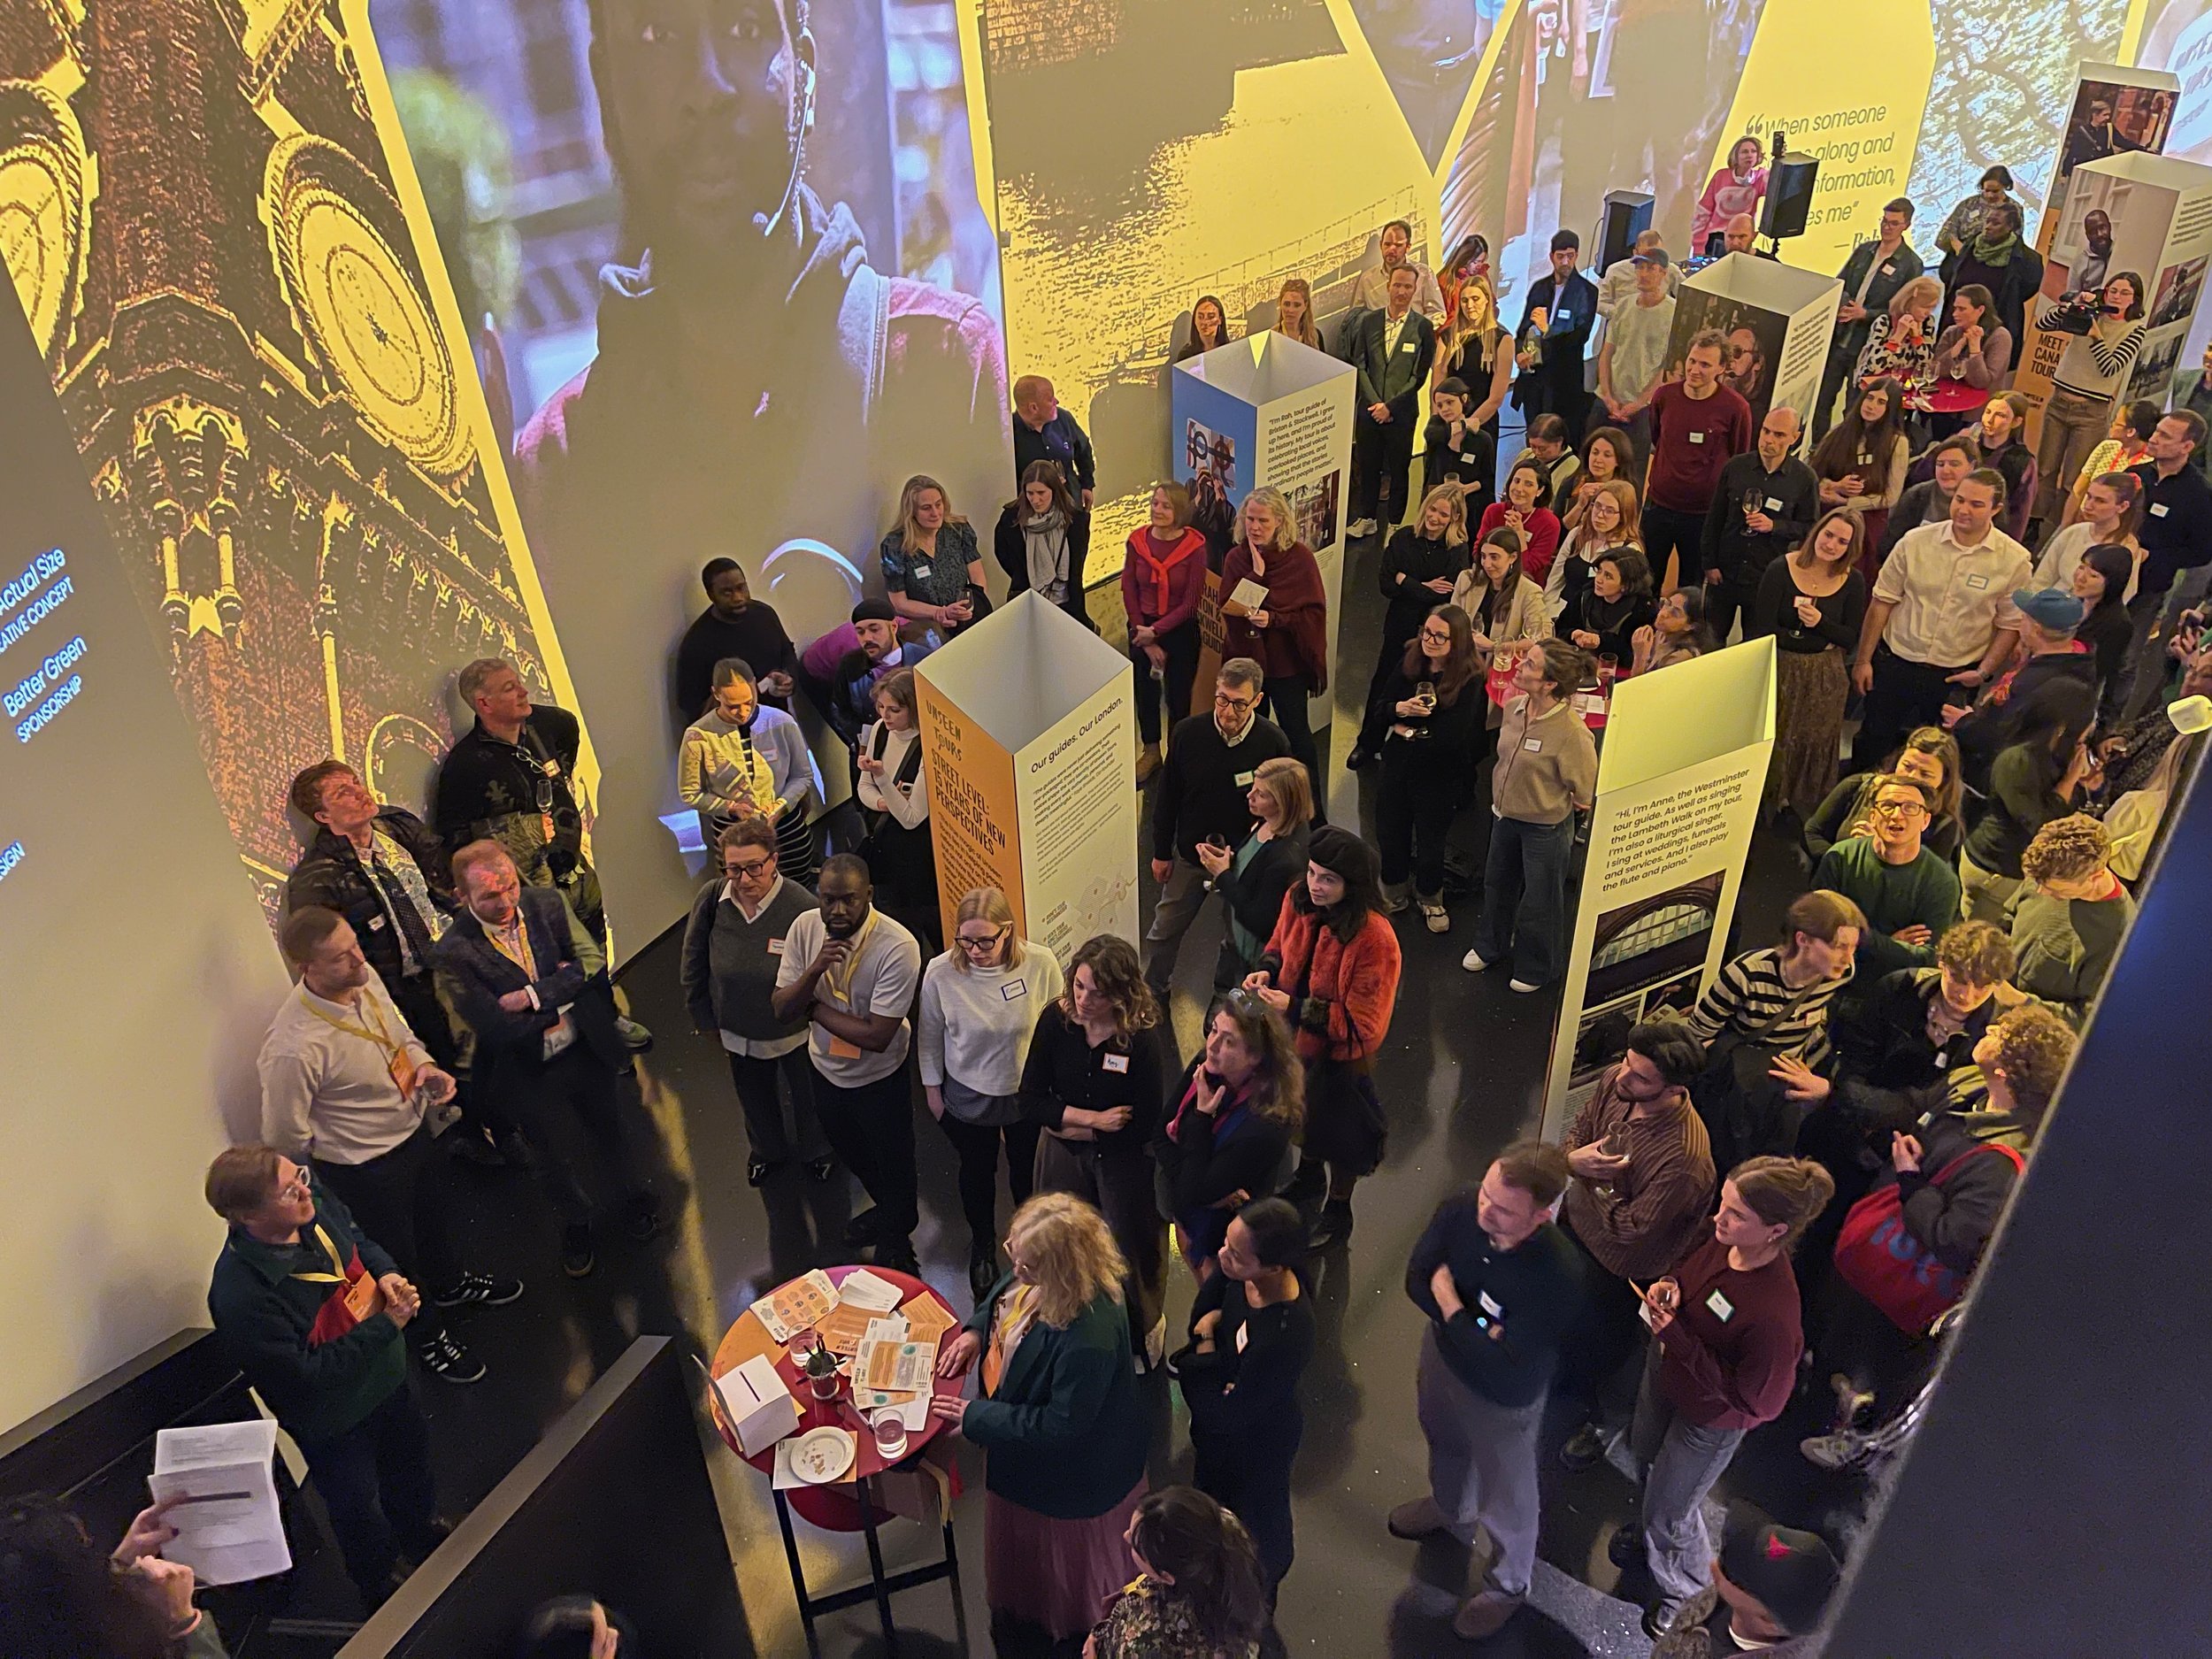
We were delighted with the opening turnout of over 100 people, we had tunes from Loop dee Loop music, the drinks were flowing courtesy of our Better Green Living sponsor - and the feedback has been strong. TripAdvisor has been kind enough to support Unseen Tours all of the way through this project.
The exhibition remains on until the end of Sunday 29th March 2026, and it’s free. If you have a spare moment and want to know more, it would be great to get you and your eyes on the images!
And of course, if you would like me to help with any non-profit, NGO-type work, please don’t hesitate to get in touch.
Making Portraits with Vintage Lenses
This article was originally published on Substack.
Alongside my documentary and travel interests on World Stories, Told My Way, I wanted to find a way to talk about the studio and portrait photography work that I do.
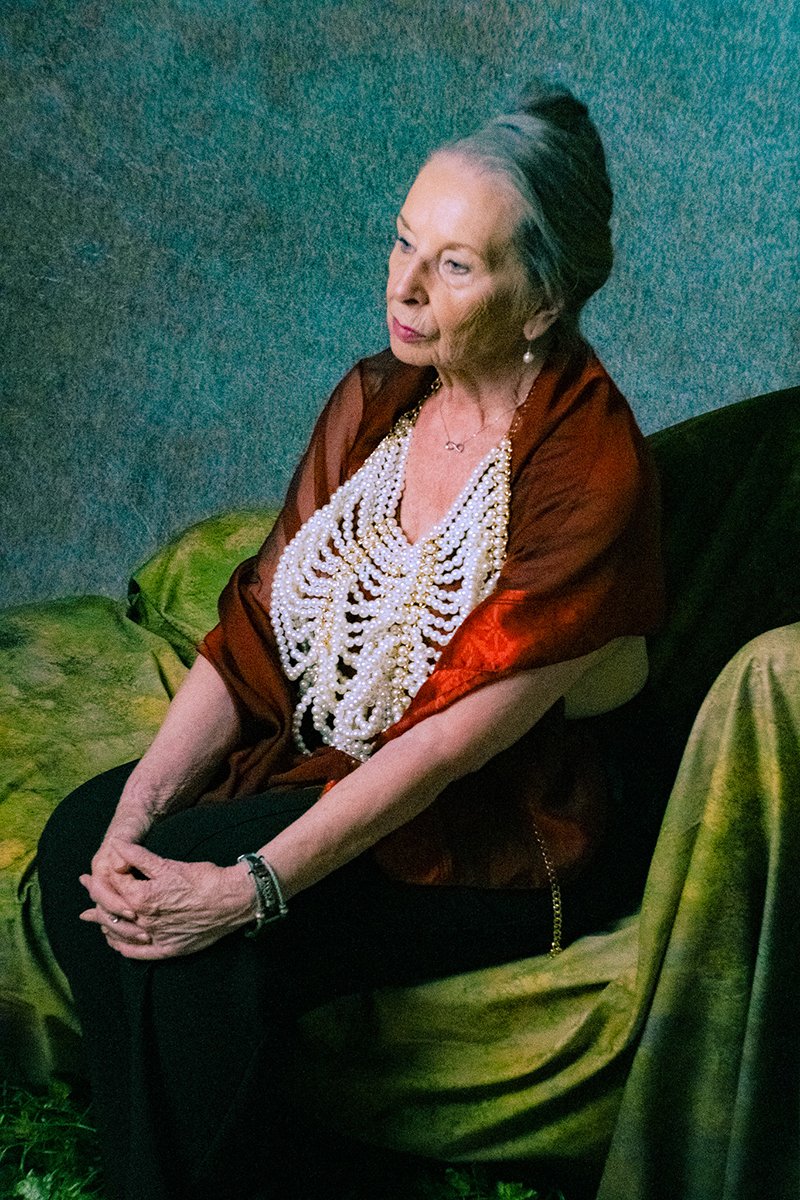
Let's start with Jesmond.

As soon as I saw Jesmond's headshots, I knew that she would make a fantastic sitter. She has elegance and poise, and a twinkle in her eye.
Many studio photographers might turn away from older models. Sadly there's a lot of sexism and ageism that exists even in a broadly left-wing, creative profession. Not only this but models and actors are there to serve a kind of market, and that market is not really there - at least not in Western society - unless you're playing a granny or someone's mum. Alex B, another older model I've photographed, writes about these types of issues also on Substack and the articles are thought-provoking.
I suppose this is where documentary photography experience is really helpful; older faces - and the wisdom that sits behind them - make for wonderful portraits. Each line, each wrinkle, tells a story of life lived, loves lost, of hardship and of happiness. I love to photograph them.

Planning
Clearly there are some administrative elements to planning a shoot but I'm not going to go into those. Yes you need to book the model and the venue, and do all of those practical tasks. It's outright essential to get it right - but it's not the stuff of written fantasy.
I nearly always plan my shoots with a specific model in mind, rather than having a creative idea and then casting to get the right candidate. This is probably a function of my limited budget as much as any artistic reason. I like it though. I like the flexibility and the challenge of coming up with an appropriate theme.
In school Home Economics lessons, we had to devise menus for specific dietary needs. Design, prepare and cook a two-course meal for a guest with Coeliac disease, that sort of thing. This is kind of the same, on a visual basis. While I didn't really know much about Jesmond the person, I knew she was an older female and an actress and model, so I set about some research.
I started with Pinterest and created a board to collate ideas. For the reasons mentioned above, there wasn't a plethora of inspiration. Often there is, and their algorithm can be quite helpful in suggesting similar types of images to the one you've just pinned. Here though, no dice. Chat GPT it was. I asked AI to recommend to me some photographers who work with older women. I skimmed through a few that didn't seem right. Some ideas I liked but I wasn't sure whether I could suggest them to Jesmond, others were too elaborate, were set outside - this was a studio shoot - or required more resources than I had, such as a make-up artist.

With the help of the chatbot, I came across the work of Joyce Tenneson. Her style immediately stood out as one that would be appropriate as inspiration for this shoot.
Other than moodboarding - which helps to understand the visual direction of the shoot and also give guidance to the sitter as to what to expect and what to bring with them in terms of clothes and props - I don't usually plan the photos much beyond this. Many photographers will have a set image list, or will storyboard, knowing exactly which poses they want to get in each frame. I would do this for a commercial shoot, or for one that's complex. But for creating images in a studio with me and one other photographer, it feels like just too much process. In the studio itself, a more flexible approach means that I talk to the sitter and we have the freedom to play - usually we both end up enjoying this.
Planning the Production
Joyce's work is fairly simple in terms of set. While I wasn't aiming to ape her work, there is a simplicity that lets the sitter's beauty do the talking. I started to think about why her images spoke to me, why they were right for this project. This broke down some of the components of the set that I needed to think about.
The light is kind to an older person's face. While part of the point is celebrating seniority, most people want to look their best in a portrait. In terms of studio lighting, for me this meant the use of constant lights and definitely not strobe. Strobe can accentuate wrinkles and shadows and look quite harsh on a face. To establish even light distribution, I planned for a large octobox modifier on one constant light, with a lower wattage fill light coming from one side to eliminate shadow.
There's some texture and movement in Joyce's images that I liked. As well as also softening lines, it nods to the less sharp photos that we saw in the past with less advanced lenses and a dependency on film. Shooting with constant lights helps with this, as your ISO needs to be higher so the images will be less pin-sharp. But I thought that a textured background would add another dimension, and that I'd add intentional camera movement in some images. The pièce de résistance, though, would be using vintage camera lenses acquired from eBay over the years.
There's something fitting about using old, contemporaneous lenses to photograph an older person. And there's an absolute joy in reviving these lenses anyway. Unlike humans whose weaknesses are strengths overplayed, the strengths of these lenses are their weaknesses underplayed. Distortion, yellowing of glass, scratches, cheap blades - these make for fantastic effects and bokeh straight out of the camera. I had a fun hour the day before the shoot dusting off these beauties and testing them on my camera with an adaptor. Why on earth had I not used these in so long? Their brand names and models were recalled - Meyer Domiplan, Helios 44-4 and -2, and some nameless.
Joyce's use of draped fabric instead of normal clothes is also very interesting. The drapes kind of blend with the image, and draw focus to the face. There's an implicit lack of judgement here; we cannot as viewers judge the sitter's clothing choices, for they've been effectively neutralised. There are lots of fabrics in the studio, and I trawled eBay and Streatham's many charity shops for curiosities, eventually opting for some brass scales of justice, a large juicy pomegranate and a metallic-flecked burgundy scarf (about £30 in total).

The Shoot
My shooting partner Josh and I set up the dark mottled green fabric backdrop on two C-stands. Using a slightly lighter coloured green backdrop we draped the (pink!) chaise longue with it and then dressed the foot of this with some dreadful fake ivy acquired from the Pound Shop.
These things often look better in images than they do in real life. They definitely smell less.
Josh had the idea of setting the main light at a Rembrandt angle which is set, as anyone who's watched a Sean Tucker portrait photography YouTube tutorial knows, at 45 degrees to the subject. The fill light was added with a rectangular softbox.
I laid out my selection of vaguely suitable props so that they were easily reachable. I like to have them there for comfort, almost. Even the best-planned set-up can sometimes not work on the day. Sometimes it just doesn't look right, sometimes the model is not what you thought they'd be, occasionally there's just not that creative connection. Having the props available can really help to make best use of time and effort, because no amount of reworking a shot can put lipstick on a pig of an idea. Just change it.
Jesmond, of course, was an enormous part of the success of the shoot. She is genuinely an inspirational person. Warm, funny, empathetic, she is an actress and model now - but has been an air attendant in the past amongst other jobs - and also sells her own paintings. Her activity belies her physical octagenarian age, and she posed effortlessly whilst also chatting to us. It was serendipity to create this painterly look whilst not knowing beforehand that Jesmond is also a painter.

Post-Production
One major advantage of photographing older people is that post-production can be minimal. Skin treatment is largely unnecessary and would be ill-advised! We got the set-up and lighting pretty much what we wanted it to be, so really the only post-prod was the dewrinkling of some areas of the backdrop using Photoshop's patch tool.

Joyce Tenneson's work employs a kind of dark sepia palette, and I used this on a number of the images created with Jesmond. I didn't like it as much as I thought I would on my own images, and the vintage lenses created this incredible colour that I felt would be wasted on monochrome. For the majority of images I boosted the vibrancy and saturation and, in some, did something that I almost never do.
Don't tell anyone, but I used a Lightroom preset. Sometimes you have to break your own self-made rules.
And now you
I'm interested in hearing your thoughts on all of this, whether you're a photographer or not.
I loved this shoot and I love the images created, so I won't be offended if you don't.
Do you like the images? Did I set out to achieve the goal? What might you have done differently?
Lastly
If you're a photographer, model or indeed someone who would like to have a portrait made, please do get in touch. I run small shooting sessions for photographers and of course am happy to have the privilege of creating portraits for individuals.
How I Take Photographs
A fellow Instagram photographer who I admire (@rogerevens) suggested that a) I update my blog and b) That maybe I write about how I approach photography.
The first suggestion is definitely a Good Idea; the last post was back in April. Updating websites is what I do all day so updating my own feels like something of a busman’s holiday.
The second suggestion got me thinking. Firstly I am no “great” photographer like Daido Moriyama, who has written a book called How I Take Photographs. The modesty button was immediately pressed. I have an international audience of Instagram followers, but then lots of people do and not all of them are any good.
More importantly, I didn’t actually know how I make photographs. It’s a very instinctive affair, and especially when it comes to street photography where your reaction needs to be quick to capture what you anticipated might happen in the first place. The more I thought about it though, there were themes that emerged.
Why I’m Making the Photograph
This is key to how I approach a shot. For standard street photography, it might just be that a scene has caught my eye, or that the light is playing well in a situation. Basically, it looks nice. But if my aim is more documentary photography - say if I am overseas and want to capture a particular scene, or there’s a detail that explains more of the story, I’ll zone in on that.


Documentary photography has something of a standard narrative to it, if you choose to follow the rules. Start with wide angle, scene setting shots. Hone in on the subjects that are the centre of your study, perhaps with environmental portraits, or something shocking that can help to capture the viewer’s imagination quickly. Embellish these scenes with zoomed in, micro details - perhaps a shot of a hand on rosary beads, or an empty bowl. Whether you follow the documentary rule book or not, making a variety of different shots definitely helps to vary the pace.
It can also be useful to remember to change from landscape to portrait, and vice versa. It’s surprising the number of people I meet who forget to do this.
Go to Interesting Areas
Travel is one of the main reasons I started exploring photography. After a trip to Cambodia where I returned with a lot of half-rate shots, I decided it was time to up my game. So going to interesting areas has always been key to the shots I make. Of course this doesn’t always mean hopping on a plane - there are plenty of interesting areas in every town.
Living in London means I have access to a big city - there’s always an interesting neighbourhood to explore. What’s fascinating to me might not be to you, but I am always interested in how people live, markets, what the markets sell. Maybe an area is known for something - a high Jewish or Afro-Caribbean population, for example. What visually stands out because of this?

Graveyards might not be everyone’s cup of tea, but I find them fascinating as you can chart social history and understand how the location changed over time. We visited one outside Belgrade in Serbia. It was a Jewish graveyard and of course the gravestones stopped in the 1940s (very sad given the memorial to the Jewish soldiers who fought in WW1 in the very same graveyard). Back in London, the Magnificent Seven offer insight into how the city developed during the Industrial Revolution.
Meet People or Hire People
One of the main reasons I use Instagram is that there is a community of like-minded people right there, and all over the world. And whenever I have met any of them in Real Life, they have been unfailingly charming and I have learnt a huge amount from them.

Speaking to local people obviously gives you a layer of insight into a destination that you wouldn’t otherwise have. You might also visit different photographic points that you wouldn’t find by yourself. My husband and son are also grateful for my friends’ intervention: they get terribly bored of me darting off down side alleys, chasing the perfect light or a quirky-looking individual. They are glad to go to the pool for a day by themselves.
Particularly if I am short on time, I might hire a photographic guide for a day. I have enjoyed a number of trips in this way - such as photographing the villagers of Transylvania with @vladbrasov or exploring the alleys of Jerusalem with @simonbeni . There are loads of advantages to this approach. One is that I have picked up innumerable tips on how to use my equipment. One is that they know all of the good spots and can provide the inside track on how to access them. Usually they will also speak the local language and know the people already, which can pave the way to better shots.
I used to feel that hiring people was “cheating” - but of course TV crews and other journalists have been using fixers for years. There are online databases of fixers all over the world. Naturally you have to pay for them - but using them can cut down on the administrative hassle of travelling in a foreign clime and gain you access to subjects that you’d never have plodding the streets by yourself.
Research Your Trip
This one applies more to overseas trips that I make, or trips further away from where I live. While I also like to freewheel and just explore naturally, having an idea of the shots I might want to make does help.
Some trips are entirely inspired by things I have seen or read. For example, a trip to Slovenia was because of Paulo Coelho’s Veronika Decides to Die and my trip to Uzbekistan was entirely due to Eleanor Ford’s excellent cookbook Samarkand. Reading novels around a destination can really augment my imagination and add to my knowledge of a place.

On a more pragmatic basis, I’ll usually read the Lonely Planet or similar, and check out Atlas Obscura. While other photographers with more patience than me take far better shots of tourist sights, it doesn’t mean that I don’t want to see them at all. I’ll research hashtags on Instagram, and Google things that I might want to do. Before the recent trip to Serbia I was researching abandoned building exploration, and reached out to some people who could help me do that. I knew that I wanted shots of the concrete of Novi Beograd, and I knew that the chess players around the fortress would make for good photos. I drop pins on Google Maps and tick them off as I go.
Learn a Bit of the Language and Say Hi
I must admit that I don’t always do this, depending on the destination and how much I have travelled in a specific period of time. Much as I find languages fascinating there is only so much time one has in one’s life. But from a photographic point of view it really does help to be able to say a few words in every language - “OK?”, “Thank you” and so on. And of course communication is rarely just about words. A smile when making a photo of someone can make all of the difference between a good shot and a great one.

Being obvious about your intent when making street photographs really does help. I am a big fan of candid photography, but people do see you. Often I review shots in post-production and realise that the subject has completely seen me the whole time when I thought they hadn’t. Some places are quite anti their photos being taken (Serbia), and some places are very welcoming (Myanmar). Sometimes I carry a small portfolio book which explains what I do, and usually I’ll have some business cards on me that I hand out if people want to get the photo later. It takes a bit of guts, but asking people for shots also leads to superb work - there are those that love the camera and are more than happy to pose. Being able to communicate is key to all of this.
Walk, and Then Walk Some More
One of the reasons I like photography is that I like walking. Which is fortunate, because I do a lot of it (during a week in Belgrade I easily clocked up over 100km). Apart from the visual side of things, walking is a great way to really experience a place with more than just your eyes. You smell the smell of food cooking, you hear the sounds of everyday life. It also keeps me fit.


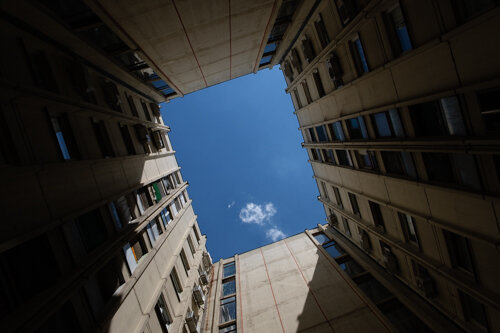
I have been known to take shots out of car windows - in our family we call this “car tourism”. But there’s no substitute for walking down a street and seeing what’s happening - and then walking back the other way. I always miss something the first time. Look up at the windows or the sky, and look down at the pavement. Go back at different times of the day, when the light falls differently or when you’re in a different kind of mood. The shots will always be different.
Telephoto Lenses or Prime?
Personal choice this one but the lens that works for me is an 18-135mm. It allows me to zoom closer to subjects I can’t reach with a prime and allows me greater flexibility while travelling. It also means I don’t have to pack a whole bag of heavy gear (done that).
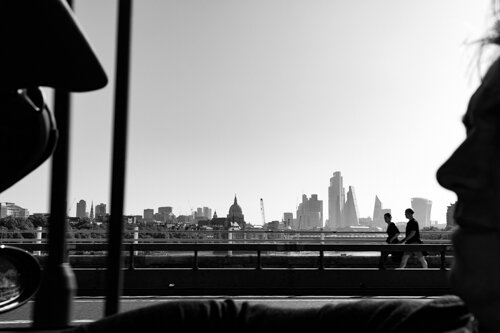
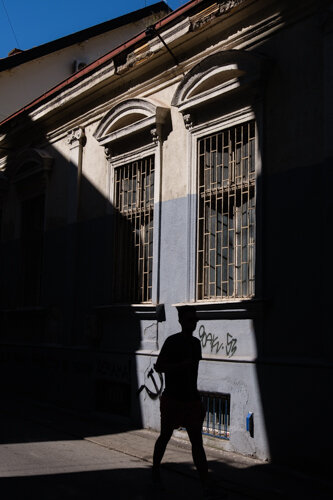
Look for the Light (and the Shadow)
Unlike many photographers, I don’t mind shooting in the full glare of the midday sun. Apart from anything else, shooting at Golden Hour only would mean severe restrictions on how much I could explore. Shadow play always makes for an interesting shot - I look for a dark background (a shop doorway, or recently I took a picture of someone in front of a lake) and create the contrast with the light hitting the subject in front.
Shooting with other photographers has made me much better in this respect. We learn from each other, and I have found the community very generous with their knowledge. Seeing what catches another person’s eye also helps to educate on what could catch yours, too.

Curious People (and Be Curious)
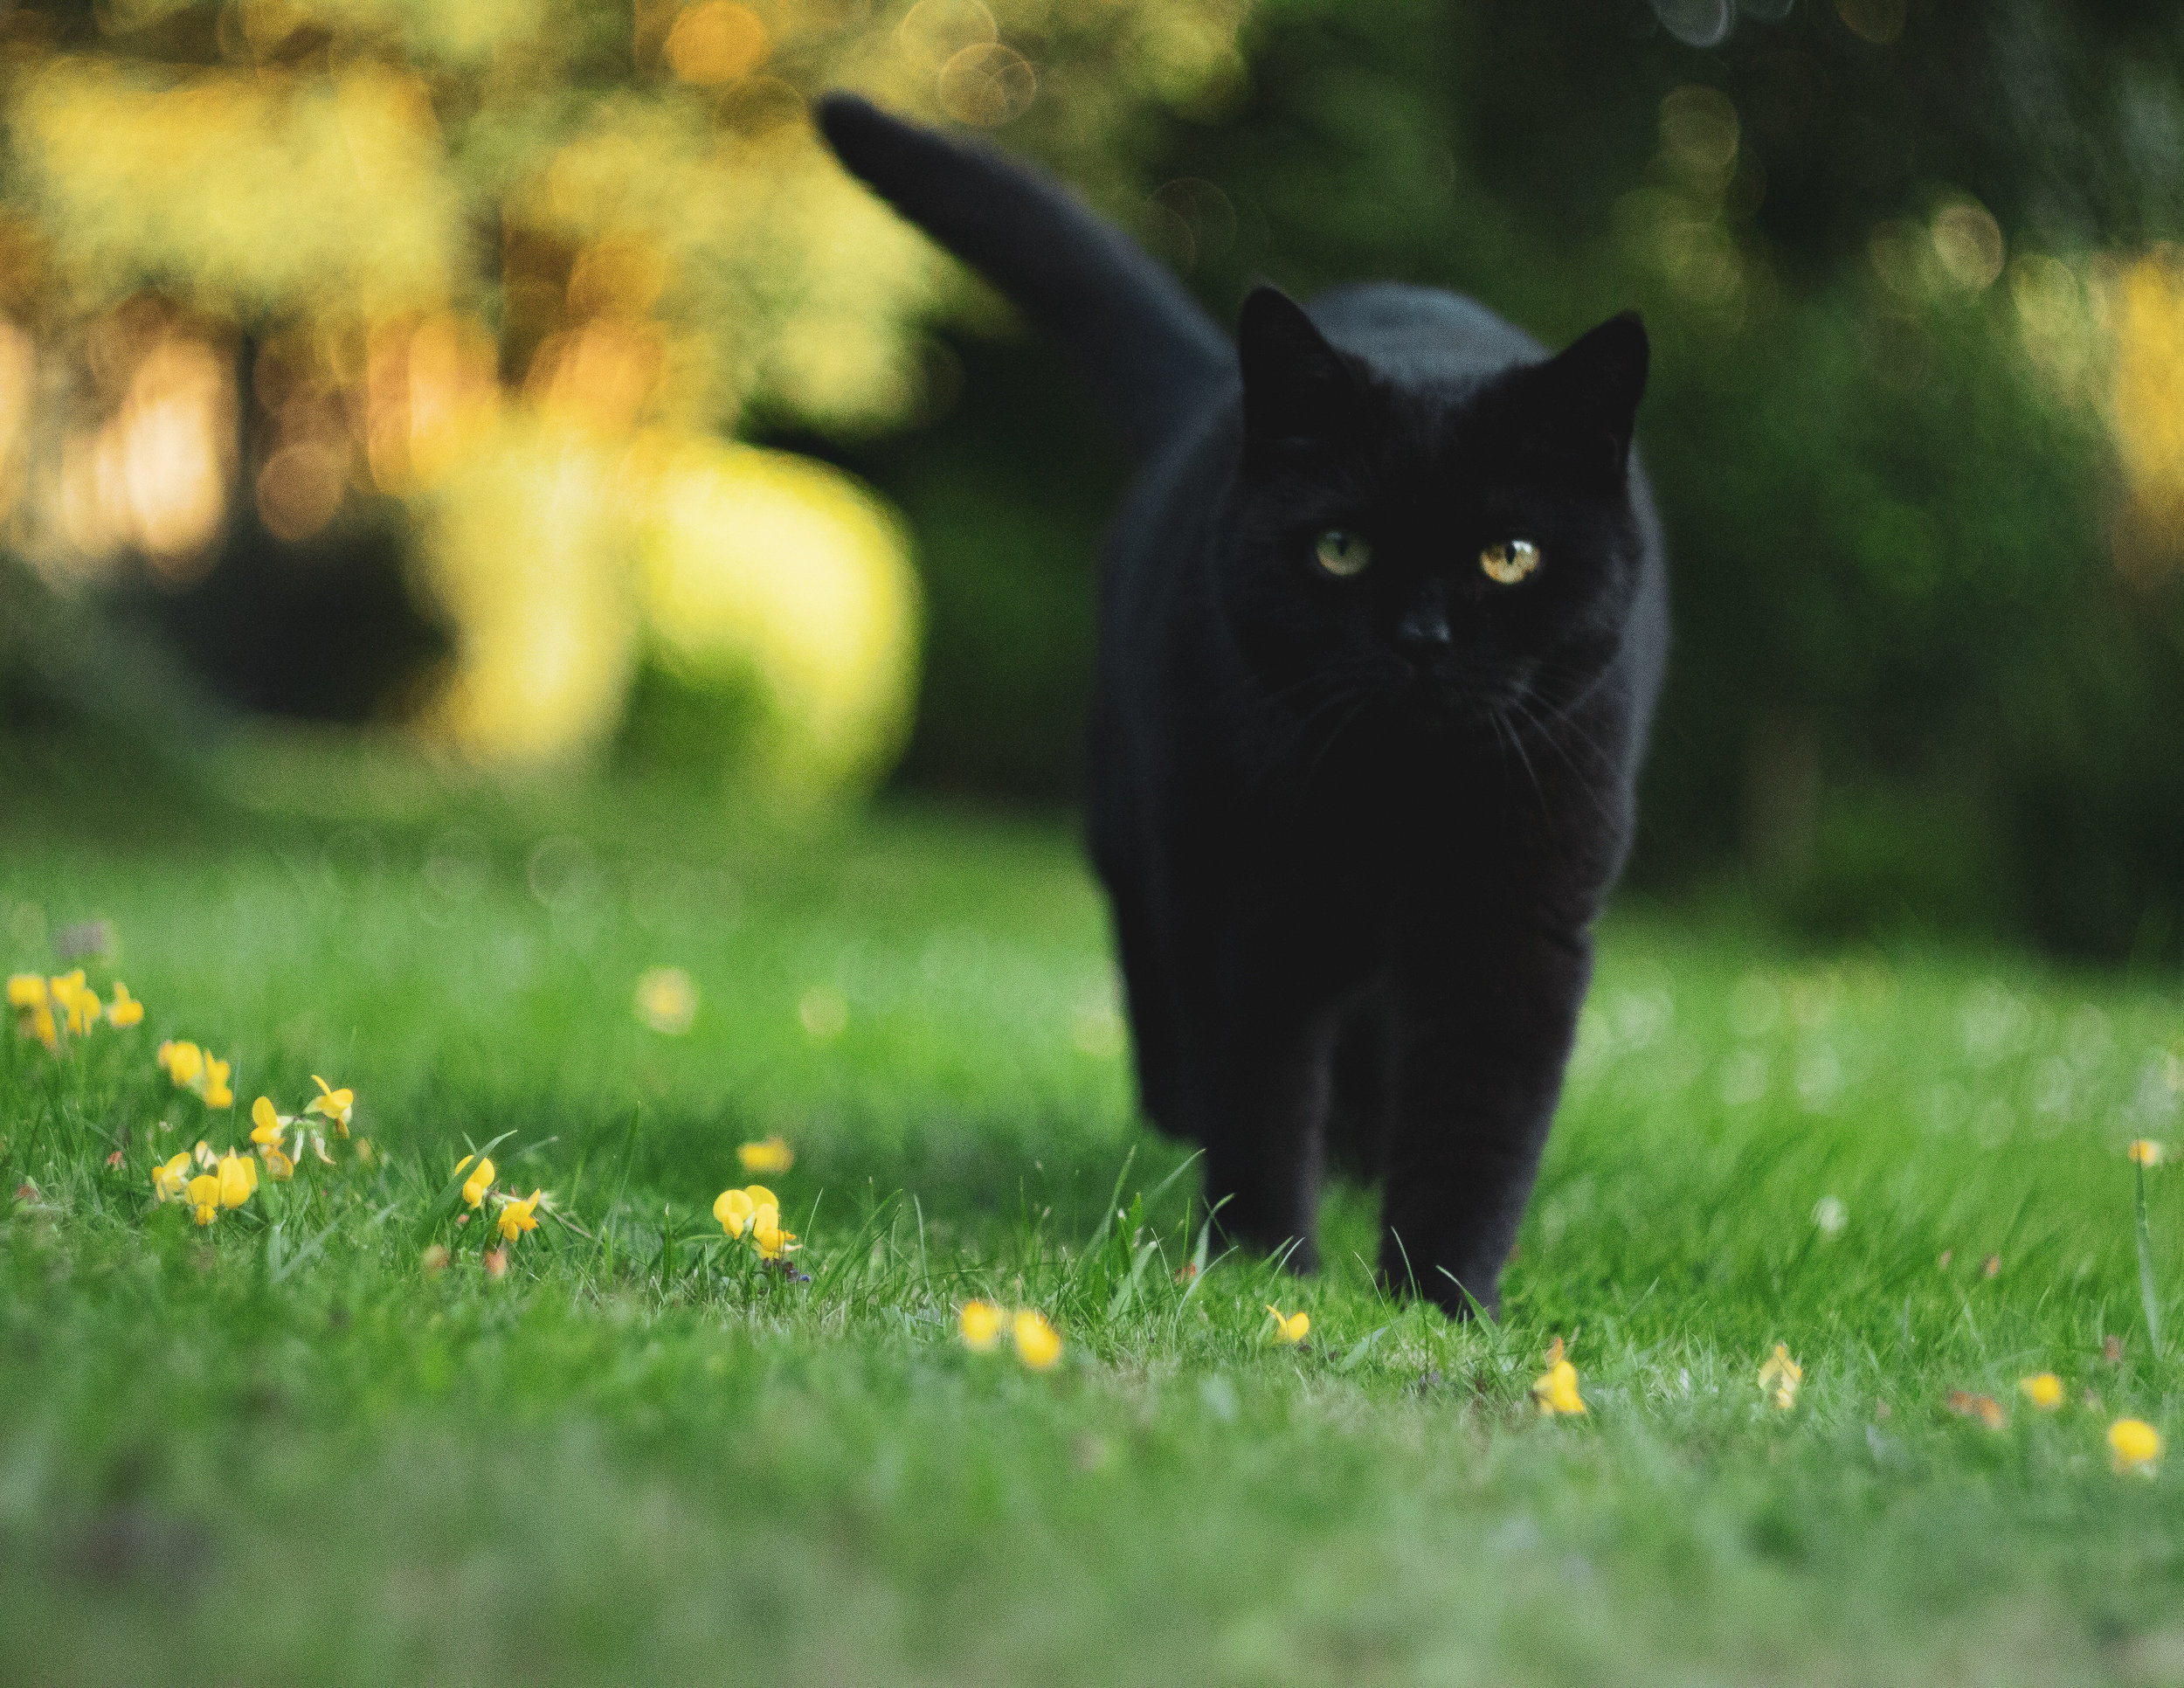
Photography is social anthropology, and being curious about people really helps my photography. The lens never judges; it just captures. In far-flung climes, of course everyone is curious. Somebody doing their laundry in Indonesia is far more interesting than me loading up my Samsung with the week’s dirty sheets. What are they eating? How are they eating it? What are the customs of that area? For example, in Cambodia they chuck their toothpicks on the floor after eating, so that they get swept up hygienically (maybe this has changed since coronavirus, but certainly used to be the case).


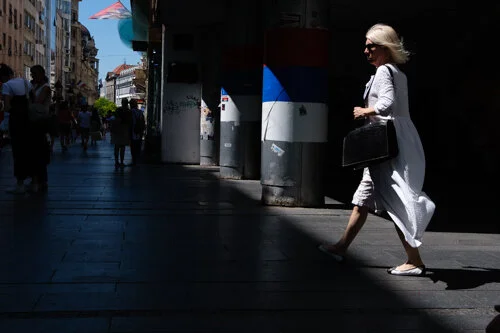
Closer to home, cities always provide “characters”. The less conformist the dress, the more likely the subject is to willingly provide shots. I look for unusual dress, or perhaps clothing that stands out against the surroundings. And of course there is always the chance of a witty juxtaposition against an advertising hoarding or one of those shots that come from pure serendipity. You know when you’ve got one.
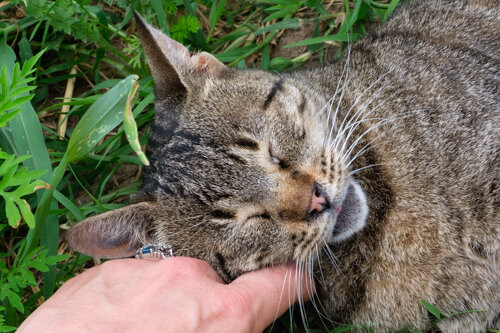
Cats
Finally, no photography trip in complete without a picture of a cat or two. Be kind to them, they are the future ;)

Printing with Salt and Silver Nitrate
I go back to the beginnings of photography to explore salt printing, a method that uses chemicals in contact printing to make photographic likenesses and prints
The Idea

For a few months I’ve been attending a local photo club, Photo Fusion in Brixton, which brings together photographers who are making beautiful art from cameras. Once a month on a Saturday some of us get together and discuss projects that are in flow. A few of these have mentioned salt printing, and I was interested to find out more.
I was planning to do a course, but Corona Kicked In. So instead I did a bit of research on the Internet. This article got me started. As a side note, I am finding a lot of great material on Lomography.com when I Google random photographic techniques. It’s either got a great SEO team or great content (or, conceivably, both).
Things You Need

Based on the article, I acquired the list of things needed. As usual, eBay fared better than Amazon for sourcing random chemicals. The big ticket items are really silver nitrate, citric acid and sodium thiosulphate.. The latter are quite cheap and you get quite a lot for your money; my silver nitrate however was £20 for 20g, so a more considered purchase. You might also want some clean decorating paintbrushes, a shallow plastic tray (I had one I had previously used for marbling inks) and some glass jars for storing the solution in. You could also do with a piece of glass big enough to put over your prints while developing, though I found that this did inhibit the colour somewhat. You might also want some plastic gloves, as my hands have been covered in black stains for over a week, and plenty of kitchen roll for wiping down the glass, digital negatives, etc.
That’s for the actual printing process. You need to make digital negatives as well (unless you happen to have some large format negatives lying around that you want to use). For the first batch I used this digital transfer film in my inkjet printer, but you can also buy OHP transparency sheets that are around half the price. They are pretty simple to make, and I used this guide: https://parallaxphotographic.coop/how-to-make-digital-negatives/
Choosing the Right Images
It’s important for this process to choose the right sort of images, with the correct amount of contrast. I had a digital negative of a picture of my son, an agapanthus flower and of a shot I took in the Tate Modern last year. These were sample images that I wanted to try out and that I thought would look quite good in the medium.
Choosing the Right Day

You need light and sun for this process. And because it’s messy as Hell, really you want to be outside with that tub of black-staining evil silver nitrate solution. Which means, in the UK, picking the right kind of day for it (ie no rain). And too sunny can be a bad thing too. My first Tate contact print I left for far too long in the sun (with this technique less - exposure - is definitely more).
The Basic Process
Mix up your chemicals as instructed in the article. Soak your cardboard or thick paper in the saline solution and let it dry. Then paint on the silver nitrate solution and let it dry in a dark place (I used the shed). Pop on top your digital negative, cover with glass and expose in the light for the relevant time. You then need to wash the paper and soak in sodium thiosulphate solution for around 5 minutes, to fix the chemicals. Missing this step means a black picture, in time. So the process is actually pretty simple and easy once the prep has been set up.
Things I Still Need to Work Out

Exposure time. Especially on more delicate prints like the one I took at the Tate Modern, less exposure is better and especially in strong sunlight. The prints get darker as well the older they are, so underexposing at first is not a bad idea
Card stock. There is a lot of liquid involved in this process and normal paper isn’t going to work (I did try on some.) For my test prints I used a stack of white card from the Pound Shop, but if you are getting wise to this process it would obviously be better to use higher grade materials
I soaked my card in saline as per the instructions, but actually I found it left a few air bubbles. So next time I will try painting on the saline with a thick paintbrush
I found I got “splots” on my prints - and later found these were acquired in the fix bath. So I need to do some trials to work out how to eliminate these. I’m not sure whether it’s a solution issue, a paper issue or what - but I might try painting on the fixer rather than soaking the card in it.
My prints are very “brown”. I know that’s kind of the point, but they seem browner than others I have seen. So I may also try diluting the silver nitrate solution a little more with some more citric acid solution, or using a smaller paintbrush to apply it more sparingly to the card
I may also try this technique on cheap canvases from the likes of The Works (or indeed the Pound Shop)
So there’s lots to learn about this old technique, as with any new skill, but it’s fun to go back to the beginnings of photography and merge them with the technology that we have now.


Developing Film at Home
I explore developing film at home using black and white chemistry and a Lab Box from Ars-Imago
Coronavirus stops analogue play!
I had managed to get a couple of rolls of medium format film developed by the shop local to where I work but, shortly before lockdown, I went there and they advised against taking more film as they couldn’t be sure it would come back to me any time soon. I figured that being at home might be a good time to learn some new photographic skills and, in any case, developing film at home would save me money and time in the long run. So along came the next project.
Research
I had a vague idea about film development having done a course many years ago before digital photography really took off. So I got a book from Amazon called The Darkroom Handbook, which is a bit old but told me what I needed to know. Following this acquisition I then ordered various chemicals - these are, for some reason, much more available on eBay than on Amazon.
The Chemistry
For black and white photography you basically need four liquids:

Developer (this develops the image on the exposed film)
Stop bath (this stops the developer chemicals from working at the required time)
Fixer (this fixes the developed image and stops light fade)
Wetting agent (this helps to prevent streaks on the dried film - I wonder if you could use dishwasher rinse agent for this purpose if you didn’t want to fork out for wetting agent)
After acquiring these I found out that there are modern solutions that do all of these at once bar the wetting agent bit. But heyho, might as well do it the more complicated way…
I was a bit bewildered by which chemistry to buy, especially for the development part of the process. There are loads of different chemistry types depending on the manufacturer and ASA of the film, the film type etc. After reading the descriptions of the ones available I went for Ilford DDX, which seemed to have the best features overall for the speed of film I generally have (which tends to the higher speed, grainier end).
Hardware
Now obviously with all of these chemicals to play with, I was going to need some other equipment as well.
Three measuring cylinders (or “graduates”) - up to 600ml volume is useful
Clips to hang my drying film from, and to weight it at the other end to stop curling
A thermometer to test the temperature of the chemicals
That’s it.
Oh, apart from the actual apparatus to develop the damn film in.
The Daylight Loading Tank
I haven’t got the wherewithal or the desire to create a darkroom in my house at this stage. We haven’t even finished decorating the house extension so a darkroom feels like a low priority. In addition, despite the analogue beginnings, the majority of my photographic uses are digital and I don’t want to spend money on enlargers and that kind of paraphernalia. What I really wanted was a daylight loading tank so I could develop my film without the need for fiddling in the dark.

Loading medium format film into the Lab Box
You can buy quite cheap daylight loading tanks for 35mm film but I decided to splurge on a piece of equipment that would also do 120mm film. The Bum Chum was duly purchased! Its real name is The Lab Box by Ars-Imago and is a splendidly expensive piece of crowd-funded plastic that allows you to load film of both 35mm and 120mm varieties without them seeing the light of day. You pour and drain the chemicals through the top and it is a very compact unit that doesn’t take a whole heap of space in the cupboard when it’s not being used.
First Attempt
So last night I attempted my first roll of film. I used a roll of exposed Svema 32 film, which is very very expired having seen its best before 1994. The upside to this approach is that it doesn’t really matter if I ruin the film; the downside is that I can’t tell if I have ruined the film or if it has ruined itself by virtue of being old.

The Lab Box people have kindly included QR code video tutorials on their website, which made it relatively easy to follow the initial assembly steps for the box and to load the film. As you can see from the photo above, you feed the backing paper out of the box and pull it, while the film becomes enclosed in a light-proof chamber below. You then attach the film end to a secure clasp attached to a spool, which you wind into the developing chamber.
The chemistry was another matter. What the hell do you do with film that has no reference on the agent instructions and what is the best way to develop knackered old film?
The room temperature was around 22C so I guessed at 12 minutes of developer and 7 of stop bath. You basically just crank the handle to agitate the film in the liquid the whole time and, in true Blue Peter style, I had pre-prepared the liquids in advance in their respective measuring cylinders.
Unfortunately the results were rubbish! Looking at the processed film there was so much residue from delaminated film (if that’s the right term), and I hadn’t used the developer for long enough so the successful images were very faint.
Second and Third Attempts
Buoyed by my efforts in Round One, I set to developing two more films. One was another Svema 32 effort (so I didn’t hold out much hope for this) and another was a new roll of Foma Retropan 320 film.
The moral of this story is read the bloody instructions. These films I had to throw away because I inserted the canister the wrong way up, and when I pulled the backing paper it spooled the film in the wrong direction meaning that I had to open the box to extract it. Not once - but twice!!
Fourth and Fifth Attempts
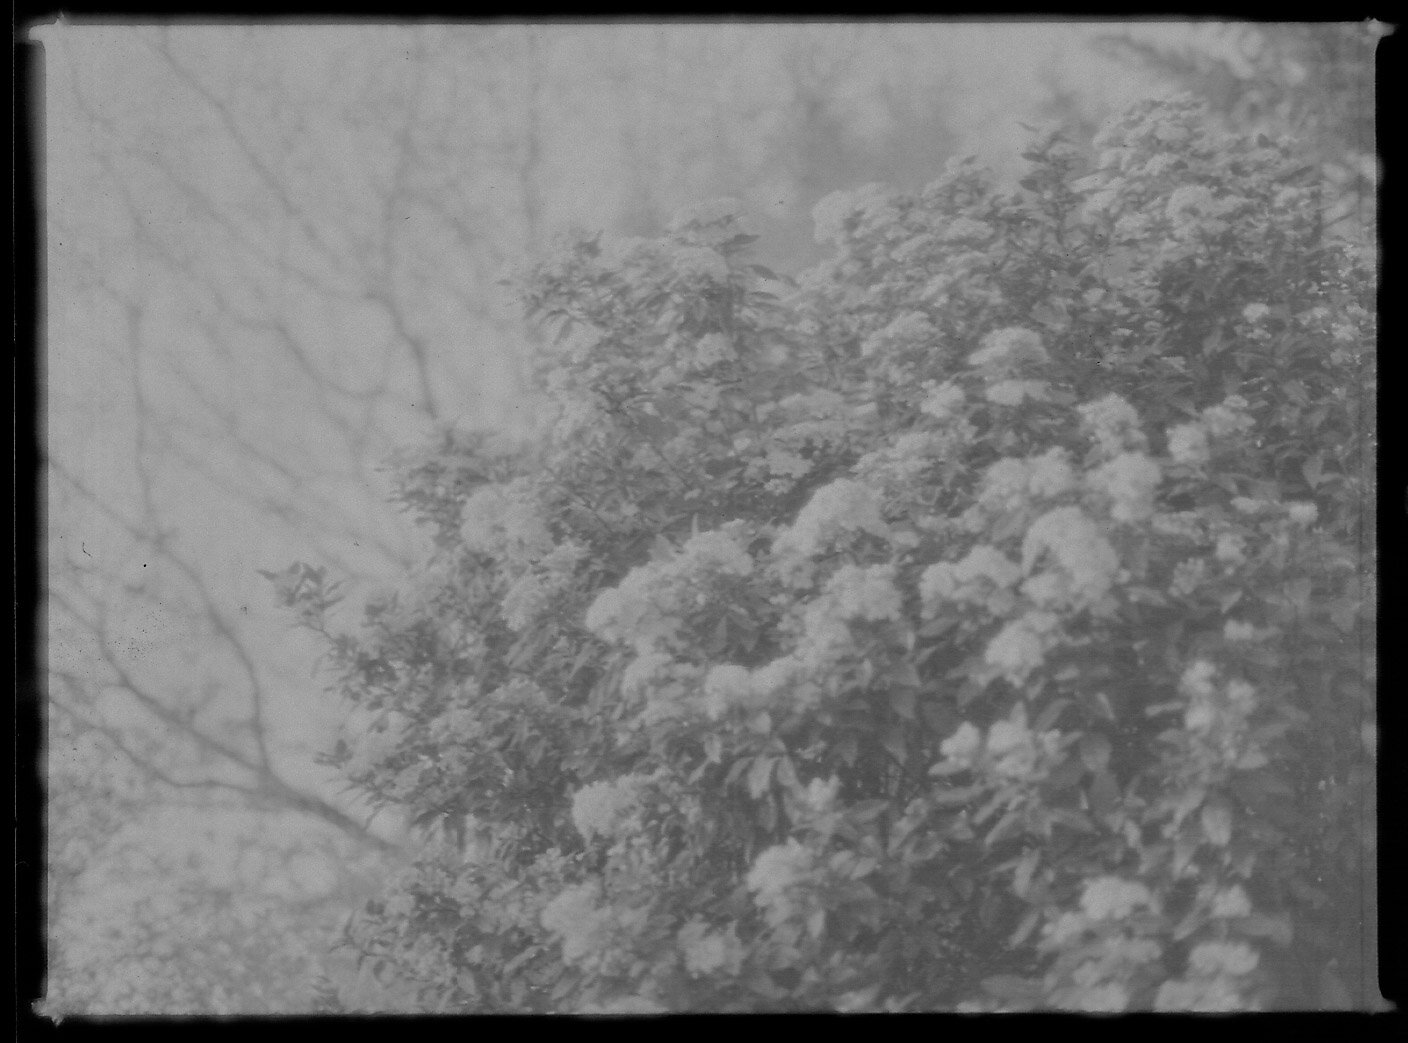
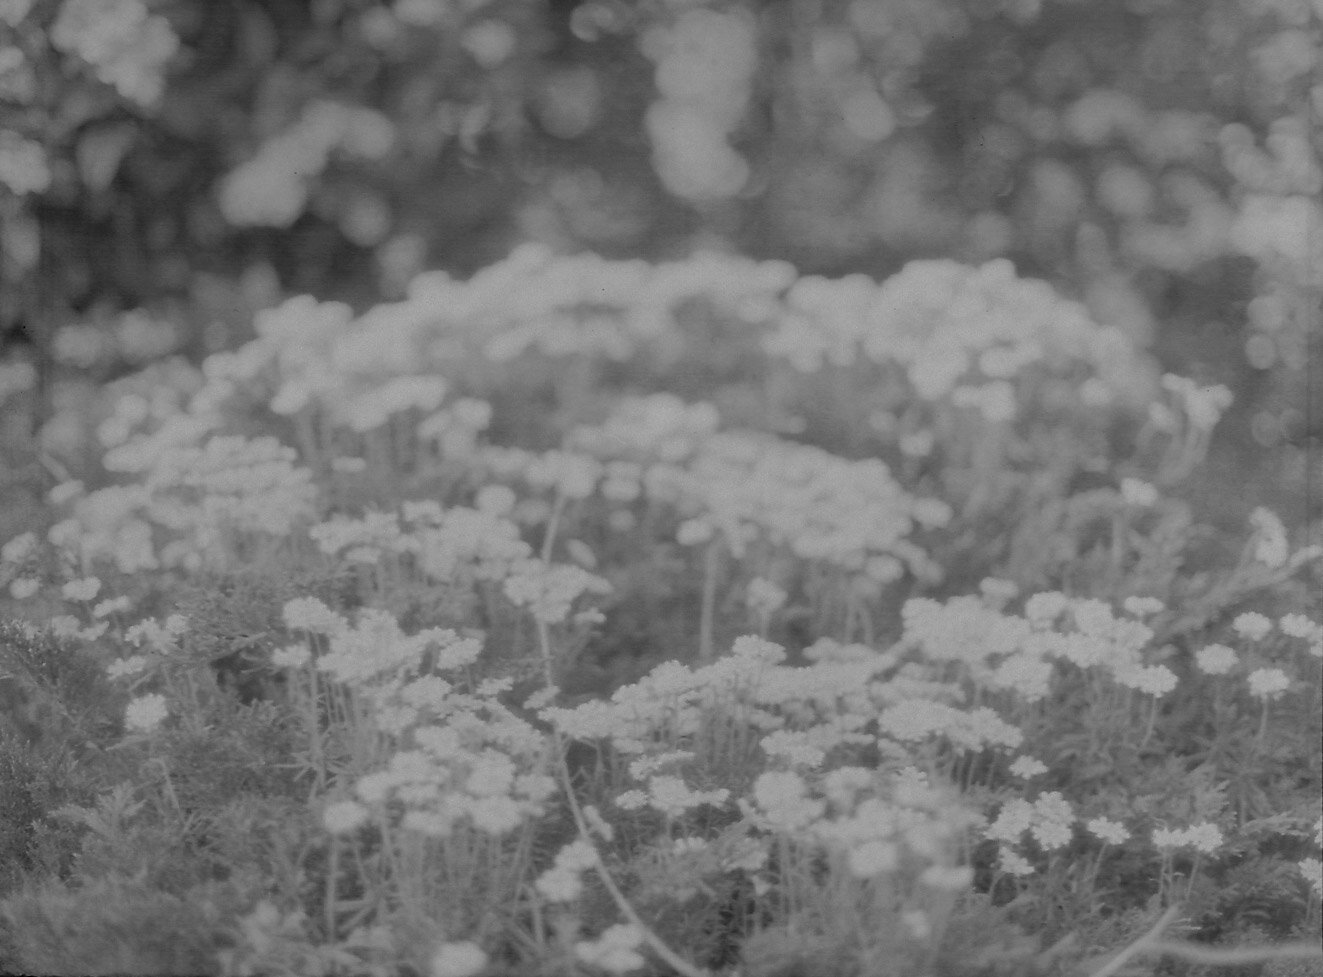
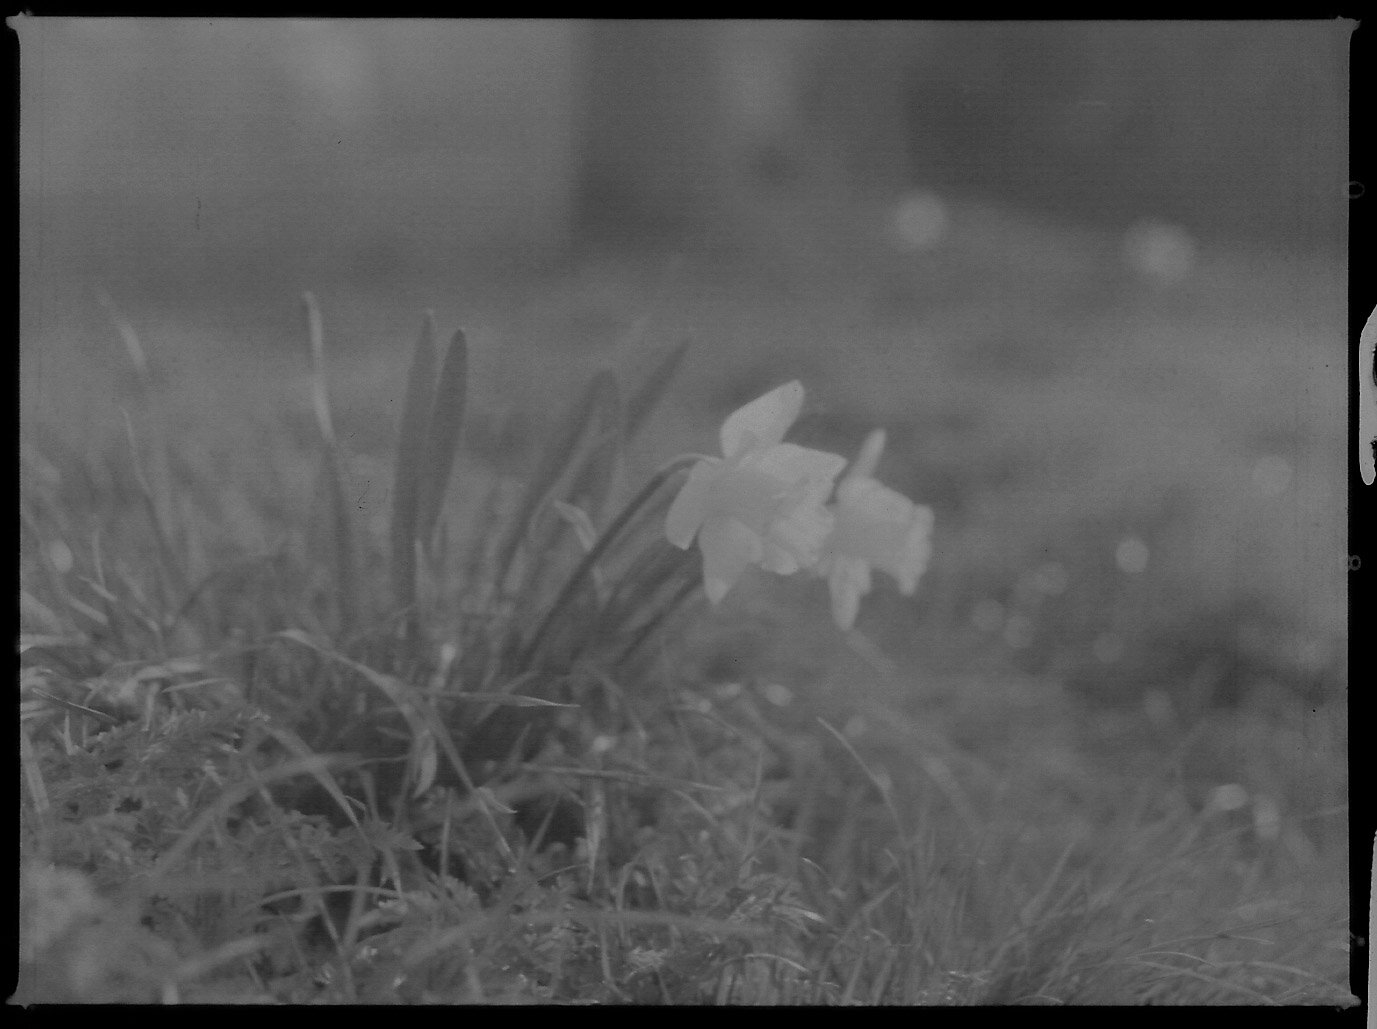
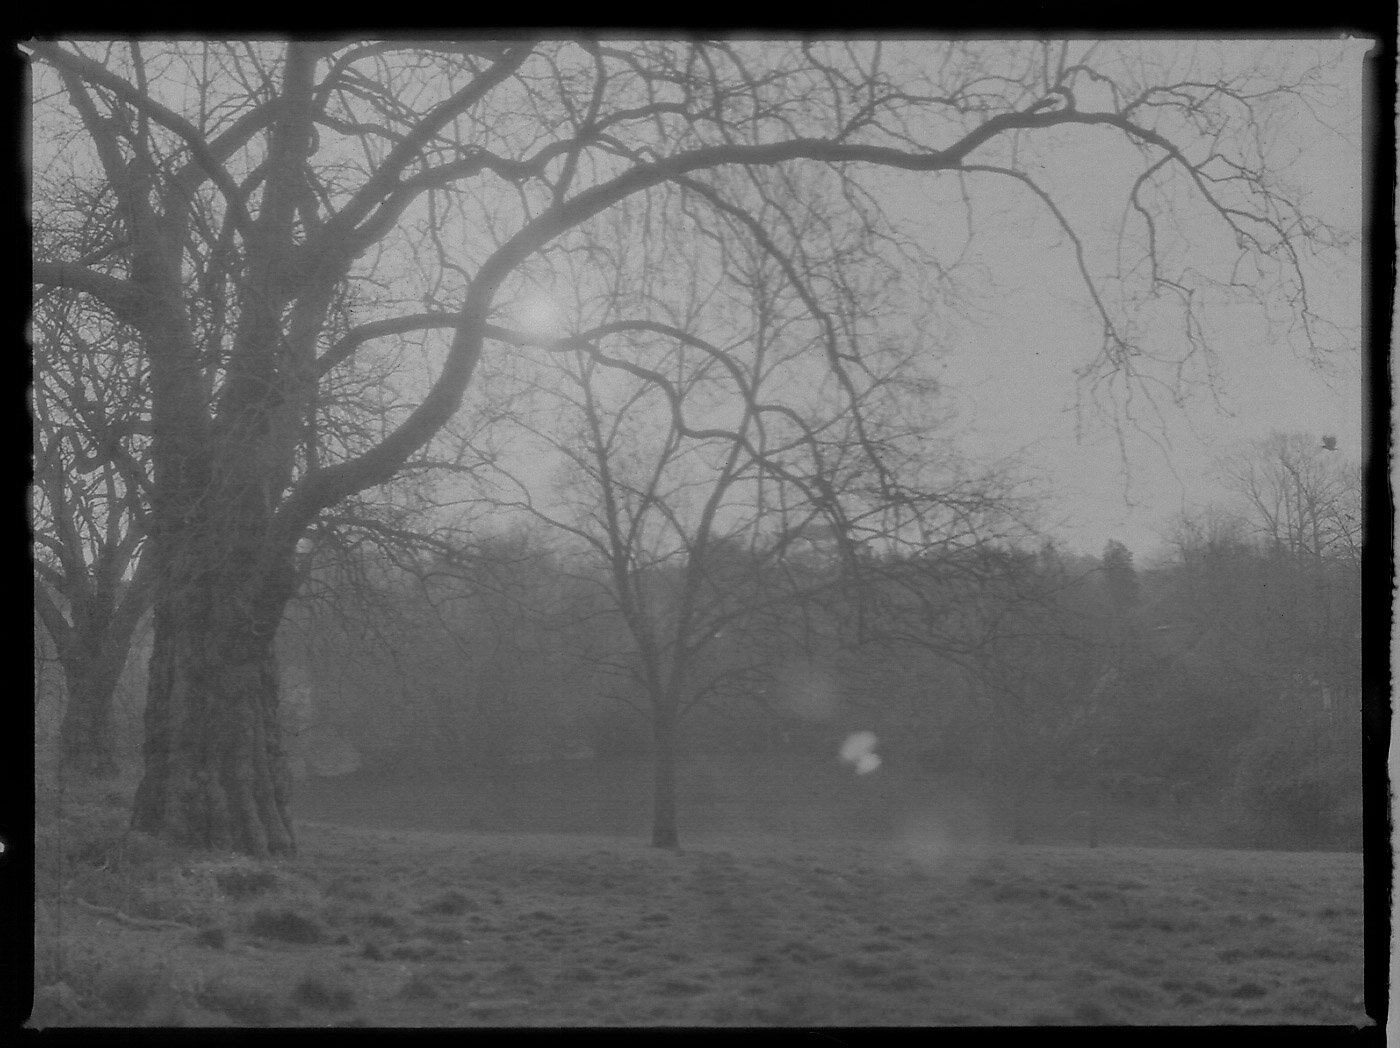
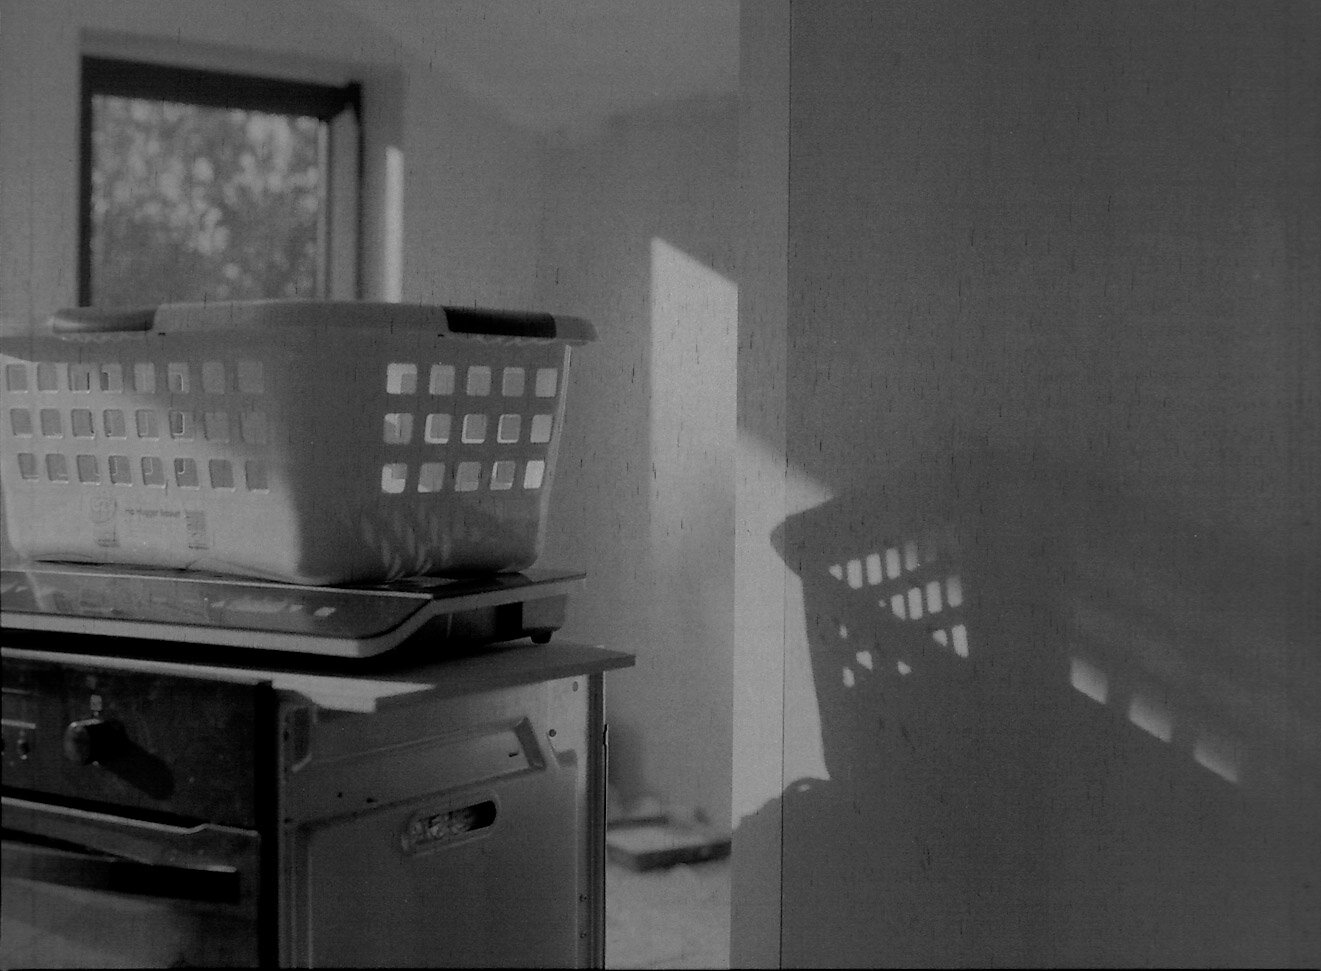
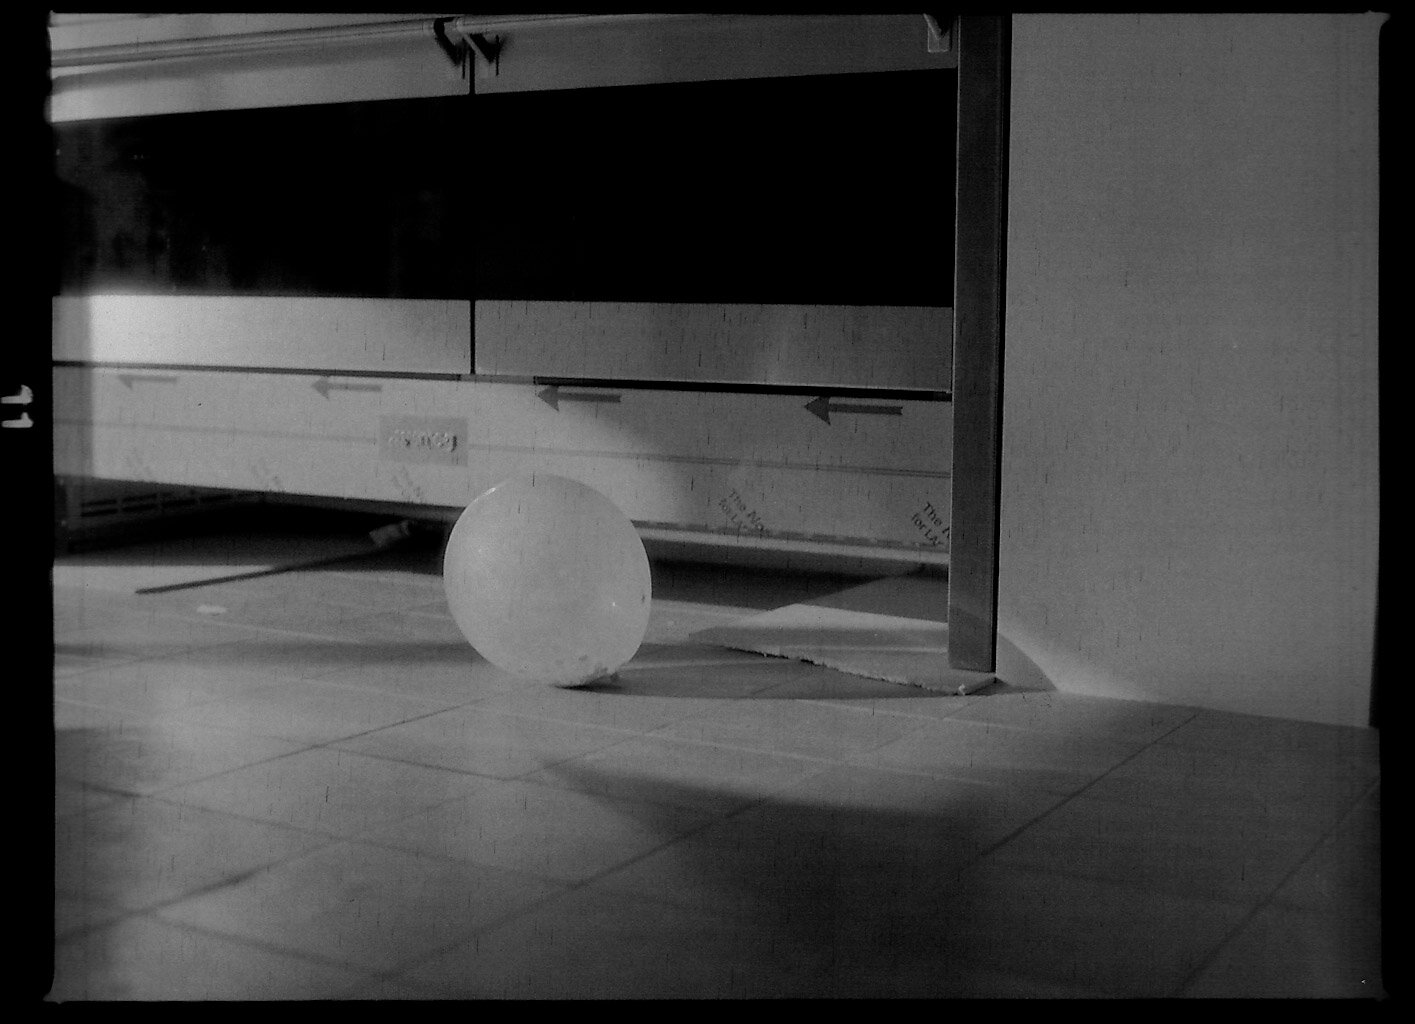
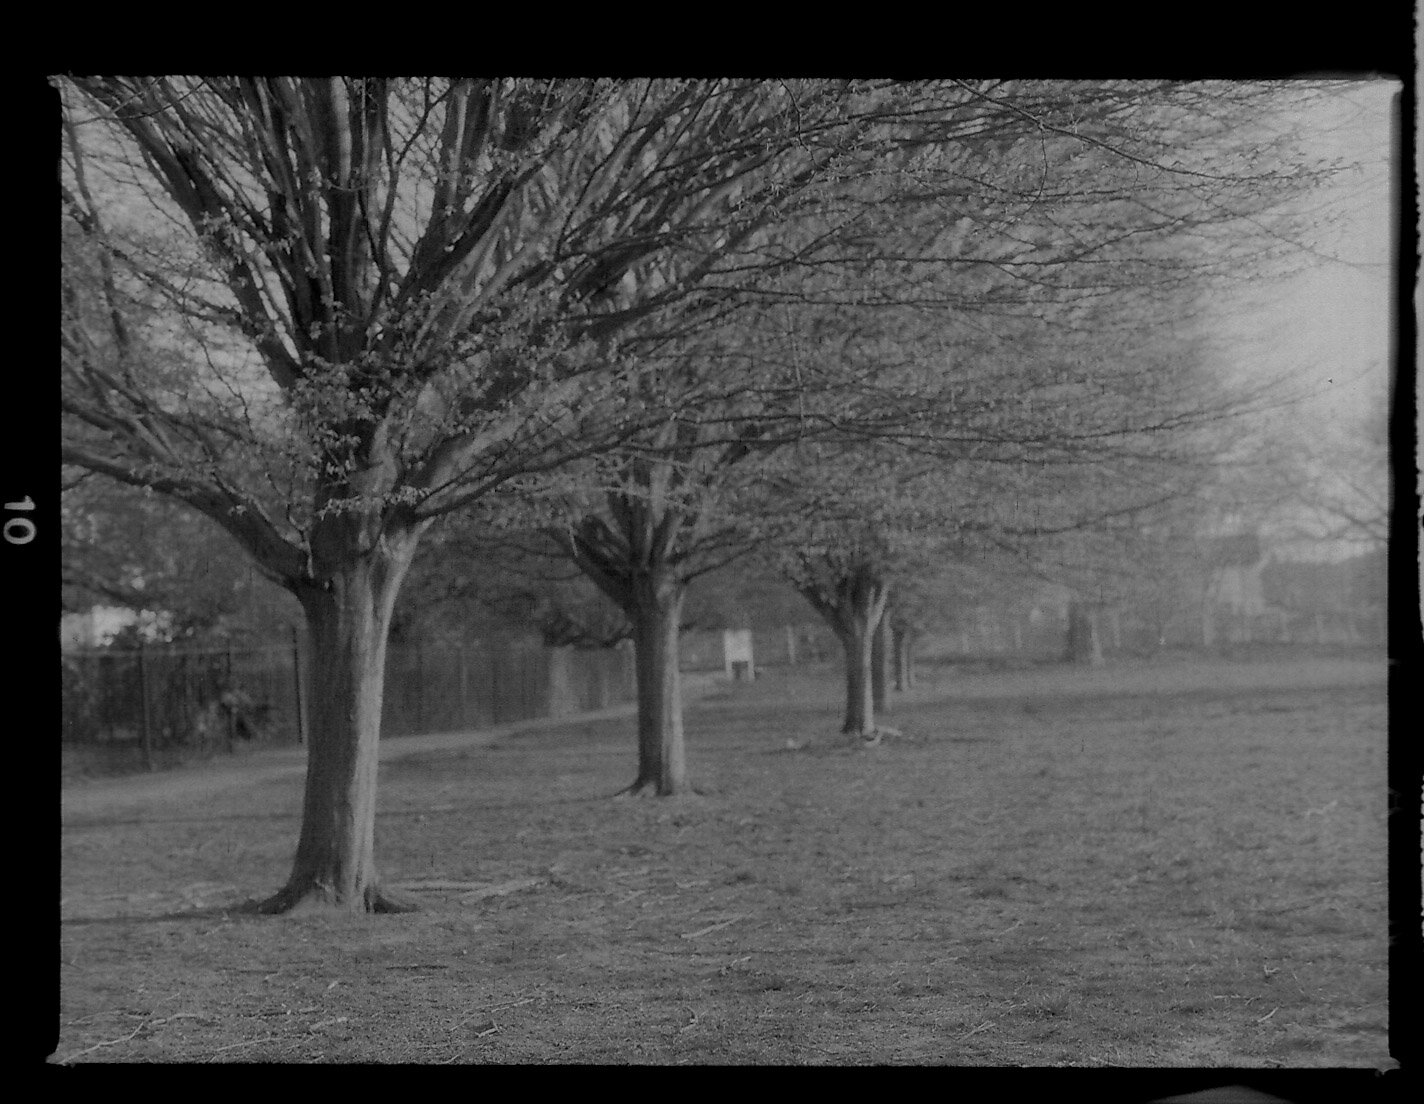
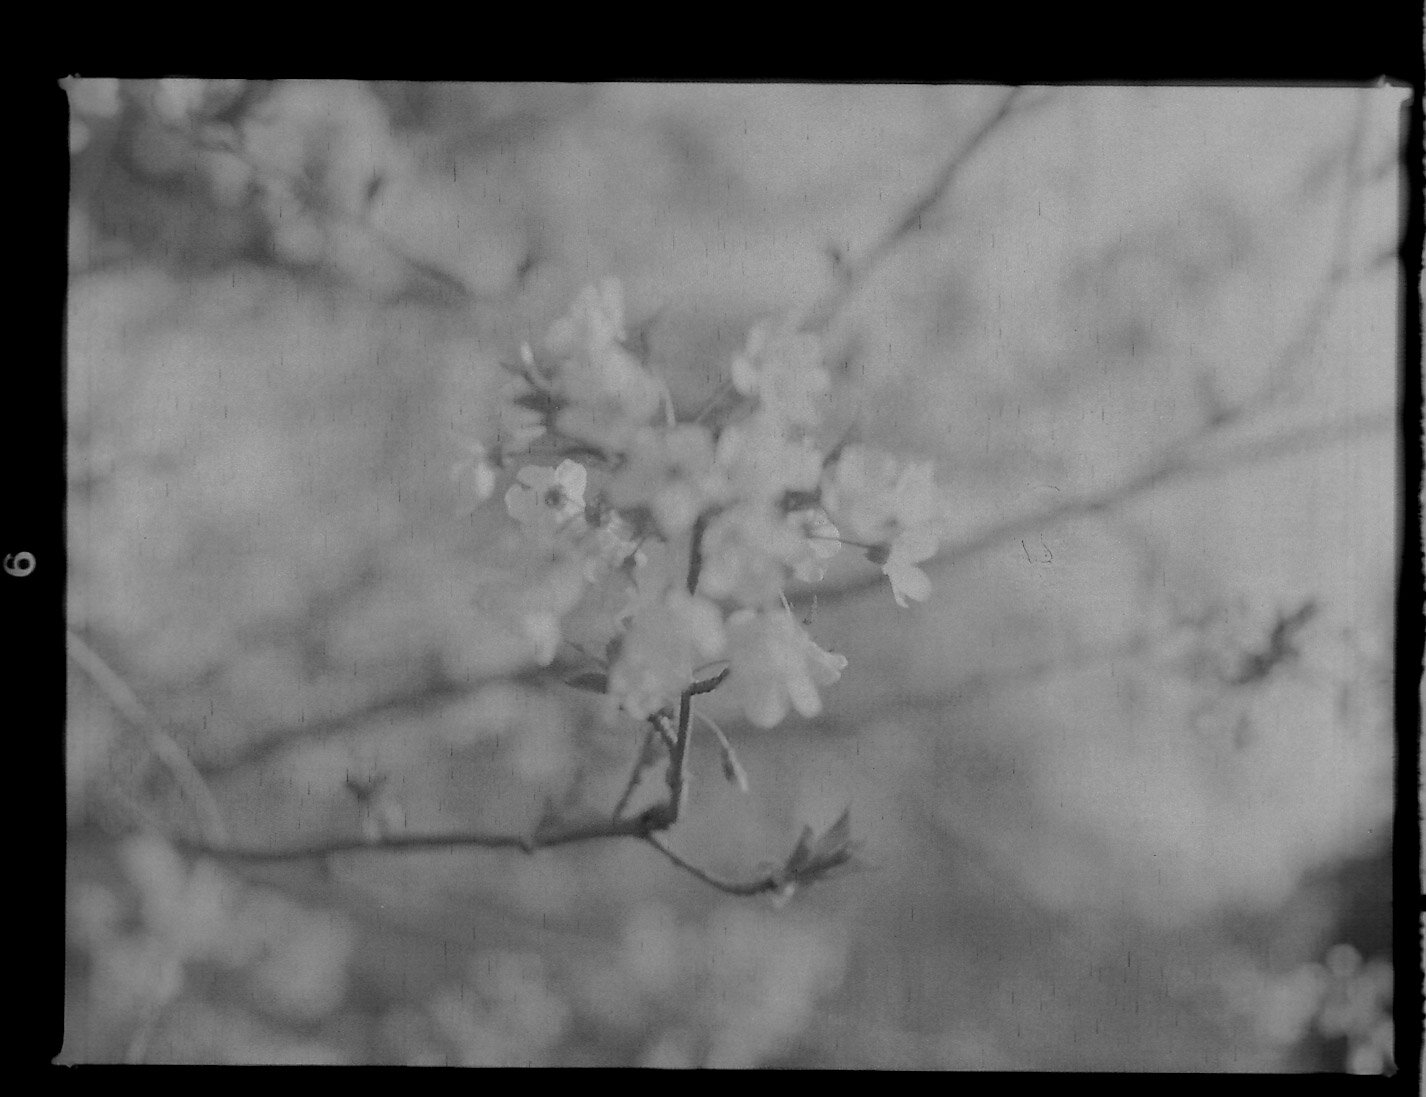
I took my daily allowed walk in the local park at 7am, duly avoiding neighbours and other interested parties, shooting a couple of rolls of film as I went. Again, to make trials consultant I used Foma Retropan 320.
Following the same instructions as the night before I developed these films and was pleased to see that they came out. I extended the development time a bit for each film successively, as the effectiveness of the developing agent wears off a bit each time.
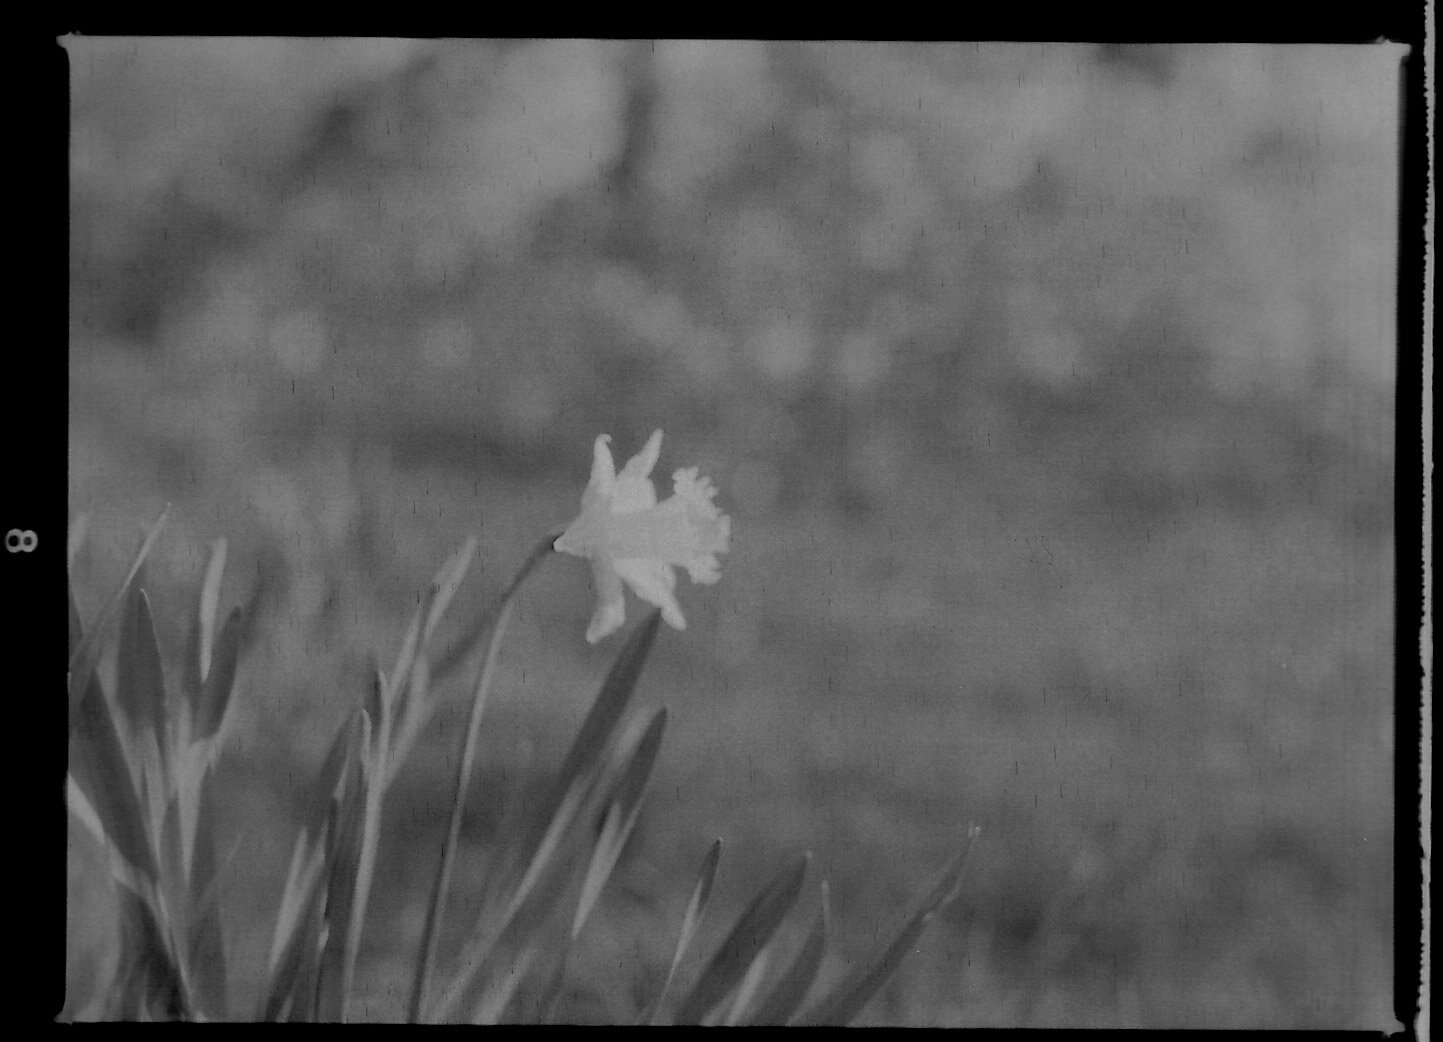
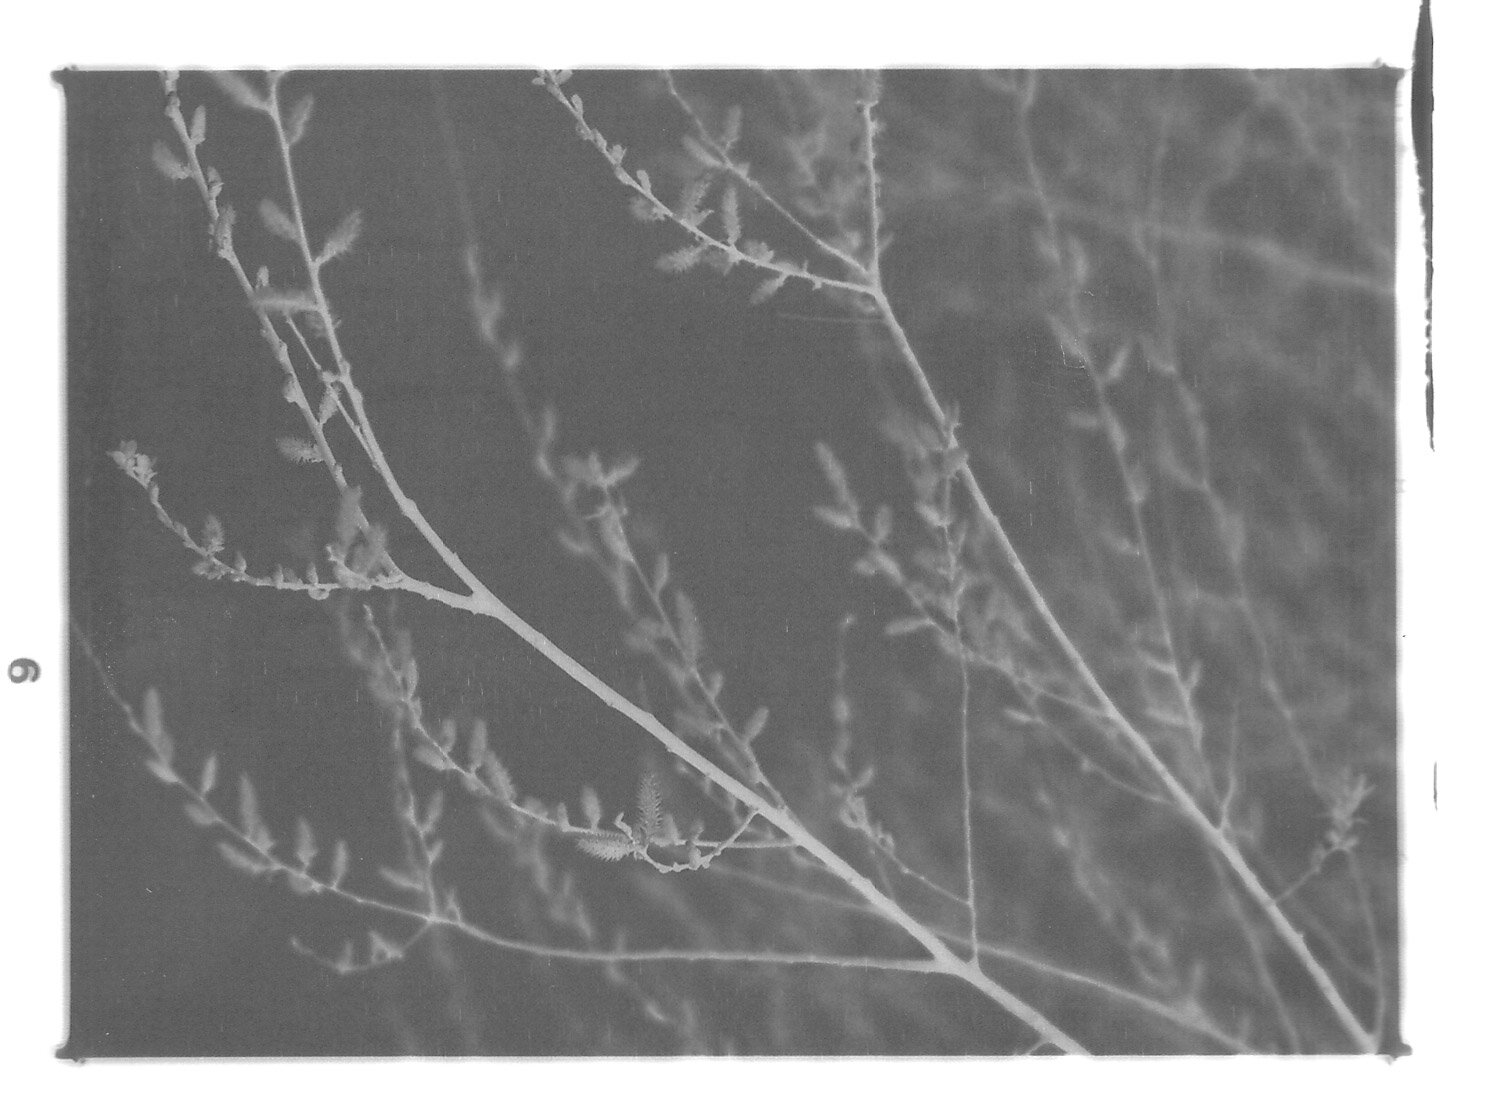
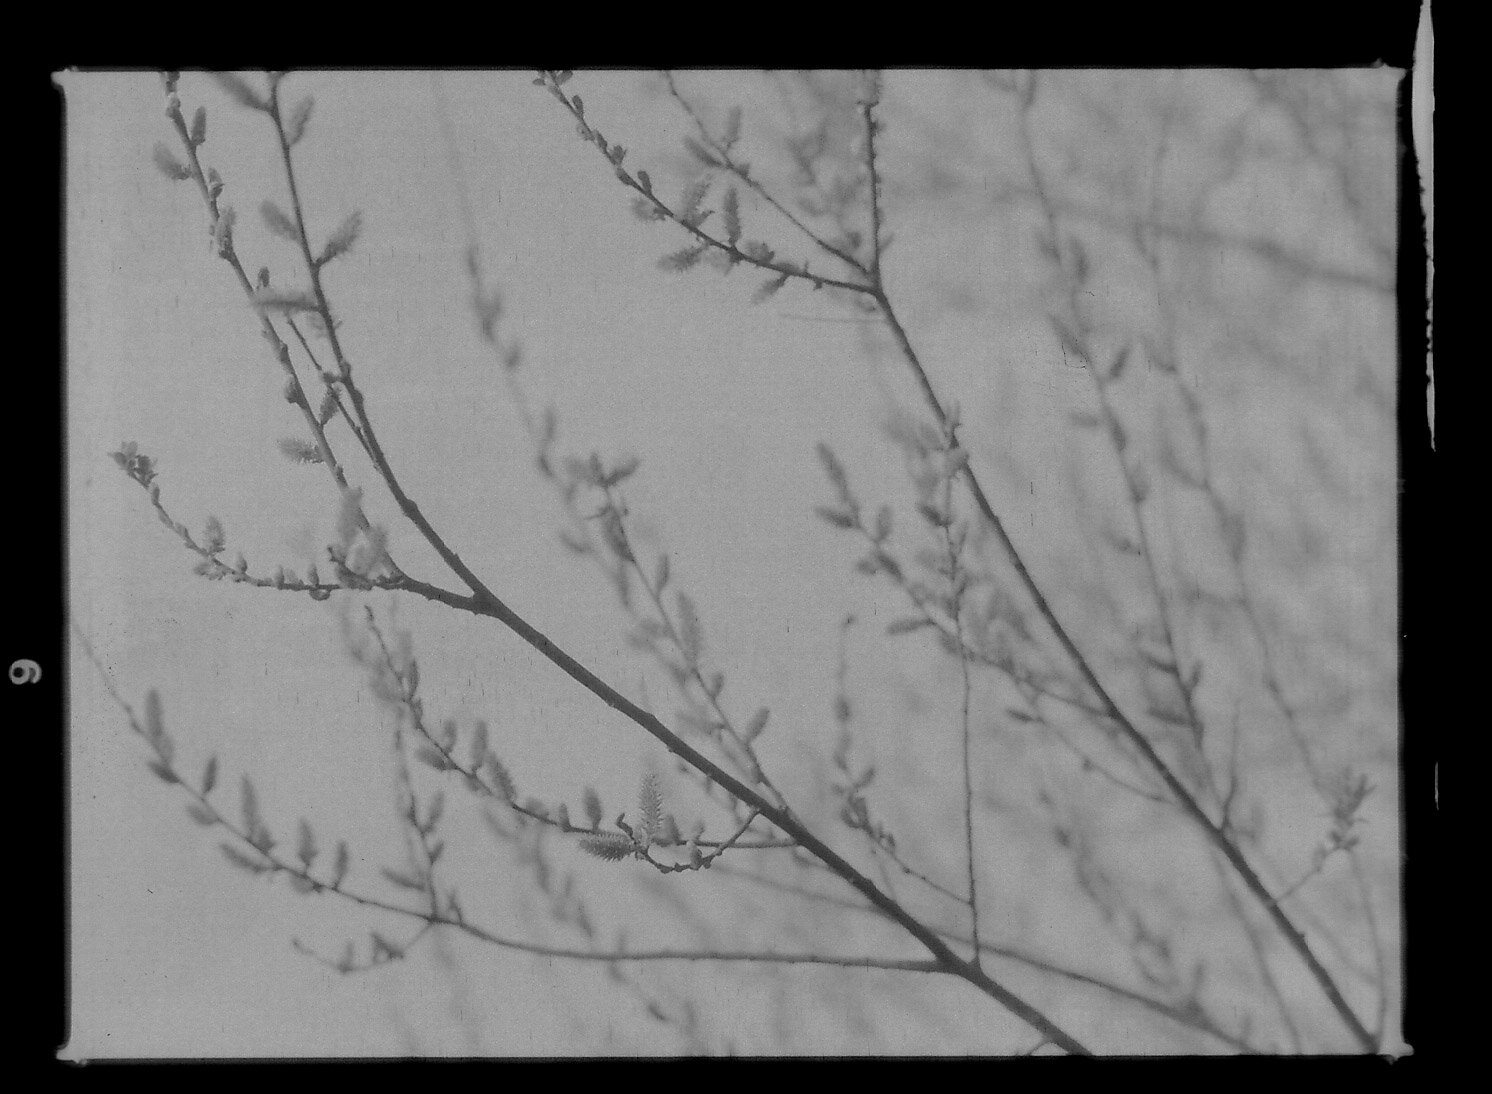
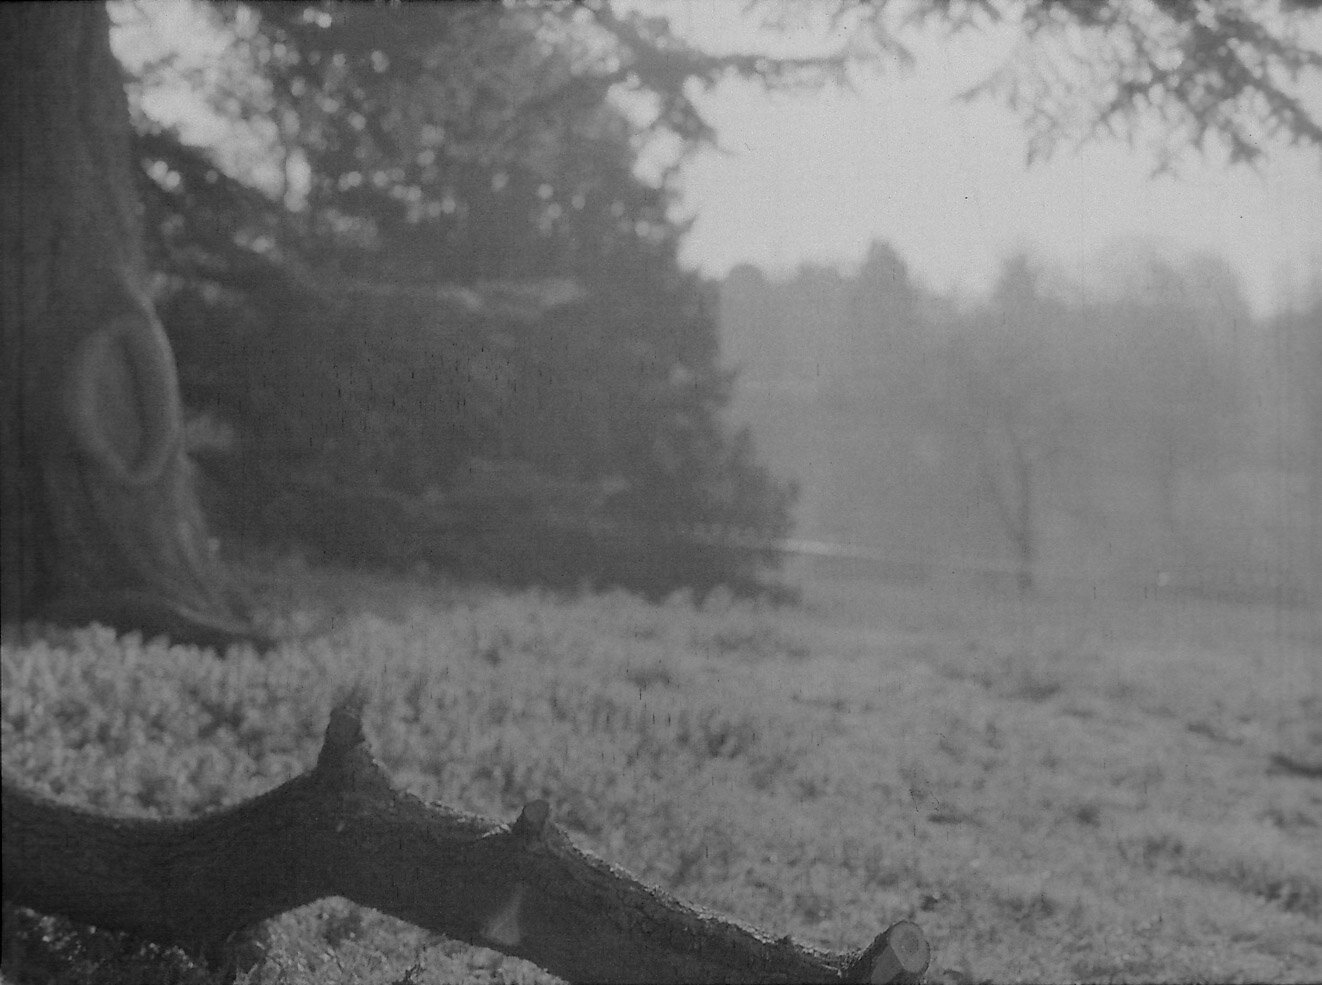
The Results
See the results below. They are my first attempts and I am quite pleased with them.
I need to play more with contrast and increase the development time I think (or maybe just lessen the in-camera exposure), and obviously I’ll play with different film types. I’ve also seen a tutorial on developing with coffee and baking soda, which will make a fun alternative process which also reduces the environmental impact of the chemicals being used. I’d also like to use the techniques with portraiture rather than with random pictures taken in Streatham.
What strikes me the most, though, is that despite the initial outlay on materials, this is a much quicker and cheaper process than going to the shop. It took me about 50 minutes to develop the film (and then a further hour or so scanning the negatives as tiffs and inverting them in Affinity). There’s no question that film photography is a much more expensive hobby than digital but with techniques like this at least the costs can be brought down.
Thanks coronavirus. I owe you one. You don’t have many advantages but you have given me a new angle to my hobby.

Frustrations with Medium Format...
Following the purchase of an old Mamiya 645 medium format camera, I explore the difficulties of scanning negatives from a less common film format and find a way forward.
Last week I rather gaily and optimistically wrote about initial attempts with the medium format Mamiya 645 camera. This week it is a bit of a different story, though now I have figured out a way forward I’m definitely a bit less sweary and generally back on track :)
You might remember that I exposed a couple of rolls of film in the ‘new’ camera, a lomo film that I thought might have had problems loading and an ancient roll of expired black and white Svema film, all the way from Russia via eBay. Well I was right about the lomo film and none of those came out. The Russian film I picked up from the photo place outside the station yesterday. They told me I’d have to scan them myself, but I assumed they meant the actual photos to digitise them rather than the negatives.
They meant the negatives.
How Not to Scan a 120 Negative
It turns out that it’s not that easy to scan a 120 negative. Probably why the photo place didn’t in the first place.
So when I got home I looked for easy ways to scan them - and there are some little scanning machines if you want to pay upwards of a couple of hundred quid. You can get negative scanners much cheaper than that, as long as you want to scan 35mm, 110mm or Super8. But for 120mm you’re out of luck. And I might get a surprise divorce if I go for one of the 120 scanners.

So I scanned the negatives this morning on our printer at home, and they would only scan to the PC as a PDF. Grrr I thought. I persuaded my husband to go into the loft to get the old printer / scanner down, which has a slide hood. But the negatives kept curling up due to their fragile, expired state. And when I scanned them it would only let me print on to paper, rather than communicating to the laptop. Upon more investigation, the printer drivers are no longer available for this printer model online - either for Mac or Windows.
By this time it wasn’t just the negatives that were negative. There are photographers who are very patient and wait for the perfect shot, and there are those who “spray and pray”: let’s just say that I’m one of the latter. How difficult could it be to see the shots I had taken?
How to Scan a 120 Negative
First of all I downloaded a free app from the App Store called Screen light, and set it to the maximum whiteness / brightness on my iPhone 6+ (fortunately it was the bigger kind of iPhone and was big enough to cover the negative)
I then downloaded Windows Scan on to the computer and set the scan type to TIFF
Putting the negatives on the platten glass, I covered them with my phone face-down so they had bright back light
These were then scanned as TIFFs
I imported these into Affinity Photo (cheap alternative to Adobe Photoshop), and cropped each image
Using Select All on the Select menu, I then went to the Layer Menu and selected Invert
Saving these out I then imported them into Lightroom so I could save them (I like to use this as a bit of a DAM as well), and straightened them out a little bit - before exporting as jpgs to upload here.


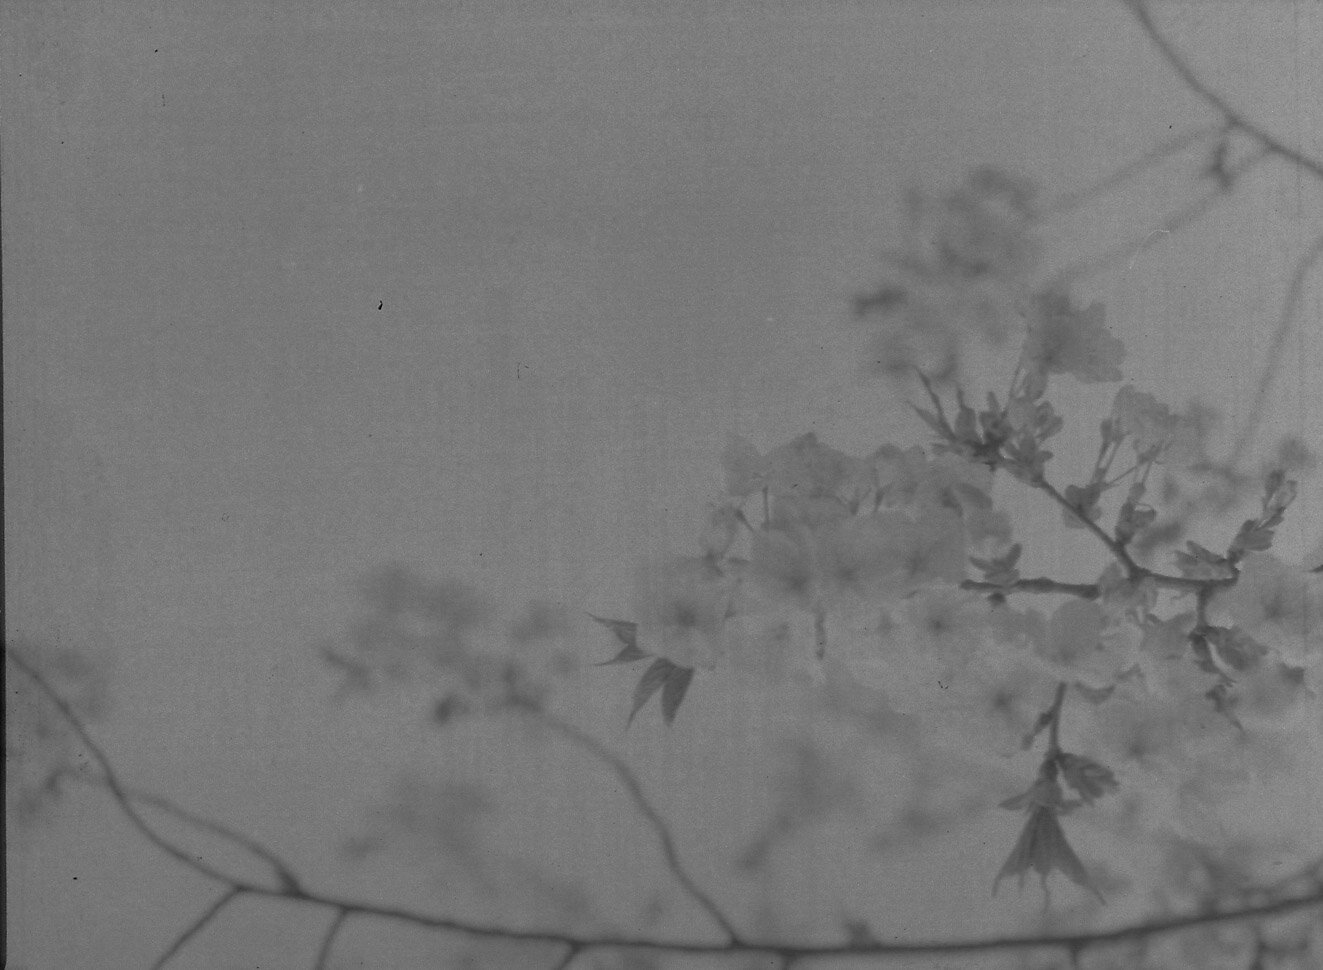
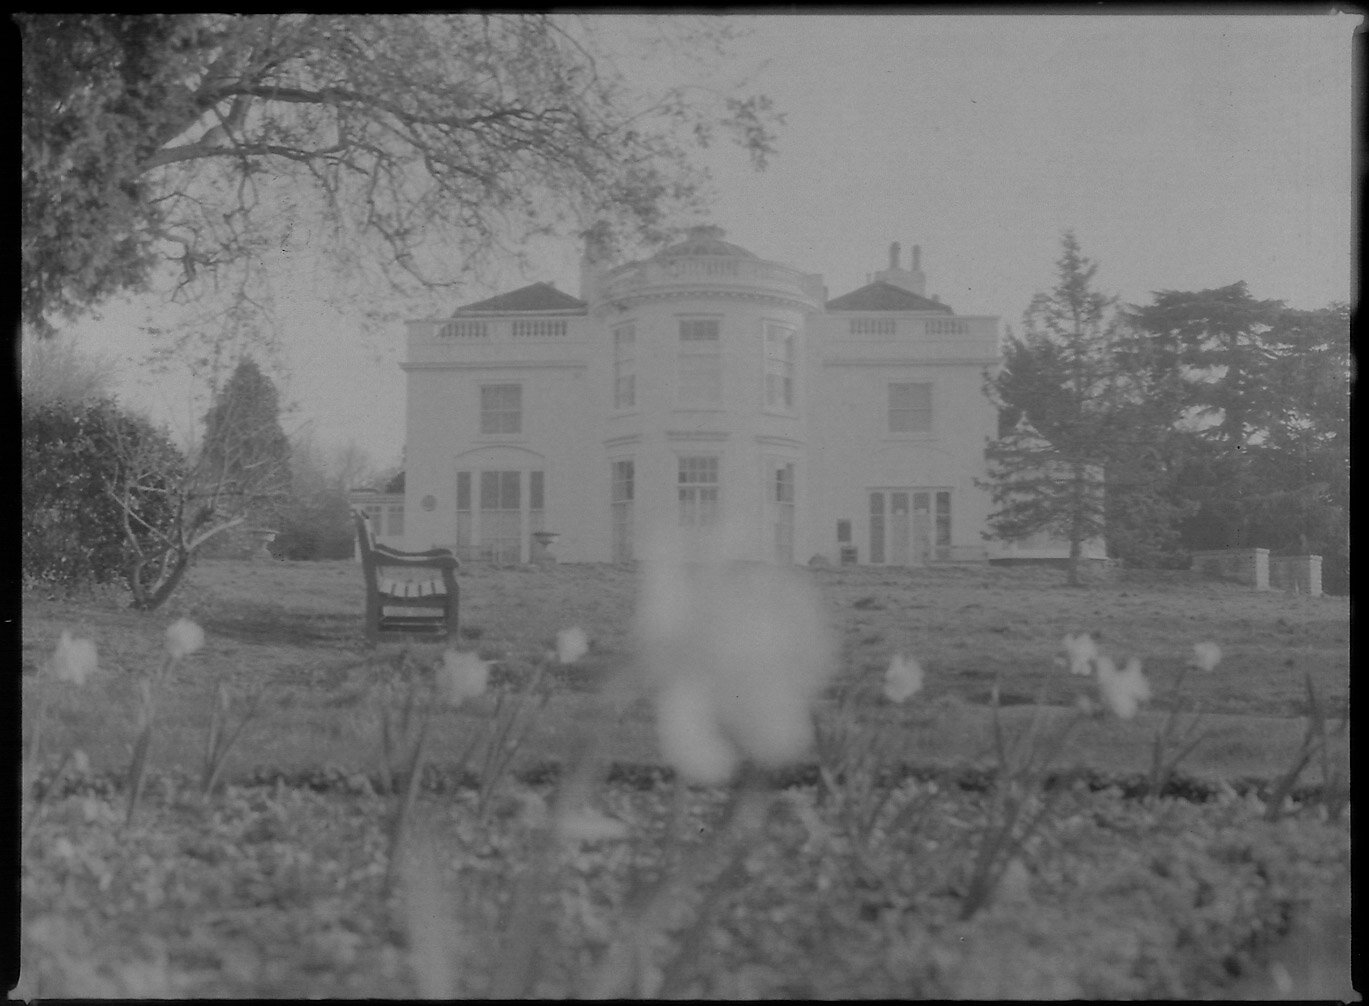
The Results
Well, it’s very clear that the Svema film is very expired, with lots of fogging and grain. I don’t dislike it though. It’s also fun to play with the negative view as well as the positive: I’ve put some of both in the carousel above. It’s also clear though that the camera itself is OK - the outlines and focus are sharp enough to see that.
So now it’s back to the drawing board and another little weekend project with the Mamiya. I’m currently working an expired Fujichrome Velvia film, and will shoot an unexpired one too by way of comparison. And now I have found an economic way forward with the scanning, hopefully this will save both money and sanity. Happy Saturday :)

Frolics with Medium Format
My first impressions of playing with a secondhand Mamiya 645 medium format camera.
I told myself that I deserved it, that I’d been working hard and not indulging my other, travel, passion half as much as I did last year. I told myself that it was time to start exploring the world of film again in a more serious capacity. I told myself that it would help me with my forays into documentary photography.
And that was how I ended up buying a medium format film camera on eBay. It had to be film: partly because I prefer the effect of film for this type of work, and partly because digital medium format cameras are so expensive it’s literally eye-watering.
I started my research on eBay as usual, and bookmarked a number of cameras that looked good and in my price range. I then started to do some basic research on which ones had the best reviews. I try not to get too invested in this stage, as there’s so much personal opinion around - and by the time a camera is second or third-hand its journey could be very different to another. I eventually bid on a Mamiya 645 with an as-fast-as-I-could-find f/1.9 lens. One of the bad things about moving to the Fuji X system is a lack of full-frame bokeh beauty, compared to the Canon I was using before.

First Impressions
For a “compact’ medium format camera, this thing is a beast. It is literally built like a brick. This is really not a street photography camera, and nor would you want it to be from an economic point of view. With 12-16 shots per roll of film, you would be spending more money than on bricks and also spending more time changing the roll than actually taking pictures
The shutter is a serious action on this camera. It’s pretty satisfying, hearing it go, and it starts to give context to why this model is actually so heavy. Anything lighter and it would be camera shake a-go-go
The set-up is a whole new world for the digital photographer. I downloaded a manual from the very useful Butkus camera manual website, and immediately asked my husband to read it and work out how to load the top viewer and film :)
The viewfinder is a very different “kettle of fish” to a digital camera’s set-up, with a large part of the viewfinder frosted with a circle of ‘clarity’ in the centre. This seems quite dirty on the unit I have acquired, and I’m not convinced that the mirror plate is as clean as it could be. So I have resolved to rattle off a few rolls of film and get an understanding of the general state of affairs before doing more research to find a camera service shop in central London.
I actually love the relatively low number of shots to a film. You can easily bosh off a roll in a weekend or couple of hours, giving you a mini-project right there and then. With 24 or 36 exposures on a 35mm film, sometimes the roll is there for weeks while you find the opportunity to finish it off with something worthwhile.
There are so many creative options for 120 film. I have indulged and ordered various types at Analogue Wonderland - and can’t wait to compare and contrast the results.
It’s difficult to tell right now whether issues I’m seeing are my fault or the camera’s. When loading a new film you have to take the film insert right out of the camera back, and this action resets the film counter to 0. On loading a lomo film earlier today, something didn’t happen quite right and the film advanced only 5 or 6 frames before the shutter decided not to fire. I think this was because the counter had not reset to 0. But whether this was a defect of the camera (I’d definitely removed the film insert) or time-honoured user error, at this stage I can’t say. Equally the first film I unloaded didn’t seem to be fully advanced around the spool; I think I followed the instructions but maybe the film caught slightly due to being extremely expired old film from eBay. As a scientific experiment this one definitely has a few too many variables to consider.
Overall though I am loving the new toy. It has so many possibilities, including the ability to multiexpose a frame, and I really cannot wait to see the results of the photographic experiments. I’ll post them here as I get them.


The Rare World of the 127 Film
I develop 127 film from the Yashica 44 medium format camera bought from eBay last summer, and look at the results of this almost lost but entirely-new-to-me film format
If you cast your eyes back to July last year, I wrote a post about the old Yashica 44 medium format camera that I picked up off eBay. I didn’t mean to buy a camera that only took 127 film; it was a novice’s mistake borne out of ignorance and possibly inattention to detail.
It turns out that very few places sell 127 format film these days. Analogue Wonderland do, as do Nik & Trick - and I have managed to acquire a few expired rolls of Ilford from eBay. It’s expensive too, at between £12 and £15 a roll of 12 exposures, and then the processing (more on that later). The negatives are 4cm by 4cm.
The biggest hurdle I have faced with the camera though is me. Inexplicably I developed a bit of a mental block around the camera. After exposing the film in July something was stopping me from removing the film from the camera. It wasn’t logical. Maybe I feared my ability to do so without creating terrible light leaks over the film. Maybe I just thought the results would be terrible. Certainly the search for a place to actually process the film was daunting in itself. But eventually last weekend, after six months of thinking about it, I got the film out of the camera and set about trying to find somewhere to process it.
After a very long hunt around, I found Forest Photographic in Walhamstow. They process at very reasonable prices (compared to everywhere else I found) 127 film, and the turnaround time was good in a couple of days.
So, the results. I think it’s fair to say that my dreams of becoming the next Vivian Maier have been cruelly dashed. BUT, there is something about these pictures that I really like.
I love the quality and timbre of the film itself (Rerapan 400) - its graininess is gorgeous. Medium format is also a lovely compositional frame.
I shot the film almost blind in the sense that the camera settings were quite alien to me. From the shots below the shutter speed must not have been quite on-point (or the camera is just old and not firing on all cylinders). But actually I really like this effect; digital photography has made sharpness a new art form and playing with lack of focus is pleasing.
Another aspect that I am excited to play with is double exposure. The double exposure of me in the mirror was an accident, of not cranking the film on enough - but this gives me so many creative possibilities that it’s quite inspiring.
There’s definitely work to be done on my side in using the camera better (framing, overall composition, understanding of how the bloody thing works), but gaining the momentum to get the film developed has inspired me to keep pushing and to explore new photographic boundaries.


Photographic Objectivity in Documentary Photography
Combining the last weeks of documentary photography study with field practice, shooting in a retirement home, I consider what it means to be truly objective as a photographer - and whether it’s possible at all.
Over the few weeks that I’ve been attending this course at City Lit, we’ve touched upon the subject of objectivity a number of times, and especially as it relates to photography.
What Does This Mean?
As with all subjects that get mired with academia, there are numerous definitions of what objectivity means in photography. When I looked up the subject on the Internet, I found a good article by a guy called Steve Middlehurst. He says,

“In Photography (1) Stephen Bull offers a definition of objectivity and subjectivity. He says that photographic objectivity is when the object, or subject matter, in front of the camera produces the photograph whereas photographic subjectivity is when the photographer, the subject behind the camera, has produced the photograph.”
In my field, ecommerce, there is an old but oft-quoted textbook by a guy called Steve Krug, called Don’t Make Me Think. The point is that, in Internet design, if a customer has to think about how they do something online, it’s just not simple enough. And that’s how I feel about that quotation. While I may be missing the point, even thinking about that quotation leaves me a bit confused. How would I tell if a photographer or an object has produced the photograph?
So, as I see it now, this is my Simpleton’s Guide to Photographic Objectivity.
Has the photographer taken the shot candidly, or with the knowledge of the subject (if the subject is alive)?
Has the photographer altered the composition in any way? For example, have they asked the subject to pose in a particular way? Have objects in the room been moved? Is the entire scene staged?
Has the photographer altered the photograph with post-processing (be this digital or with more old-fashioned dodging and burning techniques)?
When was the photographer shooting? What equipment were they using? What were or are the constraints around this? For example, in the early days of the photograph exposures were long and those candid moments were harder to capture
Has the photographer captured a one-off shot, or have the images been gathered over a period of time?
Has the photographer been paid by a particular organisation to portray a particular point of view? Have they embarked to illustrate a point or idea, or have they concluded the photographic essay with what they found along the way?
What is the photographer’s motivation (if not paid)? Here we looked at the work of Lewis Hine, a campaigner against child labour in the United States. While the motivation may be intrinsically benevolent, it is still introducing - nay forcing - bias into the photographic process and into the minds of the viewer. In effect, it’s propaganda
Has the photographer’s work been censored in any way? Typically we think of censorship as part of repression or wartime - you could argue it’s also part of the editorial process, of curation. A friend of mine took a selection of pictures for a documentary project, and the participants selected the shots. This is a beautiful community action, one that I really like, but did the participants “hold a mirror up to nature” - or select the shots that they believed most flattering?

Finally, a topic we haven’t touched on in class, and that is the photographer’s relationship to the subject. Taking some shots in a retirement home at the weekend, where my aunt is resident, I didn’t expect to be so overcome with my own emotion.
Should a photographer shoot subjects that are “close to home” or do they give away their objectivity in doing so? Is it ethically right to photograph people we know really well? Or is the photographic bias blown away from the outset?
Furthermore, it’s clear that the process of visually documenting aspects of life can be truly shocking. Some of the most remarkable documentary photos pivot on this - for example, the war photography of Don McCullinn. While you can hardly equate going in an old person’s home with entering a war zone, the experience did make me think about the kind of documentary projects I want to shoot. Feeling emotion is a powerful tool to creating emotion in others - but how much is too much for the photographers themselves? And how do you know when you’re about to cross that invisible line?

Steps in Documentary Photography
To extend travel and street photography practice, I’ve enrolled on documentary photography courses to find out more and dive deeper into this fascinating branch of photography. I start with a study of the elderly.
2020 is the year for documentary photography to begin for me. This feels like a good next step.
Why?
Street photography has taught me a lot: it’s sharpened composition skills; it’s taught me to see and react quickly to what’s happening around me. But it will never be my first love. As one of my favourite Instagrammers, @fluffystreetcloud recently said, I like to treat people on the street with the same level of respect that I would like to be paid when going about my daily life. I have never quite reconciled myself with the business of “stealing” candid shots, however much I intellectualise it.
Travel photography has long been “my thing”, borne of a desire to see the world and capture those wonderful moments you experience along the way. They are often beautiful, evocative images - but on a fleeting visit to a place, you can only scratch the surface. It’s a superficial view on a much more permanent world.
Documentary photography makes sense, then, as an opportunity to dig deeper and explore subjects and themes. And for someone who has always been heavily influenced by social history this is even more appealing.
So What Am I Doing About It?
Getting into documentary feels quite hard. What subjects should I cover? What makes a good story? How do I make contact with the right people? How do I sequence the images to make them compelling? What do I actually want the finished product to be and who do I want to see it?
To teach me and to kick-start me into action I’ve done a couple of things.
1) Joined Photo Fusion in Brixton. Recommended by a friend, Photo Fusion do a monthly Saturday photo club where members present some of the projects they’ve been working on and others give feedback. As well as this they run a lot of other photo-related services such as processing, courses on alternative film processes such as salt printing and have a lovely members’ gallery. For £60 a year membership, this is one of the best bargains around.
2) Signed up to a documentary photography course at City Lit. So far this is really interesting, and we need to create a project that we will develop over the course of the coming weeks.
Ideas
There are so many ideas and not enough time. I really like the idea of exploring identity, and how it is shaped. I like the idea of circus and performance (though access may be tricky). In this day and age of immigration rhetoric I like the idea of exploring that we are all migrants in some way, shape or form.

But the idea I want to develop is around the elderly. How they live here in the UK, the services that are available and the isolation that our First World lives bring. Shooting overseas when I travel is also a great way of adding to this work, and documenting how the elderly live elsewhere - the work shot in Romania in November is a good pre-cursor to this.
Assignment
For this week’s documentary homework we have been asked to shoot in a location that we usually wouldn’t, and to produce a more symbolic image as part of this.
It felt like the right thing to do to shoot on film and, to add to the nostalgia (and avoid delays in film processing), it was time to whip out the newly acquired Polaroid. Bought on eBay, the camera was only slightly more expensive than the film itself. (But that film is magic - it’s even got its own battery charge in it!) I didn’t read the instructions on the packet before using the film however, and waved the exposures in the air as was the fashion in our childhoods instead of letting them develop in the dark, so the results - as you can see below - are somewhat patchy and blown.
In terms of symbolism, I think the answer has to lie in the elderly themselves but as I don’t have access to a compelling subject right now I decided to make a trip to the local cemetery. It was while photographing the grave of a Vietnamese immigrant, below, that it suddenly occurred it would be interesting to document how elderly immigrants cope with not just ageing but also ageing in a community with sometimes very different norms and values to the ones they grew up in. So, this is the direction that I am going to take.
And finally, for now, I’m quite happy with my over-exposed Polaroids. They’re nostalgic, they’re a thing of the past and they are misty - like stepping back in time through eyes with cataracts. It will be good to see where this one goes, and I am excited about longer term pieces of work with a running narrative.


Along the Enchanted Way in Romania
A brief description of a photojournalism trip to Romania to meet the villagers around Brasov
A few years’ ago I came across a delightful book called Along the Enchanted Way. The author William Blacker spent some years living in the very rural Maramures region of Romania, almost untouched by Western society by dint of Communism and sheer remote location. This inspired a bout of Romania fever, which a few weeks’ ago I followed up with my second visit to the country.
I had found a photographic tour leader on Instagram (@vlad_brasov) and decided that this would be the best way to explore rural Romania. While I love taking photos and also exploring the photojournalism side of life, my Romanian isn’t so hot (though since my visit I can now say “chicken” and “cow” with some aplomb). It made sense to explore with a local photographer.


The Format
Vlad picked me up at 7.30am on the Saturday, just after the amazing sunrise over the hills. I had been a little bit nervous about meeting men off the Internet but, as soon as we met, I knew there was no call for worry. He immediately put me at ease with his kind and empathetic personality.
The idea was to drive to a village, walk a bit up some hills and meet various villagers along the way. I had no idea what to expect, really - would it feel normal or right to just knock on people’s doors and take their photos? Would we be expected to take tea? Should I take gifts?
We started with a visit to Ion, a lovely man who had been widowed a few weeks’ prior. With him and with all of the other villagers we met, it never felt forced or uncomfortable. Vlad visits many of these people regularly and has built up something of a relationship. And actually much of the visit has got nothing to do with photography at all. It’s about listening to what people have to say, building a rapport and asking questions. The actual photography comes at the end.


The Gear
I took the Fuji XT-3 and a variety of Canon portrait lenses with adaptors. Primarily I used the 85mm portrait lens. While this is a fantastic and favourite lens, it is harder to use on the Fuji body as there’s less control over aperture. I’m also getting to grips with the Fuji manual focusing system. Despite the low lighting conditions and wide apertures, I didn’t bother with tripods as they don’t lend themselves to natural shots and making villagers feel at home in their own houses!

Thoughts
In a rural area where much of the younger population has left to seek opportunity in the cities or overseas (Romania has the fifth largest emigrant population in the world), it’s clear that many elderly people can benefit from such ideas as this photography trip. While it’s the nature of farming life to keep active until the very late years, it’s still isolated as a way of life. Vlad’s visits provide a connection, a way of getting different items from towns and of boosting the local economy. We ate a meal at one couple’s farm, and Vlad bought honey at another. And, tellingly, nearly everyone opened up their stories. What better than to tell someone what’s on your mind when they’re not part of the village? It feels like such a valuable social service, in an area where I doubt there’s much access to mental health services and probably not much appetite for the stigma surrounding them.
This trip has reinforced an interest in photojournalism, and I’d love to explore that more over the coming months. It also reinforced the idea that more unites us as human beings than divides - and I returned home vowing to call my mother.
Getting There
I booked a Saturday and Sunday with Vlad, flying out to Bucharest late on Thursday night. While I had the intention of pacing the Bucharest streets with camera in hand, instead I opted to get the train from Bucharest Nord station - surprisingly easy and around 25 LEI from Bucharest to Brasov. From station to hotel it’s also possible to get Ubers, useful as the “normal” taxi drivers charged me more from Otopeni airport than it cost for my return Ryanair flight. On the way back, I booked an online taxi chaffeur from Brasov to Bucharest airport which was amazing value at around £15.
Brasov is a pleasant city with a relatively small historic centre. If its your first time here then it’s definitely worth checking out nearby Bran Castle (of Dracula infamy) and Sinaia Castle. Been there, done that though and that was not the purpose of the trip. This time it was to explore that wonderful countryside, below
More Info?
Check out Vlad’s website.


Venice: trip report
It’s been a while since I updated the blog, with plenty of everyday work to keep me occupied, a son starting school and a house extension to contend with. But it’s not all work and no play - there’s been plenty of camera action taking place as well.
One such photographic foray was a photo trip to Venice. Initially planned for two nights, I had to cut it short to one due to a coinciding work trip - so literally I had 24 hours in Venice. A whistlestop tour!
Equipped with my 24-hour vaporetti pass, I managed to navigate my way on the night vaporetto from Piazzale Roma to the wonderfully located Casa di Chiara, and my host Leonardo gave me some very useful tips about the best areas of Venice to explore away from the beaten track. So as soon as I’d woken in the morning, I made my way to the Cannareggio area and had a good explore. While I enjoyed the wandering from a traveller’s point of view, from a photographic point of view the pickings were quite slim so I decided to head to the main touristy parts of town.
St Mark’s Square was of course heaving with people.
The plus side of all of this tourist traffic is that nobody blinks an eyelid at you wandering around with your camera.
The downside of course is that it’s pretty much impossible to stand still for a minute to compose a shot, let alone actually take one without a cast of thousands.
Venice is an extraordinarily beautiful city, almost totally unique (Piran in Slovenia is close in character, without the crowds of course). And while there’s nothing wrong with taking standard snapshots of famous, beautiful places, if you’re looking for something mildly different you have to dig quite hard to find it in Venice - and certainly with just 24 hours to spare.
Venice side eye
Burano
Even though time was short, I decided I might be better off jumping on a vaporetto to Burano island. The 45-minute journey gave me time to rest my legs in preparation for the colourfest to come.
Burano, too, is filled with daytripping tourists of all nationalities, and with good reason. It’s a wonderful island of pure popping colour, all of the buildings painted vivid hues. Apparently the story goes that fishermen used not to be able to recognise their houses through the famous Venetian lagoon fog, so they painted them in bright colours. Now it’s home of course to these buildings, lots of delicious smelling restaurants and a LOT of washing hanging out to decorate the island.
Burano brights
Reflections of Burano
Burano smalls
In the warm early October sun, it was wonderful to wander around and take a huge number of photos of these colourful buildings and the inhabitants, and the peace was palpable after the chronic crowds of Venice central.
Evening in Venice
Although exhausted by this point, after returning to St Mark’s and having a quick rest at the hotel, I decided it would be foolish not to explore the nighttime sights that Venice has to offer. It was after all why I was there.
Night shooting in Venice is arguably more rewarding than taking photos during the day. The tour groups are largely tucked away elsewhere, the cruise passengers are back on board and those colours are so rich and vibrant. I wish I could have spent more time out and about during the night and, as a lone female, I didn’t for a minute feel unsafe or threatened in any way.
Gondolas of Venice
Venetian gondoliers
After a summer of strong bright light it came as a bit of a shock to have to shoot in the dark again, and it took me quite some effort to master the new lenses I’ve acquired - but it gave rise to opportunities to play with bokeh effects, which creatively I love. The lights and the water of Venice’s canals make for beautiful creative effects with a fast lens and a bit of imagination.
The next week at work was a bit of a tired one after all of the mad dashing around - and definitely I’d recommend more than 24 hours in Venice out of choice - but with 300 shots in the camera and a wonderful break from rainy London, it was worth it. Next time I go back, I’ll take my time stalking out spots and being patient where the light is good. Venice has amazing potential for street photography but, like anywhere else, not when you’re in a hurry.
Next trip: Romania.
Bokehlicious, baby, from the Helios 44
Not done with film yet…
It’s been great fun playing with film, and I’m not done yet. Last Saturday I spent a couple of hours at the excellent Olafur Eliasson ‘In Real Life’ exhibition at the Tate Modern, and shot a couple of rolls of film walking around the exhibits there. You forget how little you can control the light with film, without an ISO setting to control light sensitivity.
One of the highlights of film is of course waiting for the surprises to come back from the processing shop. So while that’s been going on, I’ve also been getting busy with the wonderful Helios 44 lens on the digital camera.
The Helios 44
Cat
Acquired for a trifle from eBay, these vintage Russian lenses create the craziest bokeh effects and particularly when ramped up to their widest aperture. I also needed to get an adaptor ring for my EF mount camera to make the lens fit on my full frame body, which was about a fiver from Amazon.
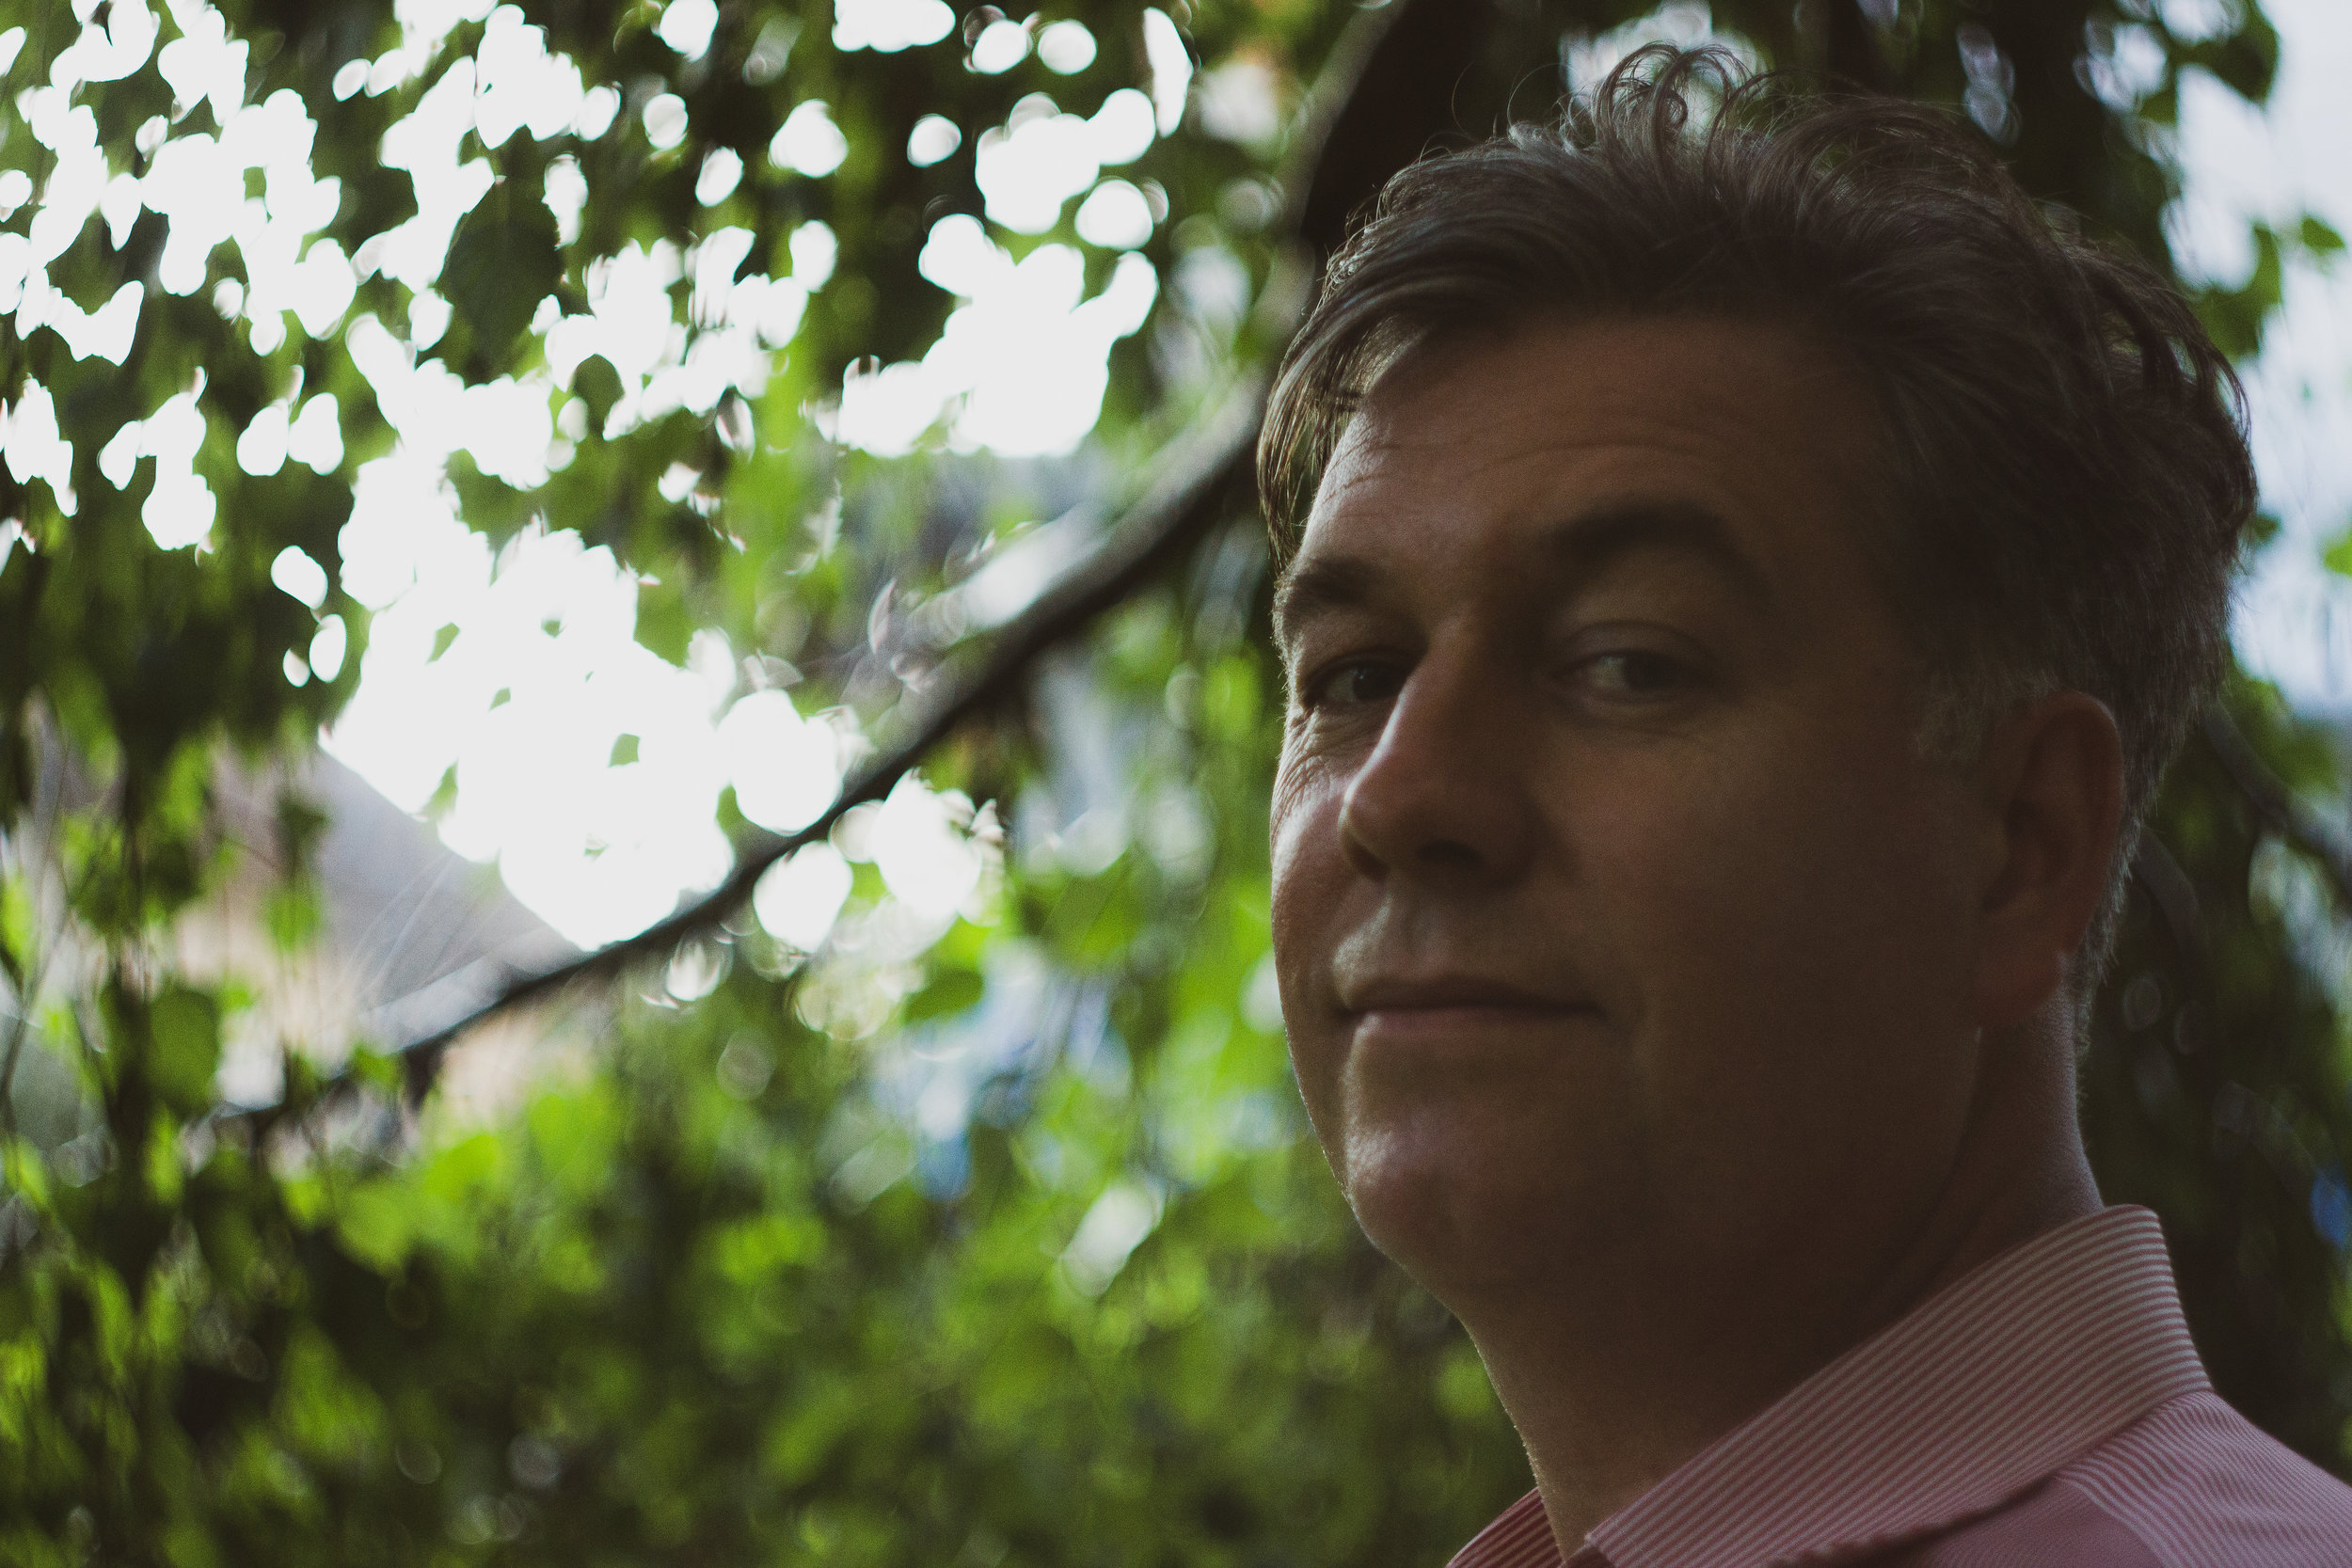
Husband
I started playing with this last night and have taken a few test shots. In the picture to the right, you can see the extreme depth of field with the area around the cat relatively focused and everything else swirly. This lens is still relatively popular due to its famous swirly bokeh effects, and you can see why. Though you’d need to be careful with it to avoid the novelty factor wearing off, I can see some great creative applications for the lens - and all for a few quid.
Learnings so far…
It’s only been taken out for a test spin for a night or two, and this is what I have found so far…
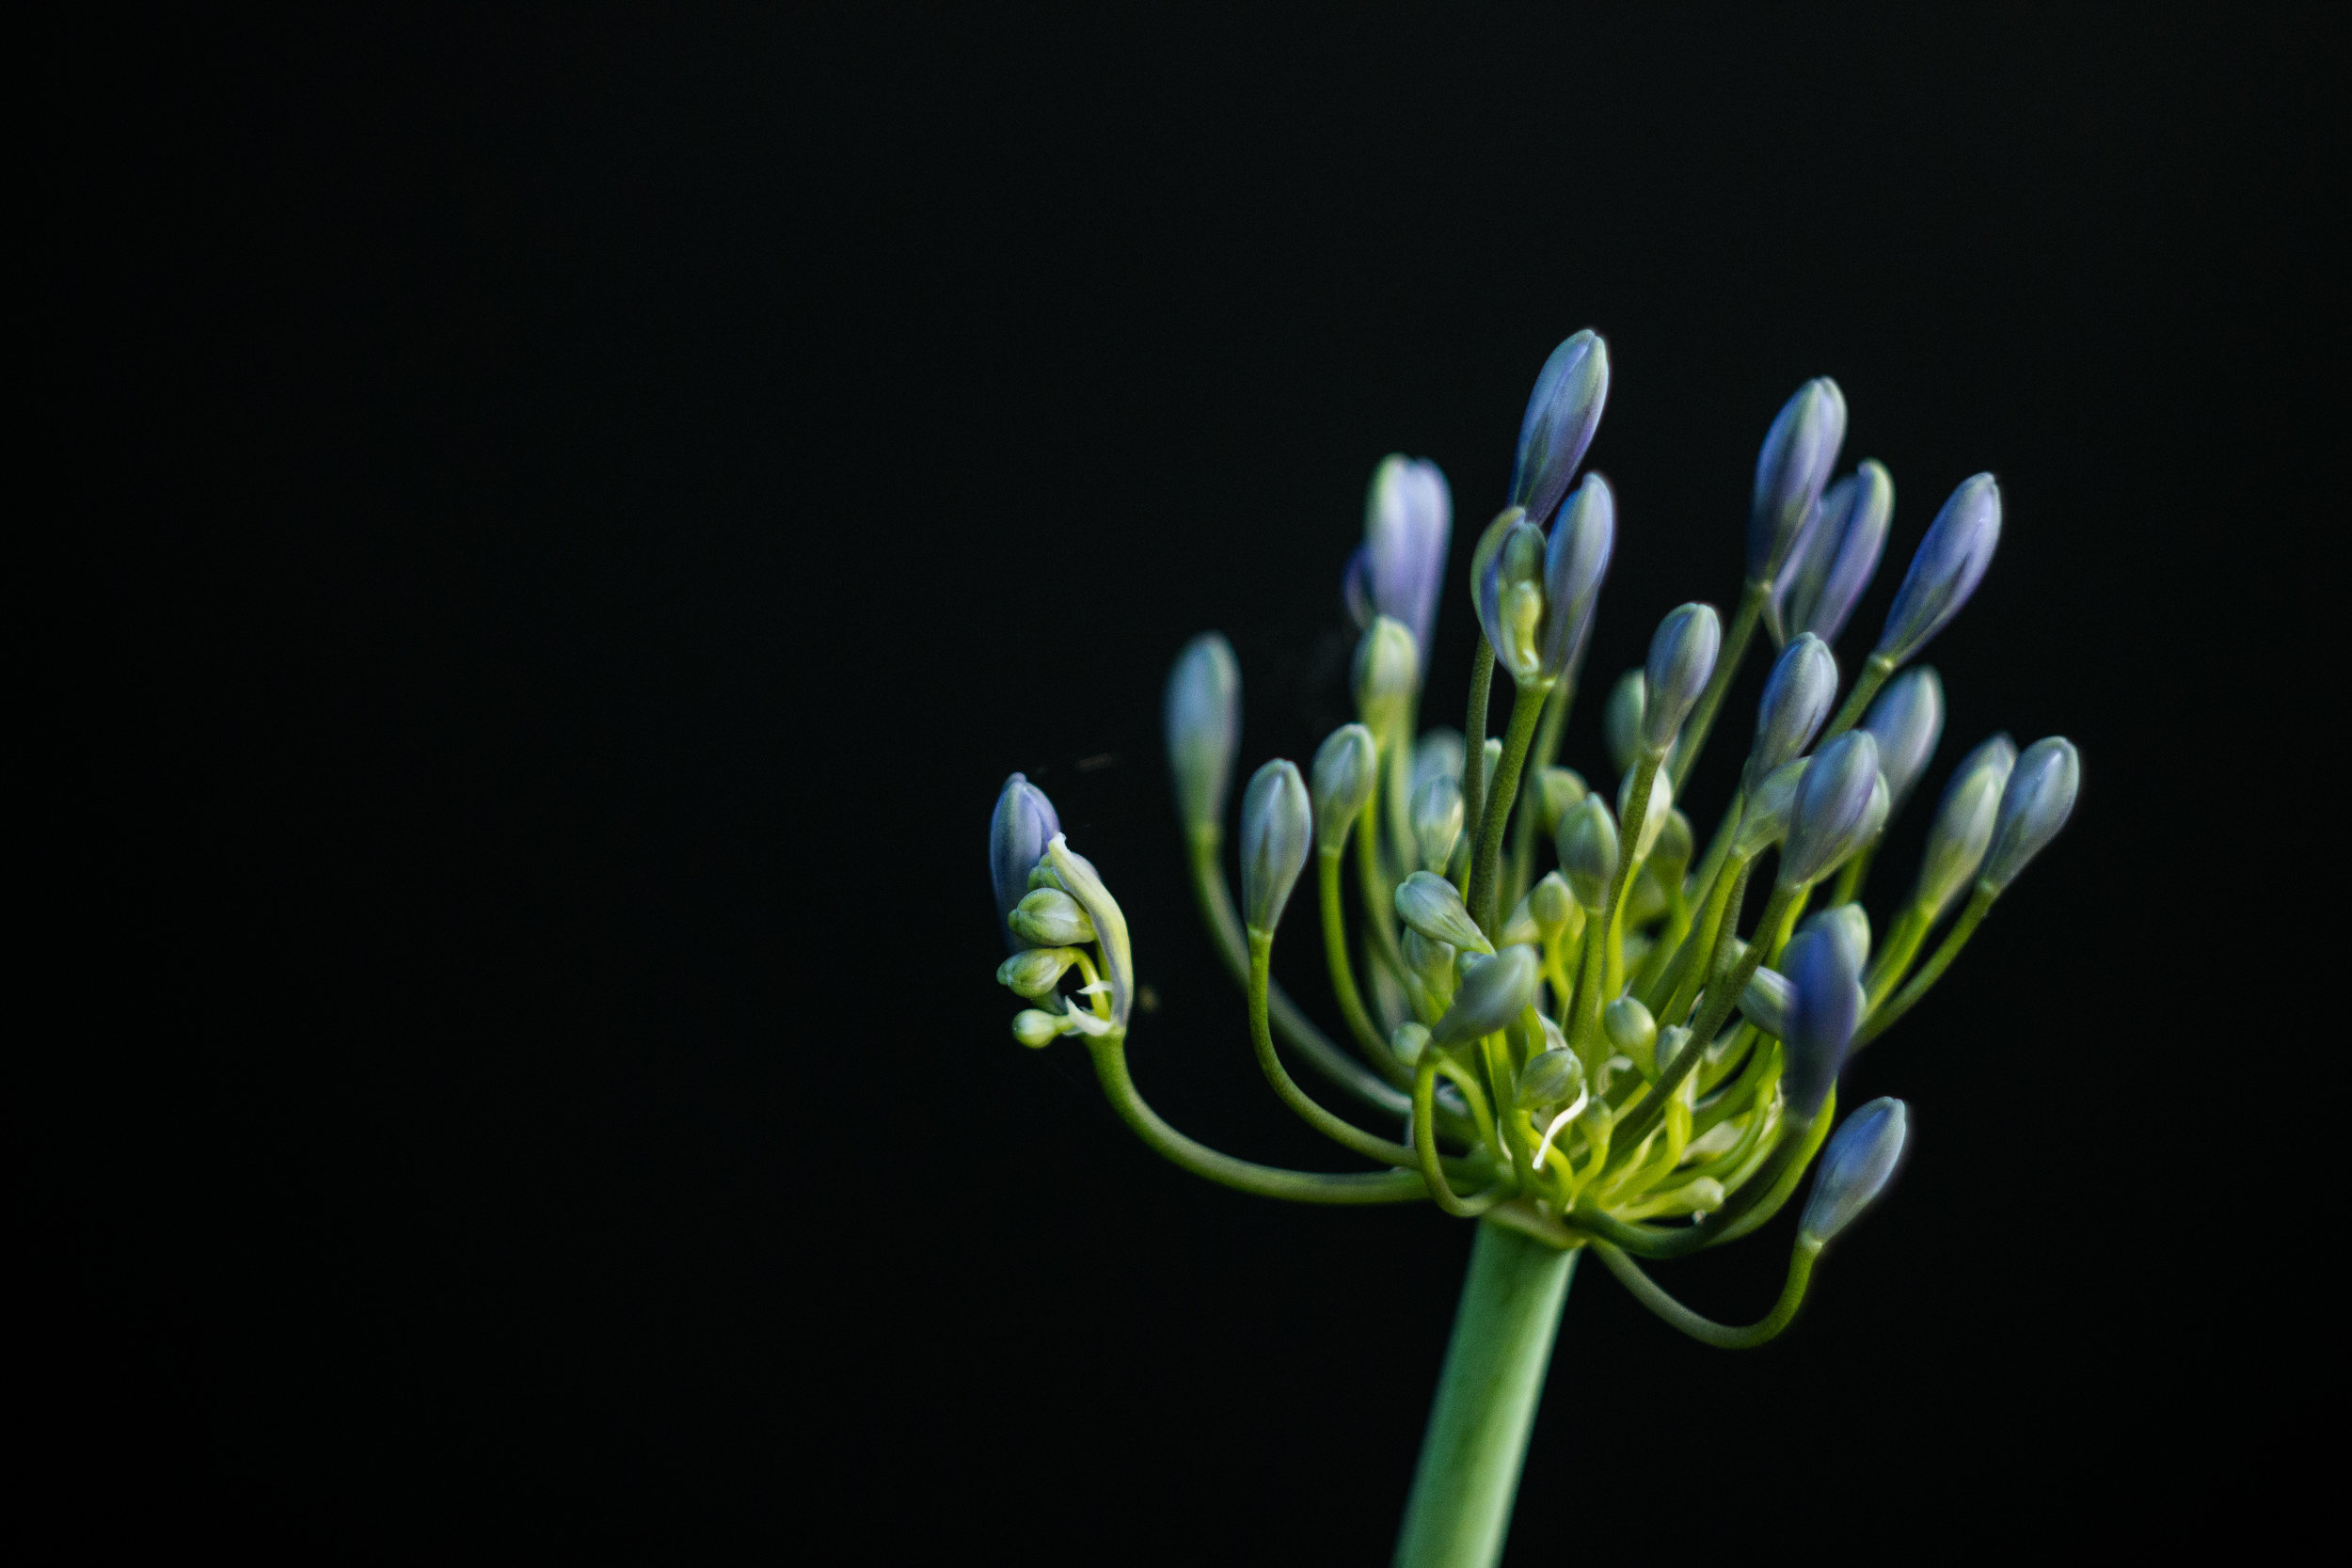
Agapanthus
The Helios is a 58mm lens, which makes it a bit of a pain in the neck to focus and especially at the wider apertures when you’re ramping it up to its swirly max. It goes to f2
This also means that you generally need to be a bit closer to your subject, and the crop is naturally tighter
I have found that, compared to a Canon lens at f2, this lens lets in more light - maybe the light meter just doesn’t work as well with a non-EF lens on the mount. I had to adjust a bunch of my test shots in Lightroom and reduce the exposure.
The lens also takes some nice shots without crazy bokeh action - as you can see from the agapanthus image shot on the black background. So although its well known for swirliness, actually the Helios seems to me to be a respectable lens in its own right
It’s nice and neat and compact - making it a fairly portable “novelty” lens - unlike my fisheye friend which takes a bit more carrying about
I’m really looking forward to playing some more with this lens and seeing what it’s capable of doing on a weekend break to Porto. Travel photography with a swirly twist?
Adventures in film (continued)
It’s been a fun few weeks as far as photography is concerned.
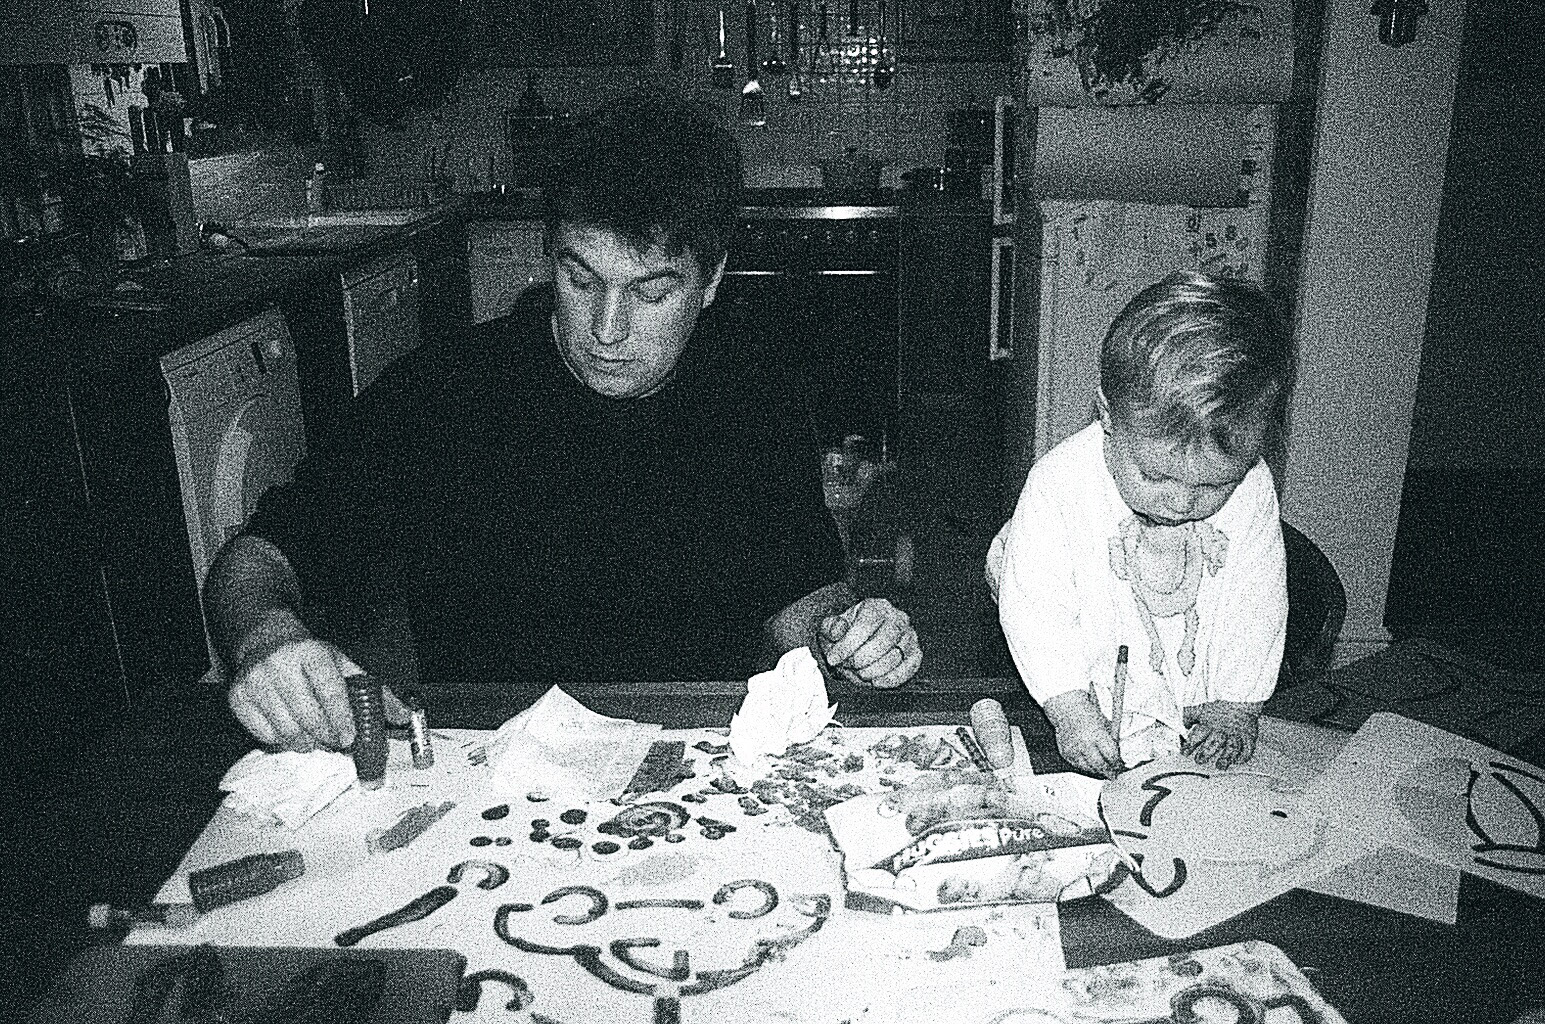
Old, grainy baby photos
The initial results of my film forays are in. Probably the greatest pleasure has been retrieving the old black and white film that was sitting in my camera for 9 years or more. As my son prepares to move to Big School, it’s lovely to find “new” images of him as a baby.
REDSCALE FILM
This 35mm film I bought from Nik & Trick (see previous post). It was the first film I’d loaded in to the camera in years, so part of the learning curve was getting used to the camera’s idiosyncrasies again.
I remember using a red lens filter years ago and having to over-expose the image to get any real sense of picture. The first couple of shots I took on an overcast day, and even with the overexposure the dark was shapeless and devoid of detail. Two stops would definitely have been better.

The shot could have benefited from more exposure
The next day I went out was bright and sunny with excellent cloud cover - perfect for redscale photography shots. Mostly one stop over-exposure was enough, but in darker areas such as in the shade of the Hyde Park Pavilion, it could definitely have benefited from more.
Now I have “cut my teeth” on redscale, I have a couple more options to play with. I have another roll of pre-rolled film to shoot - and I’ll choose my landscape more carefully, armed with my current knowledge. The other option I’m going to play with is playing around with coloured lens filters, to see if I can get the same effect on normal 35mm film or even on digital - without paying for the cost and hassle of film.
See the redscale photos here >
REVOLOG PHOTOS
Revolog is a brand of film that makes novelty effects (some might say gimmicky, but what have you got to lose other than a bit of money?). I bought a couple of rolls of different types here and here.
Obviously, taking the photos is as easy as taking any other type of film - you can’t see what you’re doing in the moment anyway. But in terms of the results, I much preferred the versatility of the Revolog film - though I still shot a little overexposed, the film was much easier to handle and the success rate of the shots was higher and especially in darker areas of the images. It is however more unpredictable in terms of the results you’re going to get - as you don’t know if a splotch of green is going to be to the left or to the right of the image.
This film is so much easier to shoot with, without so much decision making between light and shade
But of course, novelty film or no novelty film, it’s all a bit pointless if your composition is up to nothing. And this is one of the downsides of film: because the roll is in your camera, it blocks you doing anything else with it until that load is complete, so you end up taking slightly silly pictures just to finish up the roll. This said, I’ll definitely use this film again at some point in the near future: #filmisnotdead
Next time I’ll talk about loading the Yashica 44, and other medium format fun things.
Adventures in film
Travel photography is wonderful and gives rise to so many photo opportunities with people, cultures, streets and other more established tourist sights - but it is often quite reactive to situational events that you just so happen to capture. I’ve a yearning to get more creative with the photography that I’m doing.
Film lives
This has triggered something of a return to film. I’ve dug out my analog SLR from the drawer and replaced the batteries - the original Canon is back - complete with unfinished black and white film from I Don’t Know When. I had to Google film processing locations and was quite surprised to find that there is a place not far from where I work. Using the camera that I once cherished and cut my SLR teeth on now seems so simple, like a toy. The clunk and whir of the film winding on is pure nostalgia. And, actually, I loved that lens.
To add extra creativity to this burst of film activity, I have tracked down a couple of specialist retailers that sell “doctored” camera film. On its way are several rolls of redscale film, and another couple of special effects film. I can’t wait to get them loaded up and out onto the streets of London for some trial shots - I remember from my red lens filter before that you have to shoot a couple of stops up to get the exposure right so it will be a case of trial and error to get everything Just So - can’t wait to show how the shots pan out.
Here are some examples of redscale photography. And if you really get into it, it’s possible to make your own redscale film at a much cheaper price than the pre-packaged stuff - by just flipping a standard 35mm colour film around in its canister. If anyone has done this and has some tips, do let me know.
Medium format
The next adventure in film is taking it to the next level. I have acquired an ancient Yashica-44 twin lens reflex medium format camera from eBay. Possibly I was slightly impulsive when acquiring it and got over-excited by the prospect of this very cool-looking beast. It was only after investigation of its film format that I realised it doesn’t take the standard 120mm film that normal medium format cameras take, and instead takes 127mm.
Boll*cks.
Turns out that only two specialist retailers appear to sell this format in the whole of the UK, and it ain’t cheap. Nik & Trick sell it for around £12 a roll (plus specialist processing), and Analogue Wonderland offer it for a slightly higher price. So once again one is going to have to get creative and play around with the options:
Pay the price of the film
Try and load 120mm film on the spool with the help of a tactically placed elastic band on one end
Try and load 35mm film with the help of two tactically placed hairbands on either end of the spool
If anyone has tried this, please shout - I am going to need all of the help I can get… Watch out for the “creative” results…

Finding Vivian Maier
A few weeks’ ago I visited Photo London, the huge photographic show for dealers, buyers and generally interested bystanders. I know very little about photographers in general, so it was a great opportunity to get inspiration and see what’s going on in the photographic world.

Photograph featured from http://www.vivianmaier.com
Some of the work that really stood out was by the artists below:
Seydou Keita
Nino Migliori
Todd Hido
David Goldblatt
Nelli Palomaki
Sherin Neshat
Sabine Weiss
But most of all, the work of previously unknown photographer Vivian Maier really “spoke to me”. Her work stood out not because of her back story (don’t forget, I know nothing) but because it is excellent.
A Chicago eccentric, Vivian used her occupation as a children’s nanny to walk the streets for hours, recording street life with her Rolleiflex. She died unknown and penniless and it was only after John Maloof acquired a box of her hoarded negatives at auction that he began to piece together her life and work. Since then her story has been promoted and become famous, not least through the documentary film Finding Vivian Maier. Her work is documentary and prolific - you can really sense the spirit of the era - and to me at least evokes humour and pathos. For someone so much on society’s outskirts, you can really feel the connection Vivian had with the subjects she shot, and that timing she had is just so perfect.
This to me is what street photography is all about, and Vivian Maier has kept me thinking long after Photo London closed its doors, showing that inspiration can come from the most unlikely of people and places.

So long Jordan, hello fisheye lens
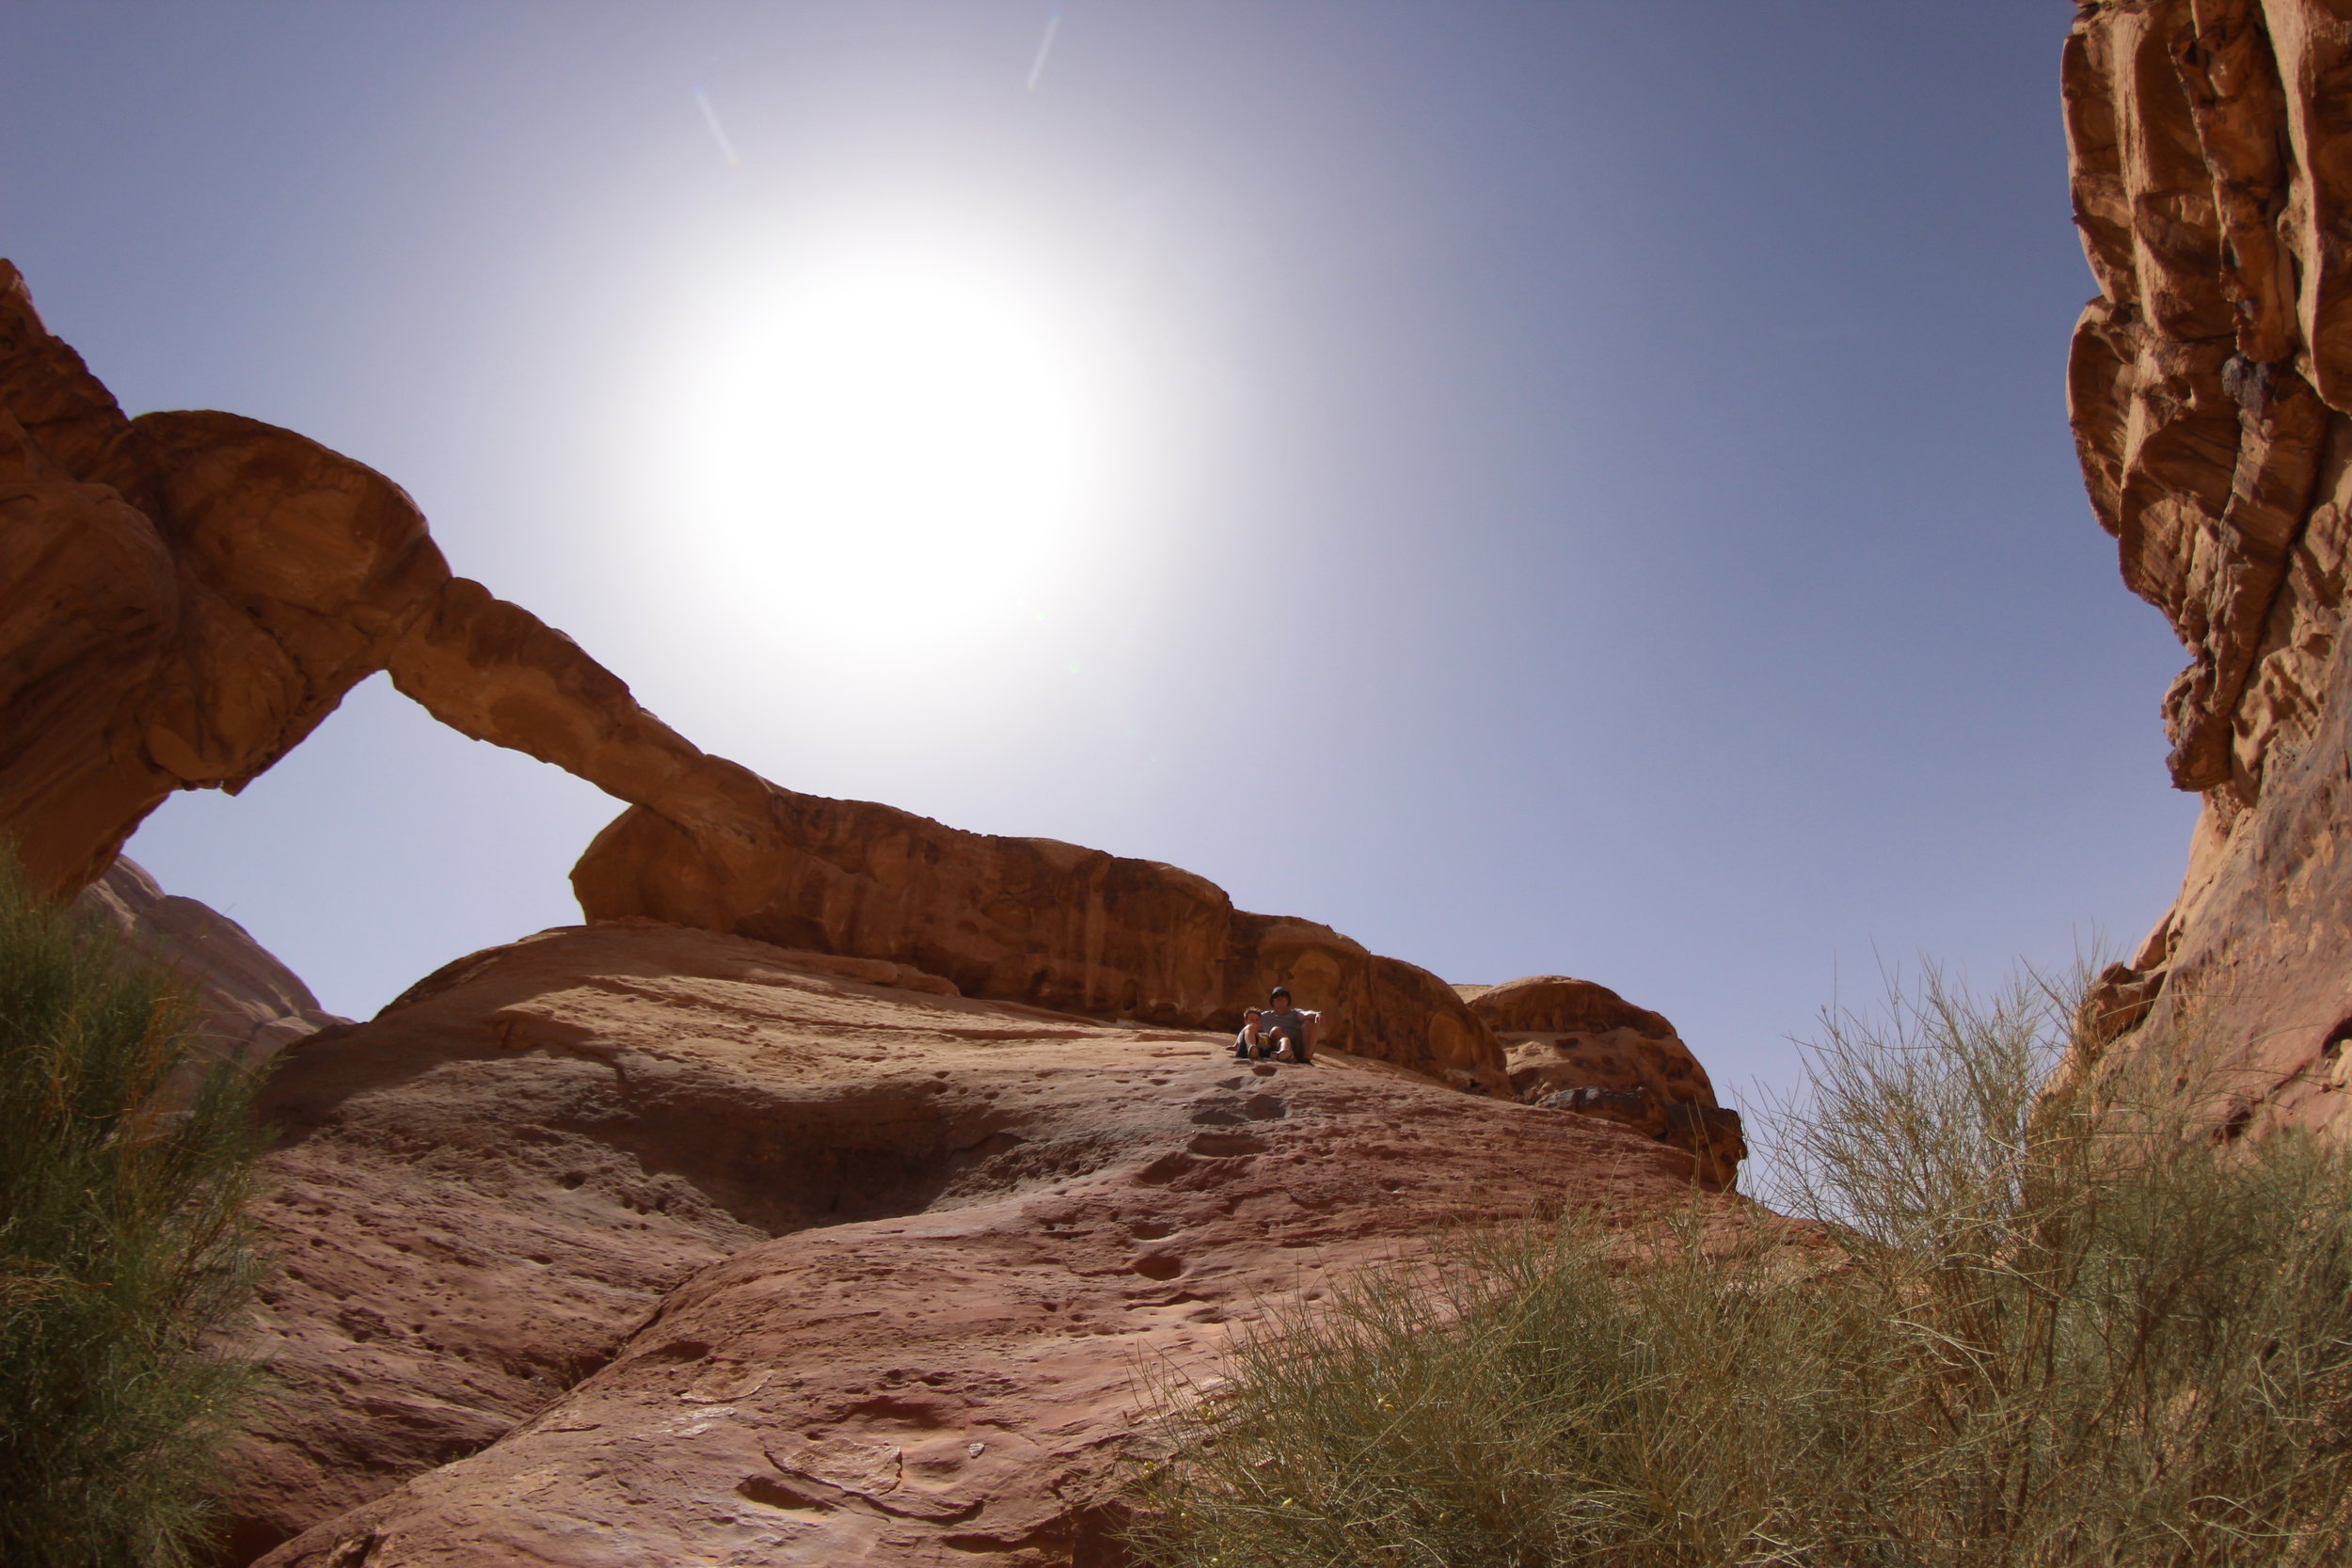
One of the many Instagrammable rock bridges of Wadi Rum
Jordan has been a country we long wanted to visit. Apart from the original pleasure of travelling - and introducing our son to the many and varied delights of desert glamping, camel riding and so on - the photographic opportunities are manifest. From the moonscapes of Wadi Rum to the fascinating rock-hewn tombs of Petra, the Rose City, everywhere seems to invite another twist of the lens, another click.
I had acquired a fisheye lens just prior to the trip, a Neewer 8mm for my Canon 600D, and some of the effects have been spectacular when combined with the vast rock mountains and cliff faces of the terrain. But using it has been a steep learning curve in itself (no pun intended).
This what I have learnt so far:
Exposure is king.
You’re dealing with a completely different beast now. For a start, on this Neewer at least, you set the aperture on the actual lens and not on the camera body. Your automatic reactions are interrupted. More importantly, the lens lets in more light (fairly obviously given its shape), and I found myself completely ignoring the camera’s light metre and raising the shutter speed to its maximum. Bear in mind it has been 40deg+ and extremely sunny, so this may be extreme behaviour for the UK. But here in Jordan, even with a standard lens it’s so easy to blow your highlights to pieces without so much as trying and definitely this is the case with the fisheye.
Dust your lens
A stitch in time saves nine when it comes to cloning out dust spots on the lens. Don’t be lazy, and clean that lens regularly - it’s much more noticeable on the fisheye.
Composition.
If exposure is king then composition has to be queen. Getting the right framing for the shots is tricky at first, and I have found myself panning the landscape - camera at eye - trying to understand the effect that moving up or down will have on the frame. I’ve learnt that buildings and other objects are great; landscapes much more difficult to achieve a nuanced effect. Get up really close to the building, and move your position as much as possible - with that fixed focal length there’s no other option, and the super-wide angle means that you get pretty much everything in.
The shape of the lens also means that the positioning of the light source is key: too near the middle and everything goes to pot.
Sunflares.
The nicest surprise of all when using this lens has been the added bonus of delicious starburst sunflares, au naturel without Photoshop or similar. Blessed with of course plenty of sun in Jordan, and lots of craggy rock faces for it to glare through, this effect was particularly pronounced and especially with a slightly underexposed shot.


